Neil Merryweather
Active member
1/3
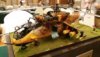
just goes to show that beauty is not the purpose of camouflage................Richard seen putting the final touches to his camo pattern :smiling5:

just goes to show that beauty is not the purpose of camouflage................Richard seen putting the final touches to his camo pattern :smiling5:
We now also know how the gravy turned out for dinner.....Richard seen putting the final touches to his camo pattern :smiling5:
Looks to me as if he's emptying the crew's chamber pot.Richard seen putting the final touches to his camo pattern :smiling5:


Thank you, but it’s really a quite basic OD-all-over with no shading, weathering, or other effects. It’s just that you can’t really tell from this photoJakko, yup, brave you were. The underlying paint job on the kit though already showed it professionally done. looks good even with the jaring slosh work of white.
")


scalemodelling.co.uk is a privately operated online discussion forum. All content posted by members reflects their own views and opinions and does not necessarily represent those of the forum owners or administrators. While reasonable efforts are made to moderate content, no responsibility is accepted for user-generated material. By using this site, you agree to comply with UK law and the forum rules.