Theme editor

Scale Model Shop

Hasegawa 1/32 Fiesler Fi -1B Storch Gran Sasso

Status
Not open for further replies.
Thread owner
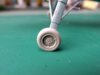
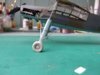
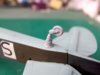
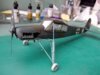
I have finally managed to complete the splinter pattern with the RLM 71. I'm some what disappointed with the colour I think it's a tad on the olive side but it's some thing I've got to live with. I'm afraid there are no photos to show the stages as I have applied the decals then sealed with a coat of Klear. A flat coat has since been applied, I used Vallejo Polyurethane matt varnish for the first time and I'm pleased with the results. I've also remove the masking from the canopy.

View attachment 79121

View attachment 79122

View attachment 79123


View attachment 192144

View attachment 192145

View attachment 192146
 

Attachments

  • 140903_0938.jpg
    140903_0938.jpg
    2.6 KB · Views: 0
  • 140903_0947.jpg
    140903_0947.jpg
    2.9 KB · Views: 0
  • 140903_0946.jpg
    140903_0946.jpg
    2.8 KB · Views: 0
Hi Vaughan

That splinter pattern looks great. It is a shame about that RLM 71 because the execution of the actual pattern is flawless. I'm honestly racking my brains to think if anything can be done about it! I think (because it's a dark colour) you couldn't steer the colour more toward green with a filter, it would just end up really dark. I have to say though that the model itself is looking very handsome indeed. I haven't applied the satin varnish yet (or removed the canopy mask) so mine's looking a bit toy-like at the mo. Your Storch is looking very cool.

Can't wait to see the finished thing.

Cheers

Paul
 
Thread owner
Thanks Gents.

Well I'm back on the case again with a small update. Under-cart is attached. This was quite fiddly as there were several components that needed to be lined up all at the same time. The main strut that enters the canopy is made of copper wire which gives the under-cart extra strength also the tail wheel is made of white metal so all in all the under-cart is quite solid despite looking very fragile all the components have been glued using super glue. Next step is to finish off the wings adding the flaps and then attaching them to the fuselage. I've also cut the Mastercaster resin wheels from their stubs at present they are a dry fit and yet to be painted.

View attachment 79524

View attachment 79525

View attachment 79526

View attachment 79527

View attachment 79528

View attachment 79529

View attachment 79530

View attachment 79531


View attachment 192547

View attachment 192548

View attachment 192549

View attachment 192550

View attachment 192551

View attachment 192552

View attachment 192553

View attachment 192554
 

Attachments

  • 141903_1652.jpg
    141903_1652.jpg
    1.8 KB · Views: 0
  • 141903_1651.jpg
    141903_1651.jpg
    2.4 KB · Views: 0
  • 141903_1649.jpg
    141903_1649.jpg
    2.5 KB · Views: 0
  • 141903_1646.jpg
    141903_1646.jpg
    2.4 KB · Views: 0
  • 141903_1645.jpg
    141903_1645.jpg
    2.9 KB · Views: 0
  • 141903_1644.jpg
    141903_1644.jpg
    2.6 KB · Views: 0
  • 141903_1643.jpg
    141903_1643.jpg
    2.6 KB · Views: 0
  • 141903_1654.jpg
    141903_1654.jpg
    2 KB · Views: 0
That looks excellent Vaughan. The delicate U/C really is a massive contributor to the distinct look of this aircraft and your rendering is perfect.

The resin and white metal wheels look really detailed and well cast.

Looks great Vaughan

Paul
 
Status
Not open for further replies.
Back
Top