Theme editor

Scale Model Shop

Hasegawa 1/32 P47D Republic Thunderbolt

Status
Not open for further replies.
Thread owner
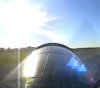
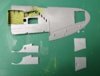
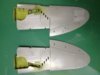
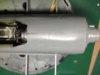
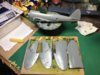
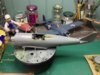
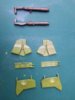
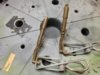
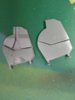
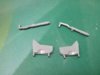
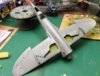
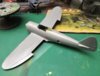
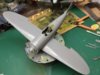
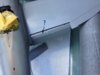
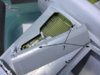
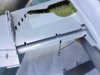
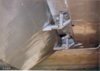
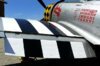
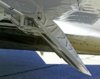
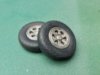
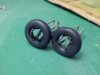
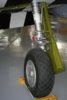
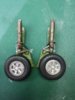
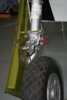
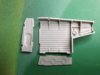
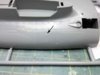
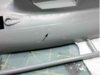
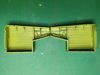
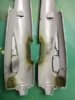
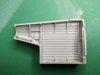
Well I'm very close to joining the fuselage. The cockpit walls are sprayed interior green where they will be visible and the area behind the pilot. There are two areas on the lower fuselage below the wings that will need some attention as there are sink marks on both halves some squadron green putty should fix it. In the mean time I've constructed the wheel bays and have sprayed them ZCY by mixing ZCG and a few drops of yellow this seem to have come out ok.

View attachment 59004

View attachment 59005

View attachment 59006

View attachment 59007

View attachment 59008

View attachment 59009

View attachment 59010

View attachment 172030

View attachment 172031

View attachment 172032

View attachment 172033

View attachment 172034

View attachment 172035

View attachment 172036
 

Attachments

  • 20130121_1247.jpg
    20130121_1247.jpg
    2 KB · Views: 0
  • Screen shot 2013-01-21 at 16.39.09.jpg
    Screen shot 2013-01-21 at 16.39.09.jpg
    5.5 KB · Views: 0
  • Screen shot 2013-01-21 at 16.38.47.jpg
    Screen shot 2013-01-21 at 16.38.47.jpg
    5.4 KB · Views: 0
  • 20130121_1253.jpg
    20130121_1253.jpg
    2 KB · Views: 0
  • 20130121_1250.jpg
    20130121_1250.jpg
    5.7 KB · Views: 0
  • 20130121_1249.jpg
    20130121_1249.jpg
    1.9 KB · Views: 0
  • 20130121_1248.jpg
    20130121_1248.jpg
    1.9 KB · Views: 0
Coming along nicely Vaughan,looking forward to seeing the fuse halves joined up! Keep up the great work,cheers Trey
 
Thread owner
Hi all

At last the fuselage is finally together a small amount of filing was required but I made sure that the seam from the front of the cockpit to the the engine cowling was left as it present on the real P47D(see Image). Wheel wells are now attached to the lower wings and also the optional panels have been added for the Maj Glenn T.Eagleston version the landing light being at the far right. I will also need to remove the two rails from the lower wing surfaces, and drill two holes, to allow the hangers for the drop tanks or bombs to be fitted.

View attachment 59242

View attachment 59243

View attachment 59244

View attachment 59245

View attachment 59246

View attachment 59247

View attachment 59248

View attachment 172268

View attachment 172269

View attachment 172270

View attachment 172271

View attachment 172272

View attachment 172273

View attachment 172274
 

Attachments

  • 20130125_1258.jpg
    20130125_1258.jpg
    2.1 KB · Views: 0
  • Screen shot 2013-01-23 at 09.57.42.jpg
    Screen shot 2013-01-23 at 09.57.42.jpg
    5.7 KB · Views: 0
  • 20130125_1260.jpg
    20130125_1260.jpg
    2.2 KB · Views: 0
  • 20130125_1262.jpg
    20130125_1262.jpg
    2.2 KB · Views: 0
  • 20130125_1271.jpg
    20130125_1271.jpg
    5.6 KB · Views: 0
  • 20130125_1266.jpg
    20130125_1266.jpg
    3.3 KB · Views: 0
  • 20130125_1264.jpg
    20130125_1264.jpg
    3.2 KB · Views: 0
Good progress Vaughan. It's recognisably a P-47 now and that ZCY looks spot on to me. You can just about see my version on the inner gear door here.

Cheers

Steve
 
Thread owner
Andy first time that I've seen your build it looks fantastic some great detail you need to get that bird in the air.
 
very cool like the tip about the wire nice build :)

Sent from my GT-S5670 using Tapatalk 2
 
\ said:
Andy first time that I've seen your build it looks fantastic some great detail you need to get that bird in the air.
Thanks Vaughan. You can find the whole build process on here in the Under Construction section. It was some time ago though.

Keep up the good work.

Andy
 
Thread owner
Thanks guys.

Well the wings are on, a smear of putty was required and I have also added the drop tank/bomb pylons. Yesterday afternoon I made a start on the wheel bay doors and the under carriage legs opting to spray them olive drab as I believe this was the case on later models.

View attachment 59396

View attachment 59397

View attachment 59398

View attachment 59399

View attachment 59400

View attachment 59401

View attachment 59402

View attachment 59403

View attachment 172422

View attachment 172423

View attachment 172424

View attachment 172425

View attachment 172426

View attachment 172427

View attachment 172428

View attachment 172429
 

Attachments

  • 20130130_1293.jpg
    20130130_1293.jpg
    5.3 KB · Views: 0
  • 20130130_1291.jpg
    20130130_1291.jpg
    2.9 KB · Views: 0
  • 20130130_1288.jpg
    20130130_1288.jpg
    5 KB · Views: 0
  • 20130130_1287.jpg
    20130130_1287.jpg
    2.2 KB · Views: 0
  • 20130130_1285.jpg
    20130130_1285.jpg
    1.7 KB · Views: 0
  • 20130130_1284.jpg
    20130130_1284.jpg
    3.2 KB · Views: 0
  • 20130130_1283.jpg
    20130130_1283.jpg
    2.7 KB · Views: 0
  • 20130129_1281.jpg
    20130129_1281.jpg
    6.1 KB · Views: 0
Thread owner
Hi Guys

I need a bit of help maybe Steve(stona) will know, as I have just put the flaps together and have chosen the down position. I'm doing an overall NMF and areas of the flaps are exposed what colour should they be ZCY or NMF? I did manage to find these reference photos one from Duxford and the other two from the squadron walk-arounds but still unsure what they should be.

View attachment 59656

View attachment 59657

View attachment 59658

View attachment 59659

View attachment 59660

View attachment 59661

View attachment 172682

View attachment 172683

View attachment 172684

View attachment 172685

View attachment 172686

View attachment 172687
 

Attachments

  • 20130205_1308.jpg
    20130205_1308.jpg
    5.3 KB · Views: 0
  • 20130205_1307.jpg
    20130205_1307.jpg
    5.9 KB · Views: 0
  • 20130205_1306 copy.jpg
    20130205_1306 copy.jpg
    5.7 KB · Views: 0
  • Screen shot 2013-02-05 at 12.13.45.jpg
    Screen shot 2013-02-05 at 12.13.45.jpg
    5.3 KB · Views: 0
  • Screen shot 2013-02-05 at 12.12.53.jpg
    Screen shot 2013-02-05 at 12.12.53.jpg
    5.5 KB · Views: 0
  • IMG_0138.jpg
    IMG_0138.jpg
    5.3 KB · Views: 0

Attachments

  • 06RepublicP47Thunderbolt.jpg
    06RepublicP47Thunderbolt.jpg
    2.7 KB · Views: 0
  • 08P47BrowningFlaps.jpg
    08P47BrowningFlaps.jpg
    2.8 KB · Views: 0
  • 17P47BrowningFlaps.jpg
    17P47BrowningFlaps.jpg
    2.6 KB · Views: 0
Thread owner
Joe thanks for the images that pretty much answers my question. Thanks again
 
Thread owner
Hi all

Very little progress over the last 5 days although I've been working on the main under cart. Wheels are together and sprayed with a a very dark grey hubs in silver and then weathered. I've also added some flats using a domestic iron, to protect the iron I placed a sheet of tin foil over the hot plate. This worked well considering this is the first time I've used this method. A small amount of tidying up was required but all looks good. All the main components are now attached and I'm pleased with the result. Just the break pipes to add and some final weathering and they're complete.

View attachment 59982

View attachment 59983

View attachment 59984

View attachment 59985

View attachment 173008

View attachment 173009

View attachment 173010

View attachment 173011
 

Attachments

  • 131102_1319.jpg
    131102_1319.jpg
    5.1 KB · Views: 0
  • 131102_1314.jpg
    131102_1314.jpg
    1.8 KB · Views: 0
  • 130802_1317.jpg
    130802_1317.jpg
    2.2 KB · Views: 0
  • 130802_1315.jpg
    130802_1315.jpg
    2.1 KB · Views: 0
Cruising right along Vaughan and its looking great,love the way the landing gear came out ,nice job!
 
Hi Vaughan, according to Nigel (Julian) who really does know,that area would be natural metal on aircraft with a nmf. On aircraft delivered in nmf and painted in theatre it varied simply depending whether the flaps were up or down at the time of painting. In aircraft delivered in Olive Drab that area was painted OD at the point of production.

Cheers

Steve
 
Thread owner
Thanks Trey and Steve for the info.

I've added the brake hoses and pipes using painted lead wire with help from reference photos I took at Duxford last year. Then I added some final weathering. The flaps were provided with decals for the no step areas but I decided to spray them red because the decals were too small to cover the correct area. Fortunately there are 4 no step decals provided so will use them.

View attachment 60020

View attachment 60021

View attachment 60022

View attachment 60023

View attachment 60024

View attachment 173046

View attachment 173047

View attachment 173048

View attachment 173049

View attachment 173050
 

Attachments

  • IMG_0123.jpg
    IMG_0123.jpg
    5.5 KB · Views: 0
  • 131202_1326.jpg
    131202_1326.jpg
    2.3 KB · Views: 0
  • 131202_1325.jpg
    131202_1325.jpg
    5.3 KB · Views: 0
  • 131202_1320.jpg
    131202_1320.jpg
    5.3 KB · Views: 0
  • IMG_0163.jpg
    IMG_0163.jpg
    5.4 KB · Views: 0
Status
Not open for further replies.
Back
Top