Theme editor

Scale Model Shop

Industria Mechanika 1/35 Implausible Long-Nose Submersible

  • Thread starter Thread starter Guest
  • Start date Start date
Status
Not open for further replies.
G

Guest

Guest
Thread owner
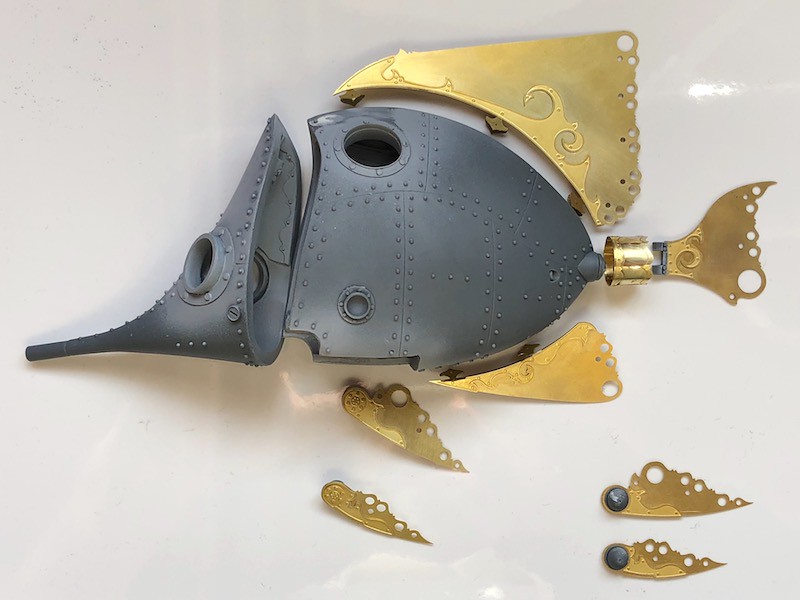
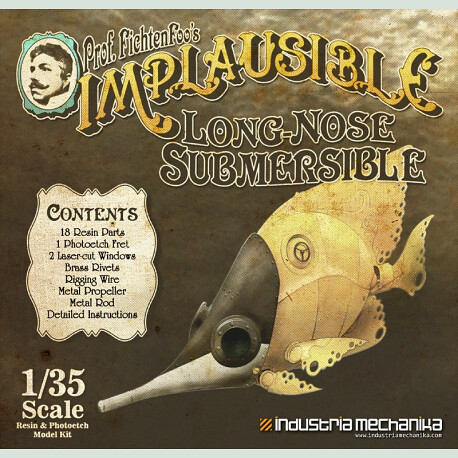
...so here we go again, the companion sub to my recent Fantastical Fish-Shaped Submersible build, the Industria Mechanika 1/35 Implausible Long-Nose Submersible.

It will have a similar steampunk style theme to the other sub, but the main body colour will be Brass, with the aim of producing something similar to the picture shown on the box art.

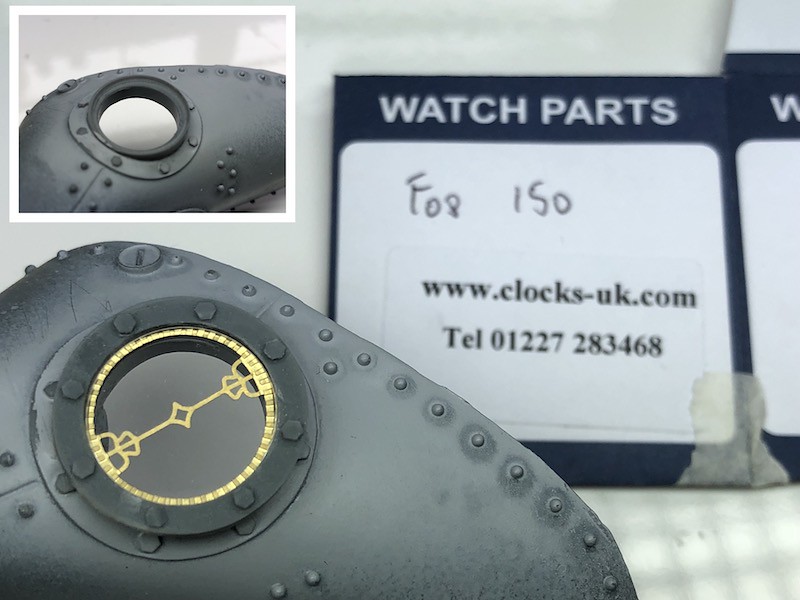
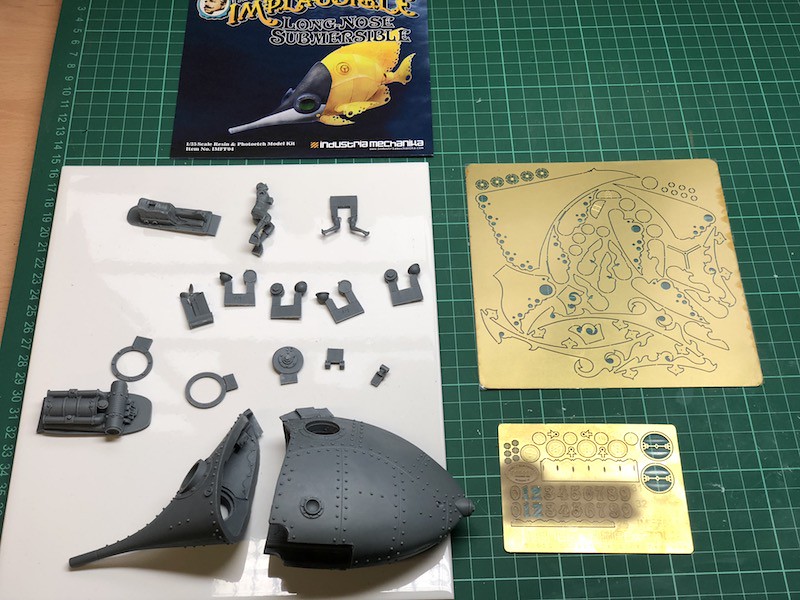
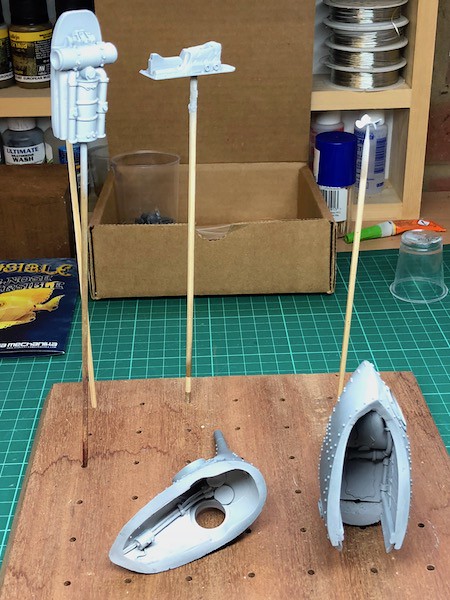
As usual, the first jobs were cutting off the mould plugs, clean up and applying Mr Surfacer 1200 primer to the interior to highlight any additional flaws that might need further attention.

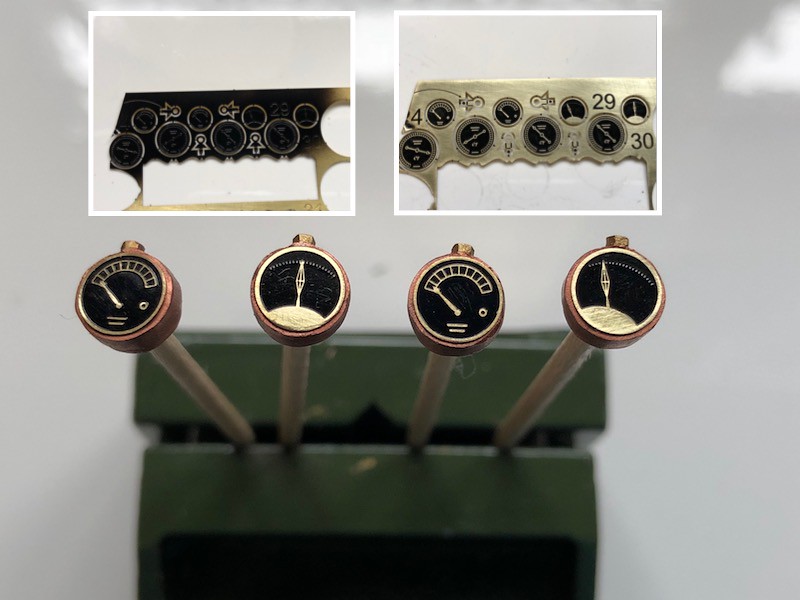
This model is supplied with a figure, and I suck at figure painting, so I might leave it out, we'll see :smiling3:
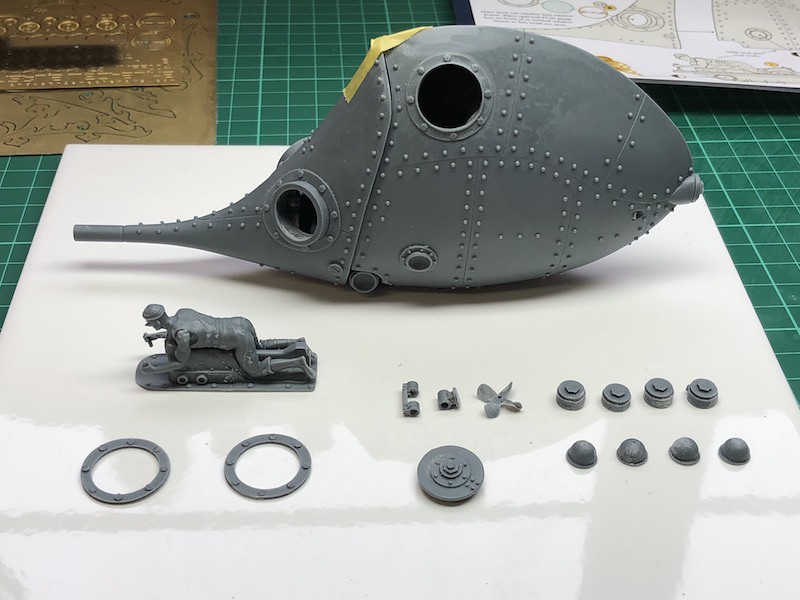


Thread owner
Wow!! You don’t know how I like those kind of model....:smirk::smirk::smirk:
I will be watching sure!!!!!!
 
Nice one Norman I'll be in watching this one too.
And welcome to the forum.
 
Norman
What a fantastic variety of builds you get on this forum. I looked at the first build and it is awesome. I will be following along mainly to find out how you do those metallic effects. Stunning
Steve
 
Thread owner
Thank you all for your kind comments :thumb2:

I didn't get as much done today as I had wanted too because I spent most of it assembling the photo-etch parts and most of that time was spent on the propeller cowl that proved to be a major PITA :angry:
In order to build it, you have to roll the flat photo-etch part into a cylinder, wrap and attach the edge detail onto the cylinder and then fit the propeller shaft holder inside. I managed to do this using CA glue, but was unhappy that the cylinder wasn't perfectly cylindrical, but any attempt to adjust it resulted in the CA glue joints pinging open, so I decided to abandon CA glue and solder it together.
This proved fiddly and time consuming (its not a big part), but at least I now have a part that is as perfectly cylindrical as its going to get, strong and not going to fail and ping open when it feels like it.

I also began working on the equipment gauges and fitted the side entry hatch, which wasn't as easy as it should have been due to the hatch being slighter smaller than the hole, but I got there in the end :)

I think I'm ready to start painting the interior.


The main photo-etch parts are now assembled and ready to go :smiling2:

 
Hi Norman
Nice work on the brass. Looks like electrical solder in the background? If it is, have you tried Carr’s 145 solder and liquid flux? It flows like melted butter and makes life easier as you put less heat in the joint. If I’m wrong, and you have, feel free to tell me to bog off
Cheers
Tim
 
Thread owner
Hi Norman
Nice work on the brass. Looks like electrical solder in the background? If it is, have you tried Carr’s 145 solder and liquid flux? It flows like melted butter and makes life easier as you put less heat in the joint. If I’m wrong, and you have, feel free to tell me to bog off
Cheers
Tim
Hi Tim
I’m always happy to receive useful advice and I’ll look into getting some of that solder, especially since a lot of photo-etch assembly is on my modelling horizon (I have several more Industria Mechanika kits on their way).
 
Hi Norman
Worth a look at the C & L site for all the Carrs stuff, loads to look at, some of it is even useful . Soldering is much more common in the railway world...I learned from the book “etched loco construction” by Iain Rice. Worth a look if you can get it cheap....uses real world language and keeps it simple so even I could understand it...
Cheers
Tim
 
Thread owner
Hi Norm I'll be follow this with interest, you like Industria Mechanika kits by the look of it as there more on the way :smiling2: .
Looks like you may have found a new home as well ?, good luck with the rest of your build.
Pete
 
Thread owner
Norm .
I'm in , Steampunk Fab . I'll sit with the others and enjoy this .
John
 
what a great,kit,Norman ,I have had my eye on some of these,s for such a long time,
and never seen one,like this started and laid out,will be watching :smiling:
great start to it.
 
Thread owner
I done a little more today, modifying the portholes and making the cockpit gauges.

Because I use watch crystals instead of the kit supplied clear plastic for the porthole glass, I had to ream out a 15mm inner circle in the portholes to compensate for the crystal thickness (see inner pic). I think it is worth the effort, because the watch crystals are so much clearer than the kit plastic parts.

I have also completed the internal gauges. I airbrushed Tamiya X1 Gloss Black (mixed 50:50 with Mr Hobby Self Levelling Thiner) on to the photo-etch gauge faces and when dry, gently sanded off the Black paint from the raised details to give a pleasing effect.


Thread owner
Stunnig detail work Norm, keep it up :astonished: :thumb2:
Pete.
 
Status
Not open for further replies.
Back
Top