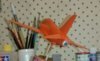
On the side I've been building this Hawk as a stress-free no frills build.
The last Revell (Italeri moulding) Hawk was the ETPS version. I didn't enjoy the Italeri moulded Hawk, so rather than cast it into the box of doom, I thought I'd do something different with this one. It'll use the Red Arrows decals that won't be needed for my other Hawks (they have different versions pending from the Xtradecal sheet). Wheels up, smoke on, mounted on a stand.
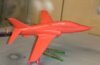
The base kit:
View attachment 290633
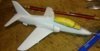
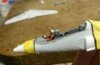
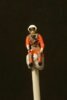
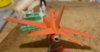
Same kit as the previous build (Rick's Hawk GB), but moulded in white instead of red. Firstly the pilot, nicked from one of the Airfix kits:
View attachment 290634
View attachment 290635
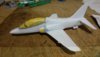
Canopy on. Had issues as before with the interior clear blast shield (hoping the Airfix kit is a little easier in this regard):
View attachment 290636
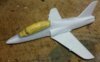
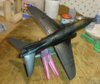
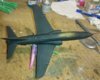
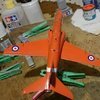
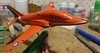
Intakes and tail feathers on. I've left a few of the under wing actuator covers (or whatever they are) off to make it easier to apply the arrow decals. As with the previou sbuild, a lot of filling and blending is required with the intakes:
View attachment 290637
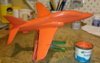
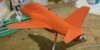
All smoothed and ready for primer:
View attachment 290638
The last Revell (Italeri moulding) Hawk was the ETPS version. I didn't enjoy the Italeri moulded Hawk, so rather than cast it into the box of doom, I thought I'd do something different with this one. It'll use the Red Arrows decals that won't be needed for my other Hawks (they have different versions pending from the Xtradecal sheet). Wheels up, smoke on, mounted on a stand.
The base kit:
View attachment 290633
Same kit as the previous build (Rick's Hawk GB), but moulded in white instead of red. Firstly the pilot, nicked from one of the Airfix kits:
View attachment 290634
View attachment 290635
Canopy on. Had issues as before with the interior clear blast shield (hoping the Airfix kit is a little easier in this regard):
View attachment 290636
Intakes and tail feathers on. I've left a few of the under wing actuator covers (or whatever they are) off to make it easier to apply the arrow decals. As with the previou sbuild, a lot of filling and blending is required with the intakes:
View attachment 290637
All smoothed and ready for primer:
View attachment 290638