G
Guest
Guest
I like it! Camp fire would be great hope you pull it off. Good luck.

 .....Jim
")


Thanks Monica, looks a bit cartoonish at the moment but not for longvery nice going with the rubble,looking good,")

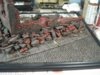
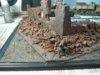
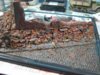
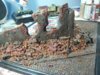

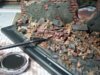
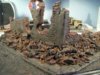
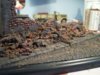
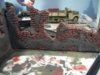
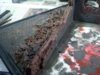
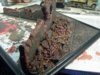
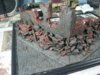
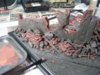


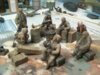
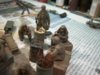
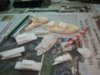
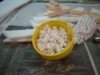
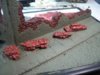
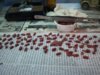
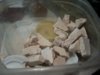
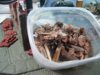
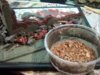
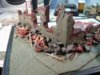
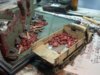
Good rubble makes or breaks a diorama in my eye, you and Ron seem to have it nailed! Watching with great interestHi folks, put a bit of time in on base, pics speak for themselves. Many layers and much to be done of course to blend colors. Will create a slurry of white glue, water and crushed brick a brack to fill gaps and lay in tid-bits. Had fun creating foam"bricks" to lay about. One would think doing rubble and debris of war is an easy thing but attempting to get it to look as authentic a possible...not so much
Thanks so much John, I feel honored to be included in such company as Ron.Good rubble makes or breaks a diorama in my eye, you and Ron seem to have it nailed! Watching with great interest
 ...............Jim
Thanks for the idea Ian I'm sure I will make use of it in future projects, one never stops learning you knowWell Jim. It looks like this is going to be epic. Loving it so far.
Just had an idea for bricks and rubble that might be helpful for the next project, (its a bit late now for this one).
Plaster of Paris mixed with pigment. Make a couple or three batches in typical brick colours. tip them into a form that is as big as you like but only as deep as a brick is wide.....while the plaster is stil wet drag a tooth pick through it to drag the different colours into each other so the three colours mingle but not so much as they are mixed in completely...Once dry bash the crap out of it. Instant brick rubble. Cut groves in it and you have brick sections....
............Jim . Dont forget a few bits of recognisable wood, like window frame parts etc, amongst your rubble piles. I'm glad this is a twelve month build too as I have some decorating to do first
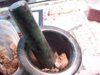
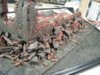
Your suggestions Paul are already in the works will post some progress pics soon, thanks for your kind attention.....JimLooking good there Jim, I would go for a 50 gallon drum being used as a brazier to keep their toes warm
scalemodelling.co.uk is a privately operated online discussion forum. All content posted by members reflects their own views and opinions and does not necessarily represent those of the forum owners or administrators. While reasonable efforts are made to moderate content, no responsibility is accepted for user-generated material. By using this site, you agree to comply with UK law and the forum rules.