Theme editor

Scale Model Shop

Kitty Hawk 1/32 OV-10D Bronco

Status
Not open for further replies.
Thread owner
One good thing about Kitty Hawk is that they do provide proper FS numbers to help accurately identify the right colours and, of course, they can easily be tied into the MRP range as they too provide FS numbers.

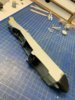
I have sprayed the interior components with the appropriate shades of grey (2 not 50!). Plus where needed interior green.
View attachment 348838

I will start some detail painting tonight.
 

Attachments

  • 4CC0C0CF-4891-4BC1-813F-5F0D48D81ABF.jpeg
    4CC0C0CF-4891-4BC1-813F-5F0D48D81ABF.jpeg
    3.8 KB · Views: 0
Thread owner
Look at what has turned up in the post!!
View attachment 348843

They look very nice indeed. I have only done limited resin work before and nothing quite like this. Any tips?
 

Attachments

  • 50A8ADC4-16FF-4230-8F8F-3653E597B955.jpeg
    50A8ADC4-16FF-4230-8F8F-3653E597B955.jpeg
    3.6 KB · Views: 0
Hi Barry
Progress on the cockpit is good. You seem to be overcoming KH's attempts to derail you :rolling: Those seats look really good. The casting blocks will need careful removing. Sides look fragile.
Jim
 
Give them a good soapy wash before painting to remove any release agent. ;)
 
I have only done limited resin work before and nothing quite like this. Any tips?
These don’t look like they need much assembly. The blocks on the bottoms of the seats, do they need to come off or should they stay on? If they have to go, use a razor saw and careful strokes so you don’t produce more dust than necessary, then wet-sand the bottoms flat. If the blocks should stay but need reducing in height or flattening on the underside, again, wet-sand them. In either case, to get it good and flat, you can tape or glue a piece of wet-and-dry sandpaper to a piece of wood and move the part over it in figure-8 motions.
 
Thread owner
Blocks razor sawed off, washed and cleaned up a bit. Black primer and painted grey. Ready for detail painting tomorrow.

Thanks for the advice everyone.

View attachment 348912
 

Attachments

  • A679D698-B31E-44FC-AD4A-CB73E3243DCE.jpeg
    A679D698-B31E-44FC-AD4A-CB73E3243DCE.jpeg
    3.9 KB · Views: 0
Hi Barry
Seats are very nice. Good job removing the casting blocks. It would have been easy to damage the delicate sides and top.
Jim
 
Well executed Barry as Jim says those sides look very delicate. Whats the part at the bottom of the photo?
 
Thread owner
Well executed Barry as Jim says those sides look very delicate. Whats the part at the bottom of the photo?
It is the camera pod that sits below the nose.when I remove the masks you will see transparencies for the cameras. No cameras though.
 
Ah ok I've just looked back at the box art and that makes sense. I thought it might have been a resin part.
 
Thread owner
I masked and then airbrushed field green for the seats. A little touch up will be needed then I will paint seat belts and other details.
View attachment 348943
 

Attachments

  • CE0344DA-7F3A-4A75-ACB5-C505D8E3F70E.jpeg
    CE0344DA-7F3A-4A75-ACB5-C505D8E3F70E.jpeg
    3.4 KB · Views: 0
Thread owner
Some more pics.
View attachment 350063

View attachment 350065

View attachment 350064

View attachment 350066

I have to say that this is a shoddy badly produced kit. At first the issues were just amusing, it then became annoying and is becoming infuriating.

If I had not already bought the Kitty Hawk F5 then I would not bother with one of their kits again. I cannot stand thoughtless poor model design and engineering.

Fixing the resin seats into place was a challenge and the rear seat has only a drop of superglue to hold it In place. It will take the slightest knock to dislodge it. OK I need not have bought the resin but the kits seats are pretty poor and I do t think they would be much better to fix in place. I am persisting with this kit but it will not take much more for me to bin it.....
 

Attachments

  • F6381913-6B81-4813-B2DA-D3F39F93A5B2.jpeg
    F6381913-6B81-4813-B2DA-D3F39F93A5B2.jpeg
    3 KB · Views: 0
  • 4A261BE7-B4F6-4A34-8268-935AE627E678.jpeg
    4A261BE7-B4F6-4A34-8268-935AE627E678.jpeg
    3.5 KB · Views: 0
  • BC8E7934-FDBC-4A1F-8DCF-74A8DCB171D7.jpeg
    BC8E7934-FDBC-4A1F-8DCF-74A8DCB171D7.jpeg
    3.3 KB · Views: 0
  • 9533DF05-65B9-4318-BF99-EA0761EF5771.jpeg
    9533DF05-65B9-4318-BF99-EA0761EF5771.jpeg
    3.9 KB · Views: 0
Thread owner
Still struggling fitting the interior to the fuselage resulted in getting out some cutters and doing major butchery to the nose and in the process the seats and rear instrument panel all broke free. Before refitting them I will complete the main fuselage constriction which is going to involve a lot of filler and sanding.

By the way - what idiot decided decals over raised detail is a good idea? Anyway the obvious happened so the panels are a mix of decals and painting.

View attachment 350067

View attachment 350068

View attachment 350069

View attachment 350070

View attachment 350071

View attachment 350072

View attachment 350073

Lots of joint filling and sanding now to do.....
 

Attachments

  • F5355623-8344-4491-8757-3263F8C83890.jpeg
    F5355623-8344-4491-8757-3263F8C83890.jpeg
    3.1 KB · Views: 0
  • 16992035-7EF9-426A-8D44-FB0FA5B80BE2.jpeg
    16992035-7EF9-426A-8D44-FB0FA5B80BE2.jpeg
    3.6 KB · Views: 0
  • 63AB8AEB-F78A-40BA-99C0-C14B1DEEF19D.jpeg
    63AB8AEB-F78A-40BA-99C0-C14B1DEEF19D.jpeg
    2.8 KB · Views: 0
  • 6A633B31-1556-42E5-B853-0CB88ADD7782.jpeg
    6A633B31-1556-42E5-B853-0CB88ADD7782.jpeg
    3.5 KB · Views: 0
  • 29C8750E-796B-47D3-9568-4821191B8D35.jpeg
    29C8750E-796B-47D3-9568-4821191B8D35.jpeg
    2.9 KB · Views: 0
  • 691BFF11-CC8C-4C64-AAF2-EFCA97CBB4A5.jpeg
    691BFF11-CC8C-4C64-AAF2-EFCA97CBB4A5.jpeg
    3.4 KB · Views: 0
  • 5E36E923-E06D-40DB-8636-FF7FB29E054C.jpeg
    5E36E923-E06D-40DB-8636-FF7FB29E054C.jpeg
    3.6 KB · Views: 0
Despite all your hassles with this kit the interior looks very nice. Keep plodding on Barry don't let this kit beat you.
 
Thread owner
Its worth adding that the white metal undercarriage supplied by SAC is a waste of time. It is quite poorly produced and I am frankly not sure how to put it together without breaking it. It is the first time SAC have let me down.

I am reverting to the kit legs but I know they wont be strong enough but hopefully it might be OK for a bit before it saga and collapses.
 
Well, that's Kitty Hawk crossed off the list of kits I must try. If it's causing you this many issues I'd have no chance!
 
What a contrast from Tammi to Kitti...just like my experience with a surprisingly good fitting Trumpy kit and my present Kinetic kit. I feel for you Barry but I know it'll come out good at the end albeit with wobbly legs.

Aren't there any other after market undercarriage for the Bronco?

Cheers,
Richard
 
Hi Barry
Despite all your hassles with this kit the interior looks very nice. Keep plodding on Barry don't let this kit beat you.
I think Vaughan is right. With your skill and experience you'll make it work.
Well, that's Kitty Hawk crossed off the list of kits I must try. If it's causing you this many issues I'd have no chance!
Me too!
Jim
 
Status
Not open for further replies.
Back
Top