First day back after the Bank Hols. and guess what? it's raining.......Can't work in the rain, head for the shed, Hey Ho!!!!
Stage 3.
In this session I will add more detail to the pillbox, start the road and the stream.
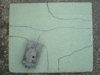
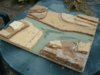
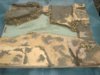
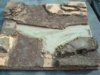
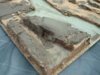
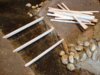
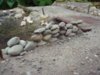
Photos 1/2 The pillbox is starting to look menacing now, with it's dome roof and I am well pleased with it so far. Note the addition of stepping stones above the waterfall so the troops won't get their feet wet going to the P.B.!! If you wish to put more stones in, use a dab of superglue on them, not too much because this stuff dries shiny and is a b****r to paint over.
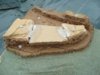
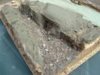
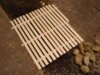
Photo 3 shows the rear of the P.B. I have an admission to make here. I forgot to include a rear door so I have started modifying this bit, naughty boy! Also I have added a bit more cement here and there. This will happen as you will always have bits you have missed or are not happy with after the first 'spreading'
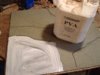
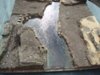
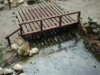
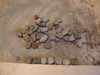
Photo 4 shows the rear of the P.B. with rubble added. I luuurv doing this bit as the effect, I hope you agree, is spot on. To achieve this get on your knees and sweep up the grit and dust from a suitable area. Mine is the workshop floor or greenhouse, honest!
Spread a light, well watered solution of P.V.A. where the rubble is to go.
If your not too sure of the consistancy practise on a bit of scrap...it only needs almost a wash type of thickness. Then simply sprinkle the rubble into the P.V.A. Put plenty on and only leave for a shorp while.
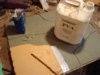
Turn the dio. on it's side and tap the board to remove any excess rubble. Job done,it's that easy. Don't worry if there are any bits missed, loose stuff can be sprinkled on later.
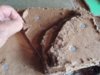
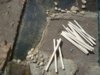
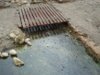
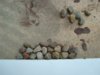
In photos 5/6 I have used the same method as above for the road surface but not quite as much. You will notice bigger bits in the road, I leave them alone, you might want to remove them. Also the back entrance to the P.B. is nearly ready for the forgotten door.
I can now start the stream. I owe the way this is done to my late father, who taught me many short cuts to achieve acceptable results.
I have read bits about using resins and this and that but just give this method a try and you will be astounded at the results..I was, and I won't use any other.....
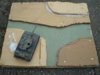
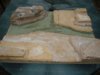
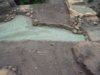
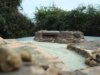
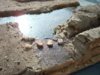
First, we need to paint the stream bed. I use water based shed paint because it soaks in quickly and dries straight away. I use 3 colours black, brown and green. Using a small paint brush apply the green at the edges, this imitated weeds, the brown mid stream and the black in the middle and by the waterfall bases where the water is deepest. This is only a rule of thumb as obviously it depends on what colours you have, have a play on a bit of board first. Photo 7 shows the finished painted stream.
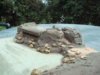
When the paint is perfectly dry and all large bits have been removed from the stream bed it is time to give the stream it's first coat of varnish.
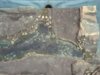
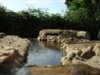
Using a thinned down mix (say 75/25, I use a cheap varnish and turps
subs) give the bed a generous coating and leave to dry. The final photo shows the stream with just it's sealer coat.
Next time I will add more coats to the stream, make the bridge and a wall and do more to the pillbox.
I hope this has been of interest and I hope you will tag along next time.
Off to our little hideaway in the Dordogne (NAME DROPPER!!!!) on Thurday for a few days, so see you next week.
Ron
View attachment 19385
View attachment 19386
View attachment 19387
View attachment 19388
View attachment 19389
View attachment 19390
View attachment 19391
View attachment 19392
View attachment 131911
View attachment 131912
View attachment 131913
View attachment 131914
View attachment 131915
View attachment 131916
View attachment 131917
View attachment 131918