Theme editor

Scale Model Shop

Phil's Eduard 1:48 me109 E-1

Status
Not open for further replies.

PhilJ

New member
Joined
May 14, 2015
Messages
1,145
Reaction score
0
Points
0
1/3
Thread owner
Hi guys, so its been a while since I have been on here or done any serious modelling, had fairly rough year in 2016 continuing on from my father passing away in 2015 but this year is going to be a good one. Even with the fact I bought myself a nice 2012 bmw 320d msport just b4 xmas after I had to get rid of my beloved audi a4 2.of tfsi black edition and within 24hrs someone scratched it over night and by day 12 of ownership (on the 2nd Jan) someone drove in the back of me and wrote it off and I suffered severe whiplash. Any way blessing in disguise cos I didn't like it and we'll you gotta look on the positive side right?
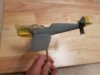
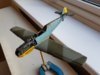
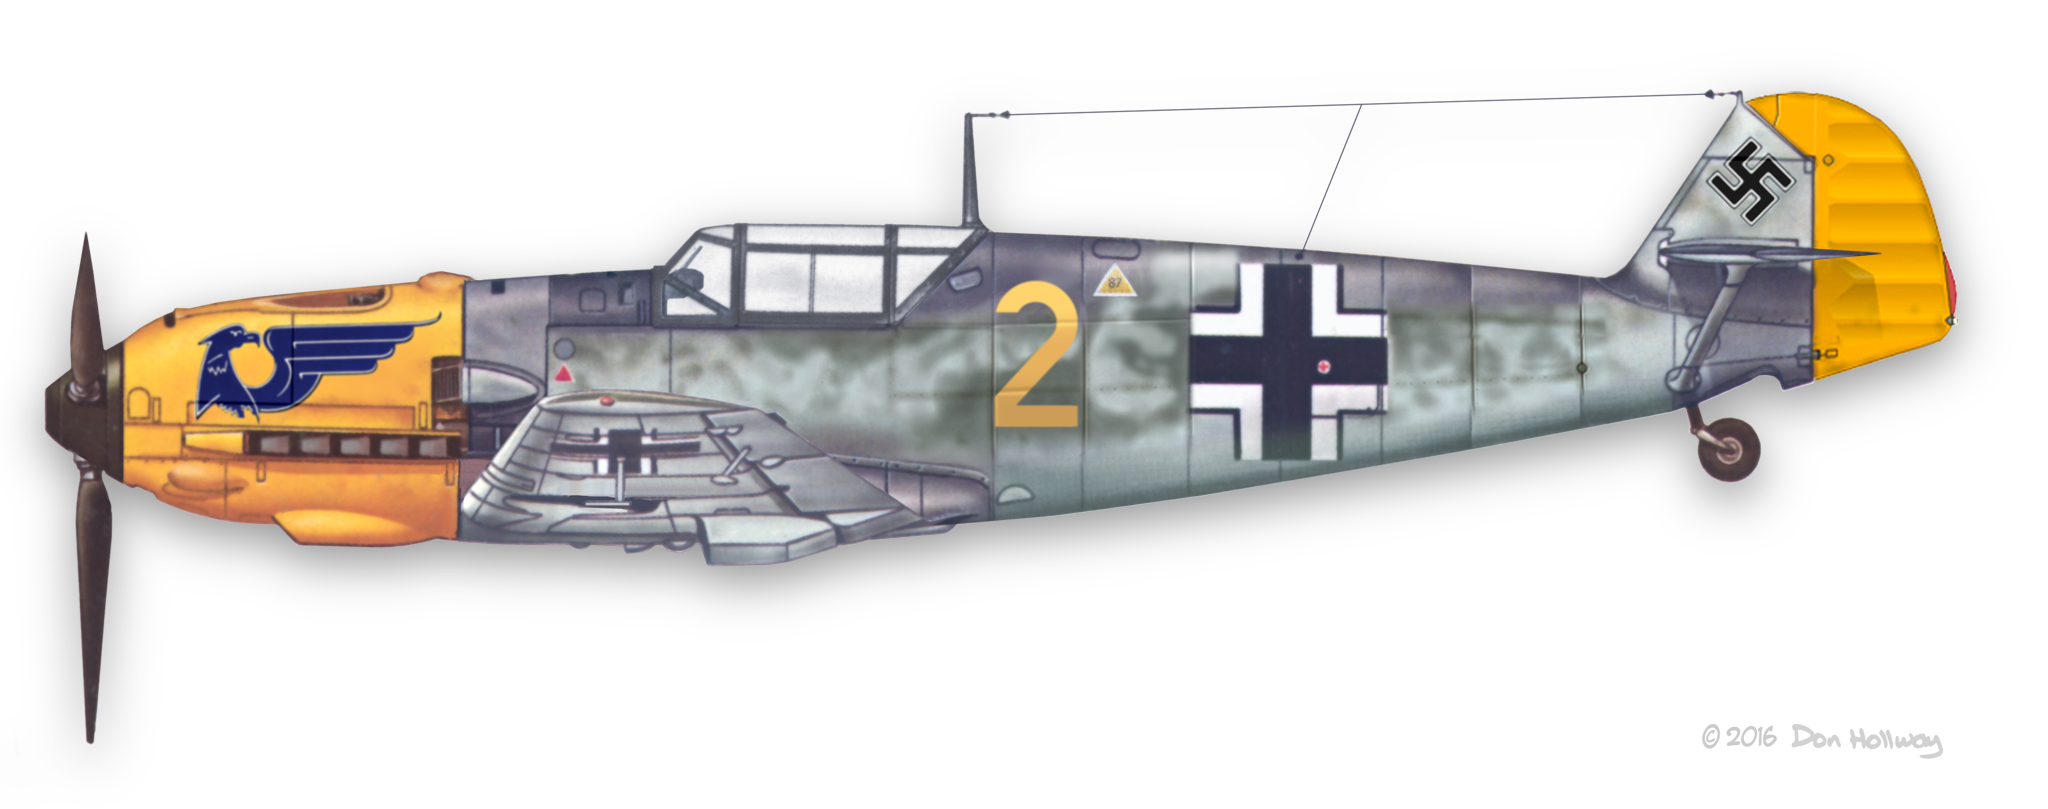
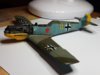
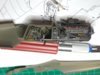
New car being picked up on Monday, can't wait, and in typical fashion its German and leads me to my build which also includes a Daimler Benz engine.
 
Thread owner
Eduards very nice looking 109 E-1 was picked from the stash and here are some pics of it so far, I'll hopefully be around again a bit more especially when I get a little more settled.
Hope you like and as before all comments and critism good or bad welcome.
 
Thread owner
Oh here we go another new phone another load of upside down pics! Jar I'll get it sorted though.
As you may be able to see some scatch work has been done particularly on the engine. I rotary sanded all the origional engine plastic spark plugs off then carefully drilled and added my own wire ones for more effect, painstaking but worth it i think. Placards by Airscale also makes for more interest. Vallejo model air used so far and brown oil paint and vallejo black wash used for weathering along with dry brushed tamiya alliminum in places.
Thanks for looking.
 
excellent work. Just one thing, the engine bearers were always painted in RLM 02, not metallic. However, if you are keeping the cowling closed, thats nothing to worry about.
Cheers, John
 
Looks great. Joe and Monica will have a better view of course.
 
Thread owner
View attachment 274309
Primer on courtesy of styrenyze or whatever it's called, and yellow tail and nose following some masking. This time I have used tamiya XF-3 thinned with Mr hobby levelling thinner which I rate very highly as it aids flow and lays so well (actually works great with tamiya paint) rather than my vallejo model air yellow which I find hard to get down in any real solid consistency.
 

Attachments

  • 20170115_230817.jpg
    20170115_230817.jpg
    2.1 KB · Views: 0
looking good so far. If you like the Mr hobby levelling thinner, combine that with Mr Hobby 1000 primer and I think you might be a convert to that primer and thinner combo.
 
Thread owner
Got some base colours down now, I'm not particularly happy with the model air rlm colour matches but unfortunately I haven't got a lot of early mr hobby ww2 rlm colours but should still look decent enough when finished.
View attachment 274334 View attachment 274336 View attachment 274338
Must remember to paint that air filter yellow...
 

Attachments

  • 20170122_130818.jpg
    20170122_130818.jpg
    2.7 KB · Views: 0
  • 20170122_130853.jpg
    20170122_130853.jpg
    2.8 KB · Views: 0
  • 20170122_130911.jpg
    20170122_130911.jpg
    1.8 KB · Views: 0
Must remember to paint that air filter yellow...
If the yellow did not extend onto the panel in front of the cockpit (behind the large engine/gun cowling) then there is a good chance that the intake was not painted yellow. You'd need to check a good photo or profile to be sure.
Cheers
Steve
 
Got some base colours down now, I'm not particularly happy with the model air rlm colour matches but unfortunately I haven't got a lot of early mr hobby ww2 rlm colours but should still look decent enough when finished.
View attachment 274334 View attachment 274336 View attachment 274338
Must remember to paint that air filter yellow...
If the yellow did not extend onto the panel in front of the cockpit (behind the large engine/gun cowling) then there is a good chance that the intake was not painted yellow. You'd need to check a good photo or profile to be sure.
Cheers
Steve
If I were you, I would check the profile as well. Steve's advice concerning this stuff is usually spot on. He helped me out a bit when I did my Dora and the info he gave was invaluable.
Looking good so far
John
 
Thread owner
If the yellow did not extend onto the panel in front of the cockpit (behind the large engine/gun cowling) then there is a good chance that the intake was not painted yellow. You'd need to check a good photo or profile to be sure.
Cheers
Steve
If I were you, I would check the profile as well. Steve's advice concerning this stuff is usually spot on. He helped me out a bit when I did my Dora and the info he gave was invaluable.
Looking good so far
John
No, I have checked and it should be yellow as it extends right back to the firewall/ammo casing area.
Cheers guys
 
Good that you checked, but have you checked an external profile eg osprey?
John
 
There are definitely profiles which tell that that type of yellow nosed bf 109's intake was not painted yellow. I believe the top profile is actually one of the schemes that comes with the kit you are building
Cheers, John
barkhorn-109e-1-yellow-2.png

bf109-4.jpg

bf109-5.jpg
 
Hi John, those are typical of the application of the yellow (O4) which did not extend past the front engine cowling. The cowling could easily be removed for painting and probably was. It's pretty typical of the BoB period markings.
I can think of variations, like Bernhardt Malischewski's E-3 which carried the yellow back to the windscreen, but only down to the original camouflage demarcation, leaving the intake in the side colour/mottle. Others had the actual intake painted yellow, inline with the panel demarcation, but 'streamline' bulge in the cowling to the rear left untouched.
There are so many possibilities which is why it is always worth checking.
Cheers
Steve
 
Thread owner
View attachment 274792
This is what I have found after some searching. This is the scheme.
Hi John, those are typical of the application of the yellow (O4) which did not extend past the front engine cowling. The cowling could easily be removed for painting and probably was. It's pretty typical of the BoB period markings.
I can think of variations, like Bernhardt Malischewski's E-3 which carried the yellow back to the windscreen, but only down to the original camouflage demarcation, leaving the intake in the side colour/mottle. Others had the actual intake painted yellow, inline with the panel demarcation, but 'streamline' bulge in the cowling to the rear left untouched.
There are so many possibilities which is why it is always worth checking.
Cheers
Steve
There are definitely profiles which tell that that type of yellow nosed bf 109's intake was not painted yellow. I believe the top profile is actually one of the schemes that comes with the kit you are building
Cheers, John
barkhorn-109e-1-yellow-2.png

bf109-4.jpg

bf109-5.jpg
 

Attachments

  • EDK3001-camo.jpg
    EDK3001-camo.jpg
    1.8 KB · Views: 0
Thread owner
Trusty old klear has been applied and most decals have been added, the left hand side has all its decals and have gone down really nice to be fair as always seems to be the way
with eduard kit stock. Another application of micro sol will see them looking nice and tight I reckon.
Thanks for looking as always any critism is welcome.
View attachment 275348 View attachment 275350
 

Attachments

  • 20170205_205302.jpg
    20170205_205302.jpg
    2.4 KB · Views: 0
  • 20170205_205249.jpg
    20170205_205249.jpg
    2.3 KB · Views: 0
That looks great Phil. The paintwork is really clean.

Eduard decals are the business, if a little fragile.
 
Status
Not open for further replies.
Back
Top