Theme editor

Scale Model Shop

Return to modelling - 1:144 Revell Castle Class Corvette HMCS snowberry

Status
Not open for further replies.
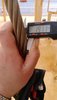
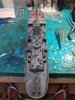
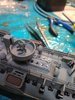
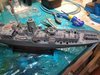
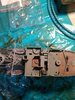
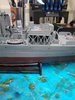
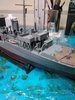
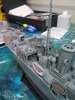
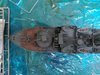
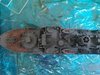
I agree with the black string provided with the kit. I have the 1/144 Fletcher class destroyer, for the railing wire I will be using thin brass. steel wire or plastic rod, of about 0.2 - 0.5 mm. I am not too sure yet which will look better, as I haven't started building it. As for the rigging, I have no idea yet, but I will need to know eventually.
 
Thread owner
Well after pondering for a while on sizes I decided to go and do some measuring.

Standing rigging is approx 19mm (see photos) as is the removable rails wire/rope so scaled to 144 this equates to 0.13mm.
I have found some 0.15mm on Amazon which I shall try when I'm back. Probably going to attempt to glue to stanchions with PVA and do a full turn round each to aid holding it in place. I wish I had though of it before I glued the rails in and then I could have drilled holes for it to go through.
 

Attachments

  • IMAG1020.jpg
    IMAG1020.jpg
    2.6 KB · Views: 0
  • IMAG1021.jpg
    IMAG1021.jpg
    2.8 KB · Views: 0
  • IMAG1023.jpg
    IMAG1023.jpg
    2 KB · Views: 0
  • Screenshot_20180423-122856.png
    Screenshot_20180423-122856.png
    6.1 KB · Views: 0
Thread owner
So I have finally returned from sea and after a month finally found some motivation to continue.

Struggled with the aft any light windows. These were so fiddly they were almost impossible to fit by someone with as little skill as me. Instead I used PVA glue on a cocktail stick and effectively made the windows. This worked so well I did it for all of the hull windows as well which in this kit don't have any windows, just small holes.

Anyway stuck on all the depth charges down aft and the top rails on the aft charge racks.

So that's it for the minute, going to fit the Nav' deck and forward gun mount next.

Happy modelling!

James View attachment 308871View attachment 308872View attachment 308873View attachment 308874
 

Attachments

  • IMG_20180717_210040.jpg
    IMG_20180717_210040.jpg
    3.5 KB · Views: 0
  • IMG_20180717_210047.jpg
    IMG_20180717_210047.jpg
    3.7 KB · Views: 0
  • IMG_20180717_210054.jpg
    IMG_20180717_210054.jpg
    3.6 KB · Views: 0
  • IMG_20180717_210101.jpg
    IMG_20180717_210101.jpg
    3.9 KB · Views: 0
Hi James
You’re making a bang up job of this one, nice work.....for rigging have you looked at ezeline? It’s a sort of stretchy thread. Works great for biplane rigging so should also work for rigging lines on ships. With respect to the windows, congratulations, you have invented crystal clear. Some companies put PVA in small bottles and charge good money for it, but it’s basically PVA....which is actually a good adhesive for clear parts....
Cheers
Tim
 
Looks good. I am building the 1/72 version and also used PVA for the window glass
 
Thread owner
I haven't thought of that actually Tim, I shall look into it though.

How is it Graham, I think from my view it would be better as at 1:144 scale this is just too fiddly really, certainly for my lack of prowess anyway.

Going to have to spray the ID numbers on with stencils I have made as I am doing it as HMS Bamborough Castle.
The 1/72 version is a big kit, the hull is 83 cm long. As it is the reboxed Matchbox kit, the detail isn't the best. The deck needs a total revamp as they have moulded wooden decking across the whole deck. Some of the parts are a bit . I am using the PE from Great Little Ships. If you do not want to spend the money on the PE, the Platinum Edition might be worth looking into.
 
Thread owner
I have only just picked mysekf up off the floor after seeing the price of the PE kit :tears-of-joy:
Personally I don't know if the PE one differs or it is just for the lights in it which I don't really like?

I have a few planes I've just bought to build next before anymore ships though..
 
James that's super nice what you have done there... i'm really interested to see your weathering...so far the build is excellent and your paint scheme is SPOT ON...keep it coming
 
Thread owner
Hi guys,

Added the nav' deck bulkheads today, again gluing is a bit messy and I will respray over this. It's maybe a bit unconventional but I want to make sure it is well glued enough so that it can be handled without falling apart easily.

Again the fit if all these parts is questionable. It's acceptable it's not an 80s Airfix 'fit' but at the same time isn't a Japanese fit. For me it's OK, just fiddly. The one of these I do for myself will be 1/72 for sure. I suppose it has improved my skill with types of tweezers no end as 95% of parts are too small to be handled by my chubby fingers.

Looking at the hull it will be getting a respray before completion. I have used gloves all the time but it's still suffered from handling.

As for weathering, well I'm not sure. I haven't ever really weathered anything but being a ship I am well experienced at knowing where they that and how it looks so I just need to portray this to look half decent ad the guys in the YouTube videos make look so effortless.
I will probably just go for obvious areas on the hull, hawse pipe, portholes and also where vertical uprights going the upper deck and fish plates.

Some photos attached.

View attachment 309002View attachment 309003View attachment 309004
 

Attachments

  • IMG_20180718_222843.jpg
    IMG_20180718_222843.jpg
    3.6 KB · Views: 0
  • IMG_20180718_222830.jpg
    IMG_20180718_222830.jpg
    3.4 KB · Views: 0
  • IMG_20180718_222824.jpg
    IMG_20180718_222824.jpg
    3.5 KB · Views: 0
Thread owner
So decided to do another 20 mins on it today.

Added the stbd bridge wing armour panels, the small davit, radar array and lockers on the upper deck.

I have come to the conclusion that I will need to respray a lot as my gluing is a bit messy. I am going to need to spend a few hours masking before this commences!

Anyway I also received something in the post today pictured below. I had had some discussion on the forward rails and found this, 0.15mm wire designed for cape repairs or something like it. Just not sure what to affix with yet?

JamesView attachment 309074View attachment 309075View attachment 309076View attachment 309077View attachment 309078
 

Attachments

  • IMG_20180719_173907.jpg
    IMG_20180719_173907.jpg
    3.2 KB · Views: 0
  • IMG_20180719_173852.jpg
    IMG_20180719_173852.jpg
    3 KB · Views: 0
  • IMG_20180719_173158.jpg
    IMG_20180719_173158.jpg
    3.3 KB · Views: 0
  • IMG_20180719_173148.jpg
    IMG_20180719_173148.jpg
    3.3 KB · Views: 0
  • IMG_20180719_173153.jpg
    IMG_20180719_173153.jpg
    3.3 KB · Views: 0
Thread owner
So got a cheeky 40 mins in the shed this evening and a good few bits bodged into place.

Spent most my time affixing armour plating to bridge aides, light posts on the bridge deck and also the forward gun platform, though this is just tested in place on the ship and I intend to take it off to respray it before gluing it in place.

I am kind of reaching that stage where I just want to see it completed. It's not a master piece but probably one of the better things I've managed to construct in my time.
After my experience with this I shall be investing in a decent visual aid to assist me in future.

Hopefully by the end of next week it will be completed minus any weathering I decide to attempt.

Have a good weekend.

JamesView attachment 309165View attachment 309166View attachment 309167
 

Attachments

  • IMG_20180720_194443.jpg
    IMG_20180720_194443.jpg
    3.6 KB · Views: 0
  • IMG_20180720_194439.jpg
    IMG_20180720_194439.jpg
    3.8 KB · Views: 0
  • IMG_20180720_194435.jpg
    IMG_20180720_194435.jpg
    3.4 KB · Views: 0
Thread owner
Today's effort has mainly been building the radar scanner tower which includes a clear window section which too a fair time to mask before spraying but seems OK.

Also done the forward platform, forward gun and also the windlass which have all be sprayed light sea grey before I will add detail by brush before gluing them in place.

Photos below....

View attachment 309183View attachment 309185
 

Attachments

  • IMG_20180721_151203.jpg
    IMG_20180721_151203.jpg
    2.8 KB · Views: 0
  • IMG_20180721_151445.jpg
    IMG_20180721_151445.jpg
    3.4 KB · Views: 0
Thread owner
This morning I did a bit of crude masking and continued on to respray the main part of the nav' bridge etc and cover up unsightly glue marks but seems to have come out ok.

So waiting for some super glue to arrive today and will then apply railings to the forward gun turret so it can be finally fixed in place.

Really looking forward to finally completing this and though not a master piece I'm quite pleased with how it's come out as after about 15 years not doing any modelling I've refreshed a few skills and also picked up a lot from here with many helpful tips along the way.

I have our based a couple more kits (all cold war jets) and decided to invest in the super detail kit for the air fix phantom. How (with these parts being so small) do people go about putting them together? Magnifying glass or the such?

JamesView attachment 309293View attachment 309294
 

Attachments

  • IMG_20180722_091731.jpg
    IMG_20180722_091731.jpg
    3.9 KB · Views: 0
  • IMG_20180722_091737.jpg
    IMG_20180722_091737.jpg
    3.4 KB · Views: 0
Thread owner
So have glued on radar tower, forward gun platform and also the forward windlass.

Slightly annoyed as only as I was admiring the forward gun platform I remembered I was going to do the railings first before putting it on, doh!

Anyway, the anchor chains need to go on, the final top deck and then the rails and it will be done. The ID number also needs to go on which I will spray on and then probably recoat the red oxide part of the hull.

One thing that has slightly puzzle me is the stand, I'm trying to work out a plan to make it look a bit better than just sprayed Matt black. Possibly some salt encrustation or something?

Hope everyone has had a good weekend, time for the F1 before maybe a few minutes modelling before the end of the day.

James View attachment 309311View attachment 309312View attachment 309313View attachment 309314View attachment 309315View attachment 309316
 

Attachments

  • IMG_20180722_132630.jpg
    IMG_20180722_132630.jpg
    3.3 KB · Views: 0
  • IMG_20180722_132634.jpg
    IMG_20180722_132634.jpg
    3.4 KB · Views: 0
  • IMG_20180722_132638.jpg
    IMG_20180722_132638.jpg
    3.1 KB · Views: 0
  • IMG_20180722_132652.jpg
    IMG_20180722_132652.jpg
    3.5 KB · Views: 0
  • IMG_20180722_132700.jpg
    IMG_20180722_132700.jpg
    3.3 KB · Views: 0
  • IMG_20180722_132703.jpg
    IMG_20180722_132703.jpg
    3.2 KB · Views: 0
Thread owner
Hi all,

Came across something interesting while building the bridge deck, the roof was missing from the kit.

Only after speaking to my grandfather who served on these during the Russian convoys did I realise the bridge on these was actually open to the elements!
I remember him saying nav' watches were always cold but had always assumed heating was just c*** not that it was an external nav' deck.

Anyway, have got some Tamiya masking sheet and am about to set about making the stencil to spray K412 on.
Any tips for this? I am planning to print it on the computer and then simply cut out the letters/numbers before sticking in place.

James
 
Status
Not open for further replies.
Back
Top