Hi everyone!
Today, I've
finally finished sorting out the fuselage of my Mitchell! Well... I think I have, anyway!

As you saw in my previous post, I'd reached the end of the first round of filling and sanding.
To fill the larger gaps, I used
Tamiya Putty Basic Type (87053). First, I masked off both sides of the seams with
DSPIAE masking tape, then applied a fairly thick layer of putty using a cotton bud. I removed the excess straight away and left it to dry.
Once it had cured, I sanded everything down using sandpaper of various grits and applied a coat of primer to check the results.
And that's pretty much where things stood when I published my first post here.
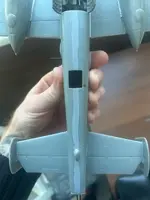
After applying the primer, I noticed there were still a few small cracks and low spots that needed attention.
So, for round two, I switched to
AMMO by Mig Jimenez A.MIG-2049 Putty Surfacer Thick. One thing I really like about it is the built-in brush, which makes it easy to apply small amounts of putty exactly where they're needed.
Then came another round of waiting for everything to dry, followed by yet more sanding.
This time, I was finally happy with the result!
Of course, somewhere along the way, I managed to completely obliterate most of the panel lines. And a special
thank you to Revell for those wonderful raised panel lines and rivets!
Fortunately, I was both mentally and physically prepared for this particular disaster!

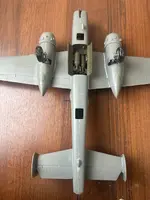
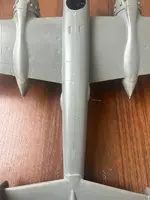
So, armed with my
OLFA XB157P (KB4-P) scriber, an engraving needle and metal templates from the
Hasegawa, some masking tape, and a healthy dose of patience, I attempted to rescribe panel lines for the very first time.
As it turns out, it's nowhere near as easy as those YouTube tutorials make it look. Who would have thought?

My first attempt was to restore a panel on the tail section.
Naturally, the result was... less than impressive. But hey,
you've got to start somewhere!
I haven't bought a rivet wheel yet, and honestly, I'm not even sure it would have helped much with such a small detail.
So I ended up making the rivets one by one using a simple engraving needle.
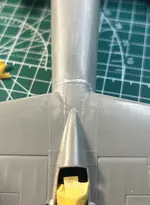
Then came a whole series of experiments as I tried to figure out how to rescribe panel lines properly.
I got the hang of using the scriber itself fairly quickly (it's not exactly quantum physics, after all!), but figuring out how to make the lines
STRAIGHT took considerably longer.
First, I tried using masking tape as a guide, running the scriber along its edge. Unfortunately, the tape turned out to be too thin and soft, so my lines ended up rather wobbly.
Next, I tried the metal templates from Hasegawa. These gave me much straighter lines, but positioning a relatively large template on an almost fully assembled
aircraft was a real pain.
Eventually, I found some old plastic cards, cut them into strips of different widths and lengths, and secured them to the model with masking tape.
And suddenly, things started going much more smoothly!
At one point, I actually had to stop myself from rescribing
every single panel line on the aircraft, rather than just the ones I'd damaged during sanding!
Oh, and somewhere along the way, I accidentally broke off one of the wings.
But never mind! Nothing actually cracked - it just came apart at the glued joint. And honestly, having the wing off makes it much easier to work on everything properly.
I think my Mitchell is trying to tell me that I was a little too eager to assemble everything in the first place!
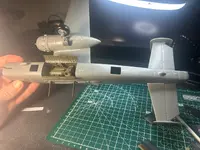
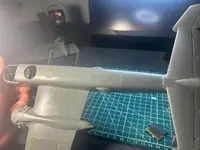
Overall, I'm pretty happy with the result, especially for my first attempt!
Not all the panel lines turned out perfectly straight, and I managed to leave a few accidental scratches in the plastic here and there.
But then I thought- maybe I can hide some of my little mistakes with weathering later on!
After all, it's a combat aircraft! It's supposed to have some chips, scratches and battle scars, right?
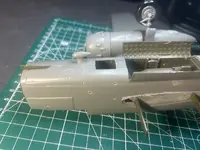
And finally, I'd like to take advantage of how friendly and helpful everyone has been here and
bombard you with a few questions about the techniques I'm currently learning!
1. Filling and sanding
At the moment, I'm using two different putties:
Tamiya Putty Basic Type (87053) for larger gaps and
AMMO by Mig Jimenez A.MIG-2049 Putty Surfacer Thick for smaller imperfections and final touch-ups.
I've been applying the
Tamiya putty with an ordinary cotton bud, simply because I haven't found anything more convenient yet.
So, I'm curious —
what do you guys use to apply putty?
I've seen all sorts of tools in tutorials: toothpicks, silicone brushes, spatulas, and pretty much anything else you can imagine!
Do you have any tips or favourite tools for applying and smoothing putty?
I've also seen people thinning Tamiya putty with liquid plastic cement. I currently have
Italeri 3990 Liquid Cement for Plastic and
Tamiya Extra Thin Cement (87038).
Is there any benefit to thinning the putty with either of these, or would you recommend using it straight from the tube?
2. Rescribing panel lines
I recently bought an
OLFA XB157P (KB4-P) scriber. To be honest, I simply went for one of the cheapest options, since dedicated scribers from Tamiya, DSPIAE and Mr. Hobby can be rather expensive.
What confuses me a little is the variety of blade widths available: 0.1 mm, 0.15 mm, 0.2 mm, 0.3 mm, and so on.
Is it worth investing in several scribers of different widths, or is one general-purpose tool enough?
Can you control the width of the panel line by making several passes with the same tool, or do different blade widths make a noticeable difference?
I'm mainly interested in building aircraft in
1/72 and 1/48 scales.
And one more question:
what do you use as a guide when rescribing panel lines?
Is there a more convenient solution than cutting old plastic cards into little strips?
I'd really appreciate any advice, recommendations, or tips from your own experience.
Thanks in advance, everyone!




