
Hi guys
A bit late out of the gate but eventually got my hands on a Phantom for this GB build and so this will be my entry.
It's an older kit 1979 I believe but then it's right in there with Vietnam eh
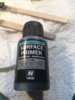
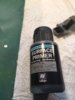
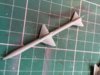
I plan to build it straight out of the box with the addition of Eduards Cockpit upgrades.
It's mainly raised and fine line panel detail and although some would sand this smooth and rescribe ........ I don't think I have the knowledge for that ( just yet ) I think is a good looking kit and not bad for a non jet builder to grind his teeth on
I'm not sure either what's what so I may need the odd bit of help here and there. All offers gresteful
Not sure on paint sceme either yet but the box art shows a tri colour camo which looks nice ( we shall see
All in I paid just over £25 for this kit and extras so not bad in my books.
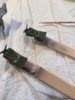
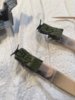
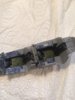
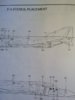
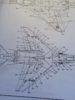
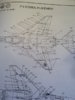
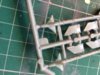
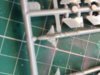
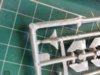
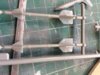
Box art and sprue shots etc
Thanks for looking
Robert
View attachment 275614 View attachment 275593 View attachment 275594 View attachment 275595 View attachment 275596 View attachment 275597 View attachment 275599 View attachment 275600 View attachment 275602 View attachment 275603 View attachment 275606 View attachment 275605 View attachment 275607 View attachment 275608 View attachment 275613 View attachment 275612
A bit late out of the gate but eventually got my hands on a Phantom for this GB build and so this will be my entry.
It's an older kit 1979 I believe but then it's right in there with Vietnam eh
I plan to build it straight out of the box with the addition of Eduards Cockpit upgrades.
It's mainly raised and fine line panel detail and although some would sand this smooth and rescribe ........ I don't think I have the knowledge for that ( just yet ) I think is a good looking kit and not bad for a non jet builder to grind his teeth on
I'm not sure either what's what so I may need the odd bit of help here and there. All offers gresteful
Not sure on paint sceme either yet but the box art shows a tri colour camo which looks nice ( we shall see
All in I paid just over £25 for this kit and extras so not bad in my books.
Box art and sprue shots etc
Thanks for looking
Robert
View attachment 275614 View attachment 275593 View attachment 275594 View attachment 275595 View attachment 275596 View attachment 275597 View attachment 275599 View attachment 275600 View attachment 275602 View attachment 275603 View attachment 275606 View attachment 275605 View attachment 275607 View attachment 275608 View attachment 275613 View attachment 275612
Attachments
-
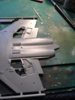 image.jpeg2.6 KB · Views: 0
 -
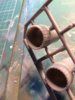 image.jpeg3 KB · Views: 0
 -
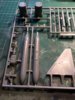 image.jpeg3.1 KB · Views: 0
 -
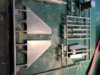 image.jpeg3.1 KB · Views: 0
 -
 image.jpeg2 KB · Views: 0
 -
 image.jpeg2.4 KB · Views: 0
 -
 image.jpeg2.5 KB · Views: 0
 -
 image.jpeg2.2 KB · Views: 0
 -
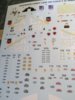 image.jpeg2.7 KB · Views: 0
 -
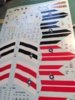 image.jpeg3.4 KB · Views: 0
 -
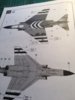 image.jpeg2.3 KB · Views: 0
 -
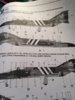 image.jpeg2.7 KB · Views: 0
 -
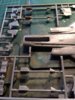 image.jpeg3.3 KB · Views: 0
 -
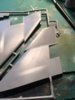 image.jpeg2.7 KB · Views: 0
 -
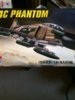 image.jpeg2.6 KB · Views: 0
 -
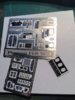 image.jpeg2.7 KB · Views: 0
 -
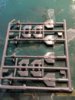 image.jpeg3 KB · Views: 0
 -
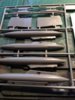 image.jpeg3.1 KB · Views: 0
 -
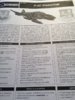 image.jpeg2.5 KB · Views: 0


")