This is a marathon post because since my last one I’ve not been able to up load any photos to my gallery, up until now that is; I’ve been preparing the posts as usual over the last few days so in fact this is several added together and I have to say I’ve been rather busy of the festive season! I’ve not done any editing using the benefit of hindsight so some details have “developed” throughout this one post.
Ron Pepper, I’d completely forgotten that. Definitely a name from the “good old days”!
The weight saved by cutting holes in 1/16th balsa is minimal, although it does add up taken over a complete model, but as much as anything I like the aesthetics even if I’m the only one who sees it. I couldn’t use the weight argument with regards to the Vickers because it that case I actually added weight, albeit very little, but I though it worth it, even though not much will be visible on this model, because it is now a complete unit that may be able to be transferred to other models in the future. As for the effort in making the complete gun, it wasn’t an effort it was a pleasure!
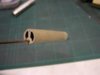
One coat of resin was enough to give the required strength but being quite a loose weave meant that it needed a lot of filling but to me this was preferable to working with resin to add extra layers. I can’t say that I’ve really enjoyed this part of the build; from now on it will be OK but it started badly, I think as much as anything because I had the wrong attitude, I knew I wasn’t going to like it and that’s not the way to start things. There are a few more small mouldings needed for the SE5a and for these I’ll certainly try out the brown paper technique first and start with a positive attitude!
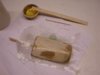
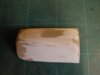
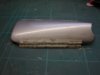
The inside of the cover.
View attachment 262724
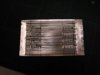
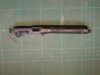
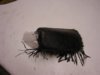
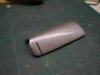
The resulting finish will be smooth enough to simulate metal so no need to cover it with litho plate, this is with just one coat of silver Solalac and not yet sanded.
View attachment 262725
The next job is to make the 2 long “hinges” that attach the cover to the fuselage, they have loose pins, so the cover will be removable but not easily. Once again these are not working hinges, when the model has been painted etc and the cover fitted in place it shouldn’t have to be taken off again (unless I want to show off the Vickers!) so litho plate will suffice.
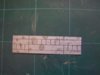
Here’s a series of photos showing the method of making a hinge.
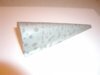
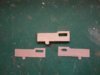
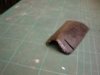
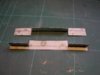
The litho plate “blank”
View attachment 262726
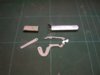
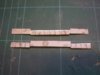
The first bends.
View attachment 262727
The second bends.
View attachment 262728
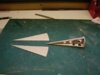
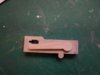
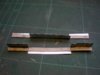
Bent around the hinge pin ready for trimming.
View attachment 262729
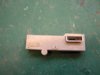
The assembled hinge glued to the cover.
View attachment 262730
When gluing hinges like this it’s obviously important to not glue the pin so use very little epoxy to “tack” the assembled hinge in place, take it apart and fill in any voids with more epoxy. The same applies when gluing to the fuselage.
View attachment 262731
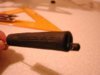
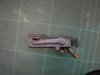
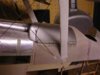
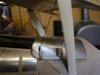
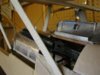
Some SE5a’s had an extra hatch towards the rear of the cover; I think I’ll add one to take away the plainness. With the bracing wire passing through the cover and the angle of the top “hinge” I didn’t think that it would actually work as such and would really just be used to hold the cover in place, but in fact it does allow the cover to be easily hinged open, I should have had more faith in the designer! Of course now I need to make a convincing mount for the Vickers, as I will be able to “show it off”.
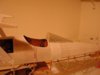
With the extra hatch and the other various fittings added the cover is looking a lot more business like.
View attachment 262732
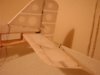
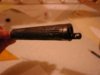
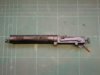
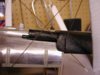
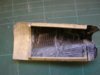
With the cover hinged open the Vickers is visible in all its glory.
View attachment 262733