Theme editor

Scale Model Shop

Ships in Bottles?

donco

SMF Supporters
Joined
Nov 28, 2023
Messages
32
Reaction score
69
Points
18
Age
94
Website
sai.org.uk
1/3
Thread owner
As a change from run of the mill models I thought to re-visit the craft of stuffing a bottle with a ship.
The last time I did this must have been about seventy years ago, so I sent off for a couple of modern books on the subject only to find that nothing in the way of technique has changed!

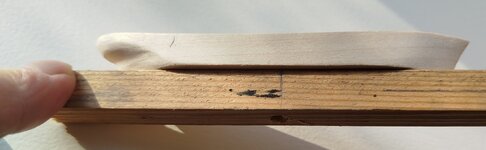
To get the little grey cells working I decided to do a very quick build of a little Thames Sailing Barge, a vessel I'm familiar with. This model was just to see how fine the detail could be modelled, bearing in mind that the masts & spars will need to have small diameter holes drilled through them to allow them to be folded backwards together with all the rigging.

Here's the result of the "test model" which has taken just over a week of afternoons to get this stage.

Minibarge WIP_2.jpg
The hull is 62mm long and I have, at least, proved that it's doable for me to drill little holes through little bits of wood!
Incidentally, the Admiralty Pattern anchor is from three pieces of 28g steel wire silver soldered! It's 3/16" high. I have yet to add flukes.

Admiralty Pattern.jpg

Now to find a bottle into which I intend to erect a 5" long "Endeavour" of Shackleton fame. Watch this space?

shackleton-expedition.webp
 
What an interesting subject Don. Considering the size of your model I think you have made a cracking job of it. Following with interest.
 
Watching with interest. When I was very young one of my dad's relatives, can't remember who, had a ship in a bottle on his mantlepiece. We visited a couple of times and as a 4 or 5 year old I still remember being intrigued by it.
 
Thread owner
Thank you for your kind words, Fellers! A heavy frost this morning dictates a day in the shed! So.... It's time for a start on the "Endurance" I'll try to document the build , mainly for my own archive of model making but some pix can be posted here.
 
Thread owner
Yes, Pete. I do have a heater but with the winter fuel allowance now kaput it's set to low - so still a little chilly. Yesterday I blocked out the hull of the "Endurance" - henceforth referred to as the model! - and plotted the side and bottom shapes using thin card templates.

Deck view
endurance.jpg Bottom view ...

...and this morning finished shaping the basic hull and mounted it onto the building jig.
endurance_3.jpg on the build jig
endurance_4.jpg a close up.

Now to paint the hull ready to add the deck layer, bulwarks, various strakes & wales, deck houses etc.

That's all for today.


​​​​​​
 

Attachments

  • endurance_4.jpg
    endurance_4.jpg
    160 KB · Views: 0
Thread owner
I needed to reduce the depth of the hull so that it will fit through the neck of the bottle! A 1/64" plywood deck layer was added after scribing some planking, tinted with soft pencil lead rubbed in. The bulwarks are from the same plywood CA'd edge on. Hull now painted Black acrylic and when dry a couple of coats of shellac was brushed on.
Bowsprit is added, hardened with thin CA, sanded and drilled for running threads which will raise the masts.

Here's the result of another afternoon in the shed. Next will be to add the deck structures - apparently mostly dog kennels I understand!
endurance3_3.jpg endurance3_2.jpg
 
This is a real example of superb small scale modelling. Looking forward to the next steps.
 
Thread owner
Yesterday I put a few notional deck houses and fittings in place. Today, Sunday morning in the shed with a reel of fly tie silk and and a bit of breath holding, I've braced the mizzen mast with it's lower shrouds.
mizzen shrouds.jpg
The engine room ventilators are 'large' insect mounting pins with the round heads filed flat on one side, clipped short, painted White with Red 'insides' and CA'd into drilled holes.
 
Thread owner
Thanks Peter! It's now 4.15 and I'm finished with the shed for today. All of the lower shrouds are on.

lowershoudsdone.jpg


The sheer batons are from black cotton stiffened with CA. Incidentally, the thick Black continuous cordage from stern to bow is there as a temporary 'hand' to keep the masts in their correct fore & aft relationship. It's ordinary Black sewing cotton but looks thick & hair under so much magnification! To give some idea of sizes, this view on the screen of my laptop, shows the model at Full Size! That is from stern to bow measures 4.25 in. The five small companion ways are 3/32 " square.
 
Thread owner
Thanks, Paul & Jim!
Some additions to the mini barge. The sails etc.

minibarge.jpg
minibarge_2.jpg


Off topic, I know, but it's my 'try out' model to confirm various techniques before going for it with the 'Endurance' model.

Just for fun, I shall complete this model and stick it into a case as a diorama.:)
 
Just for fun, I shall complete this model and stick it into a case as a diorama.:)
Will you be leaving a tiny gap between the case and the diorama base when you come to insert the ship? 😉

Seriously, this is wonderful - those sails look perfect.
 
Back
Top