
You are using an out of date browser. It may not display this or other websites correctly.
You should upgrade or use an alternative browser.
You should upgrade or use an alternative browser.
Tamiya 1/24 Aston Martin D B S
- Thread starter Marc Stock
- Start date
- Status
- Not open for further replies.
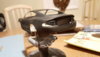
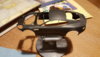
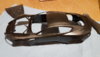
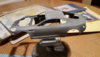
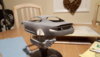
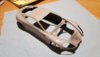
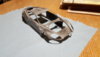
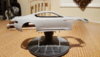
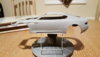
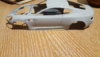
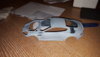
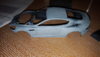
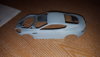
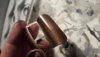
Some progress on the bodywork. The body needed a lot of work. There were mold lines to remove, Flashing on top of the roof join and some horrible swirls to sand out.
The body as it stands is now much smoother and cleaner but will probably need two more filler primer sessions and smoothing before its ready for paint suitable for an Aston martin.
View attachment 242357
View attachment 242358
View attachment 242359
View attachment 242360
View attachment 242361
View attachment 242362
View attachment 242363
View attachment 242364
View attachment 242365
View attachment 242366
View attachment 242367
View attachment 242368
View attachment 242369
View attachment 242370
View attachment 242371
View attachment 242372
View attachment 242373
View attachment 242374
View attachment 242375
View attachment 242376
Attachments
-
 20151231_230112.jpg2.6 KB · Views: 0
 -
 20151231_230101.jpg2.7 KB · Views: 0
 -
 20151231_222344.jpg2.3 KB · Views: 0
 -
 20151231_222337.jpg2.1 KB · Views: 0
 -
 20151231_211945.jpg2.4 KB · Views: 0
 -
 20151231_211722.jpg2.2 KB · Views: 0
 -
 20151231_211544.jpg2.5 KB · Views: 0
 -
 20151231_211538.jpg2.3 KB · Views: 0
 -
 20151231_211530.jpg2.5 KB · Views: 0
 -
 20151231_231230.jpg2.7 KB · Views: 0
 -
 20151231_231234.jpg2.6 KB · Views: 0
 -
 20160101_000032.jpg2.1 KB · Views: 0
 -
 20160101_010444.jpg2.2 KB · Views: 0
 -
 20160101_010438.jpg2.3 KB · Views: 0
 -
 20160101_010423.jpg2.3 KB · Views: 0
 -
 20160101_001929.jpg2.3 KB · Views: 0
 -
 20160101_001913.jpg2.2 KB · Views: 0
 -
 20160101_000040.jpg2 KB · Views: 0
 -
 20160101_000034.jpg2.3 KB · Views: 0
 -
 20151231_211515.jpg2.1 KB · Views: 0
G
Guest
Guest
Watching this one!
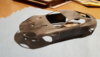
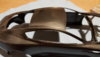
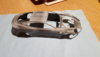
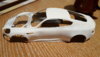
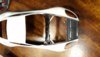
The final primer filler coat has been applied on the main bodyshell. Shut lines had to be deepened and panel lines too.
Next is a very light smooth down and a go over with the white primer 3 coats with rub downs in between ready for colour coats and clear. I will be coming back to to the colour coats later on in the build when I have finally decided what colour coat to go for. Its a toss up of either berwick bronze or morning frost white. Zero paints order being done next week. Im ordering alot of paint about £130 worth to replace my enamels and some thinners and cleaners and some other supplies that should see me through the year.
More pics to come as ever. Next job is back onto the engine block but i wont be starting that until paint comes in, stay tuned for this weekend as im aiming to have body shell preped into white primer ready for painting.
All the best
View attachment 242469
View attachment 242470
View attachment 242472
View attachment 242474
View attachment 242477
Attachments

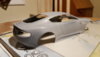
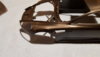
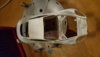
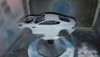
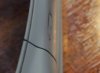
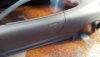
All that work for nothing. I put the body shell down whilst i concentrated on the bonnet and didnt realise the heater was blowing hot air directly at the body shell and it deformed beyond repair.
So this shell is gone. Im going to have to do a re order of the body shell. I even spent time doing the last primer coat. Flapping heck im well peed off at that what a doofus
View attachment 242602
View attachment 242603
View attachment 242604
So this shell is gone. Im going to have to do a re order of the body shell. I even spent time doing the last primer coat. Flapping heck im well peed off at that what a doofus
View attachment 242602
View attachment 242603
View attachment 242604
Attachments
G
Guest
Guest
"OMG" feeling gutted for you mate after all the work you had put into prepping the body..\ said:All that work for nothing. I put the body shell down whilst i concentrated on the bonnet and didnt realise the heater was blowing hot air directly at the body shell and it deformed beyond repair.
So this shell is gone. Im going to have to do a re order of the body shell. I even spent time doing the last primer coat. Flapping heck im well peed off at that what a doofus
John.
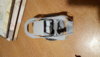
Okay im back on track 2nd coat of grey primer on new shell curing. Waiting for rub down.
View attachment 243221
View attachment 243221
Attachments
G
Guest
Guest
Totally gutted for you Marc! I'm watching this thread and when I read that bit\ said:All that work for nothing. I put the body shell down whilst i concentrated on the bonnet and didnt realise the heater was blowing hot air directly at the body shell and it deformed beyond repair.
So this shell is gone. Im going to have to do a re order of the body shell. I even spent time doing the last primer coat. Flapping heck im well peed off at that what a doofus

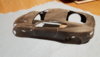
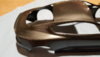
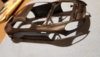
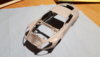
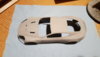
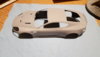
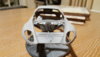
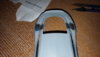
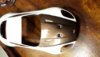
Ok been making some significant progress on the replacement body shell. The mold lines on the rear wings have proven to be quite a challenge to get flat without seeing a slight depression from where they used to be after sanding. Only way to combat this was localised sanding after priming numerous times. This seems to have made the slight depression along where the mould line used to be dissapear.
This may seem overkill. However when i do the final paint job on the body shell i want the surface to be as perfect as it can possibly be as I want to achive a mirror like shine like that of an aston martin should be.
Next job is shut lines deepening. A smooth over for white primer. (This time away from the flipping heater)
View attachment 243267
View attachment 243268
View attachment 243269
View attachment 243270
View attachment 243271
Attachments

OK. An update. Just bought a load of paints and will be able to continue shortly. I have decided on berwick bronze for the colour.
This is the interior combination and paintwork I'm going for, this is the target look
View attachment 244714
This is the interior combination and paintwork I'm going for, this is the target look
View attachment 244714
Attachments

Just been cutting in some of the chrome trim. By taking a knife and following the shut lines around the edges and in between the door it seperates the trim slightly enhancing the effect of the shut line and making the chrome look like separate pieces.
I have also done this with the bumper trim and skirts.
Next is a white base coat, a good sanding and a start on the colour. Not sure if i am going to bmf the chrome trim or use alclad chrome. Some opinions would be helpfull on this.
View attachment 244813
View attachment 244814
I have also done this with the bumper trim and skirts.
Next is a white base coat, a good sanding and a start on the colour. Not sure if i am going to bmf the chrome trim or use alclad chrome. Some opinions would be helpfull on this.
View attachment 244813
View attachment 244814
Attachments
G
Guest
Guest
Fantastic idea to switch to rhd looks like a fiddly job but makes it a more unique model. Your attention to detail is fantastic... Would love to see your build photos if you could post them.\ said:Are you building it as -box, or convert it to RHD?
It's not a difficult conversion.
I did mine a few years back - the pics make the interior look pink but in reality it is Salmon and ox-blood - a genuine Aston scheme...
Roy.
View attachment 141915
View attachment 141916

Attachments
G
Guest
Guest
Looks very cool 
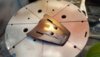
Bonnet done. Air grilles in place and aston martin logo done. I was going to start on the body but had to paint the engine bay first and idd rather mask the engine bay when doing the colour coats than the other way round
View attachment 246587
View attachment 246588
View attachment 246589
View attachment 246587
View attachment 246588
View attachment 246589
Attachments
G
Guest
Guest
Sorry for the delay in posting the RHD conversion stuff.
I've been through all my build files etc and can't find many pics of the work although I know I took a lot.
It's basically just cut the instrument binnacle off the LH side and draw around it onto the RH side.
Then, cut a hole in the RH side and glue the binnacle in.
Lots of filler.....
On the LH side, I used very thin plasticard to make replica parts of the LH side, flipped them over and glued them in place.
It worked out ok.
The bottom pick is my finished model.
Roy.
View attachment 246620
View attachment 246621
View attachment 246622
View attachment 246623
View attachment 246594
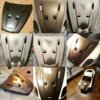
The bonnet had a couple of dimples next to the logo hole. I had to fill them and smooth off a few times to remove the dips.
Here is a bonnet montage
View attachment 246590
View attachment 246591
View attachment 246592
View attachment 246593
The bonnet had a couple of dimples next to the logo hole. I had to fill them and smooth off a few times to remove the dips.
Here is a bonnet montage
View attachment 246590
View attachment 246591
View attachment 246592
View attachment 246593
Attachments

- Status
- Not open for further replies.
Legal Notice
scalemodelling.co.uk is a privately operated online discussion forum. All content posted by members reflects their own views and opinions and does not necessarily represent those of the forum owners or administrators. While reasonable efforts are made to moderate content, no responsibility is accepted for user-generated material. By using this site, you agree to comply with UK law and the forum rules.