G
Guest
Guest
Lovely bridge Ron ")


 ,
,\ said:Thanks folks, I'm glad you like the first phase of the bridge construction.Here's the next.....The under the bridge bit and the road.
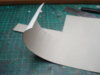
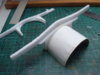
I've used a scrap piece of card from an old receipt book....In the past I've used a toilet roll middle. Anything stiffish will do.
I cut the card roughly to size, then eased it into the 'round' I required
View attachment 82744
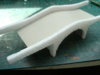
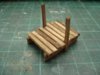
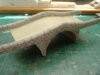
I made some stiffeners as shown. These give the support to the arch and road. Then I glued these to the arch. Note the creases in the card, I'm not bothered about them, as they will look like cracked cement render when painted.
View attachment 82745
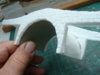
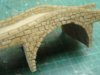
Here is the finished underside....Excuse the thumb nail, matron!!!!
View attachment 82746
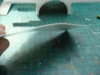
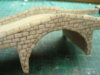
I used more of the same card for the road...This time I cut the card the exact width of the bridge, but left a little on the length. I slightly bent it to the shape of the bridge before gluing.
View attachment 82747
Here the road is fixed in place......
View attachment 82748
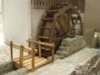
And placed on the dio. to test the fit....
View attachment 82749
Next, a bit of paint for the stonework....
Cheers,
Ron
, that is great Ron, I,m very impressed , with it,
Sorry Monica, I forgot to answer you question........\ said:do you work off any real size for the stones or just what you think looks ok for your scale ?or not so import for stone , but more necessary for bricks
 , as for the wheel, I'd say that's your choice, I couldn't make up my mind
 ")
scalemodelling.co.uk is a privately operated online discussion forum. All content posted by members reflects their own views and opinions and does not necessarily represent those of the forum owners or administrators. While reasonable efforts are made to moderate content, no responsibility is accepted for user-generated material. By using this site, you agree to comply with UK law and the forum rules.