Theme editor

Scale Model Shop

De Havilland DH88 Comet - Airfix - 1:72 - AB Victim no'2

pjgtech

Peter in Kent UK
SMF Supporters
Joined
Dec 28, 2023
Messages
2,580
Reaction score
3,187
Points
113
Age
61
Location
Swale Kent UK
First Name
Peter
1/3
Thread owner
Yes, I know these have a terrible reputation, old moulds, poor fit, lacking detail, gaps, etc.
So I thought yeah, lets do that one, Lol! :LOL:
These were cheap from Lidl, so another ideal guinea pig candidate for practising with my new AB.
I was thinking maybe something metallic, aluminium, steel, gold even? We'll see....

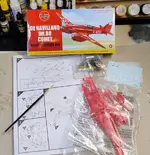
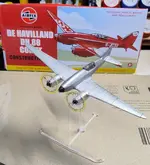
Obligatory box/sprue pics....
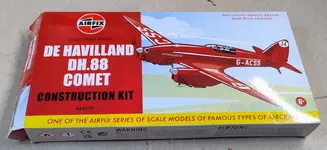
De Havilland DH88 Comet orig pics  (1).webpDe Havilland DH88 Comet orig pics  (2).webp

Theres certainly not many parts.... :)(y)
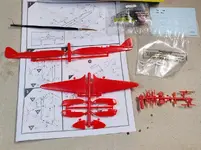
De Havilland DH88 Comet orig pics  (3).webp

Main fuselage fits together ok, slight warp so needs clamping, and no location points, so just gotta do it by eye [ Gulp!]
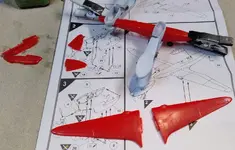
De Havilland DH88 Comet orig pics  (4).webp

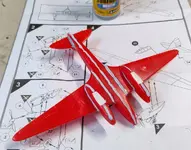
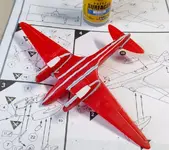
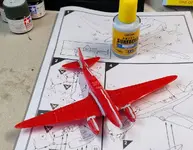
Wings are on, again not a terrible fit, yep theres gaps where the wings meet the fuselage, so some filler will be going on....
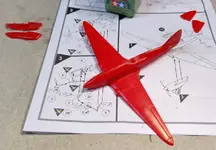
De Havilland DH88 Comet orig pics  (5).webp

Rear tail winglets on, they were flopping a bit, so up ended it until they settle down.
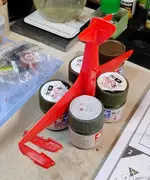
De Havilland DH88 Comet orig pics  (6).webp

Undercarriage pods assembled, will also need filler, Lol.....
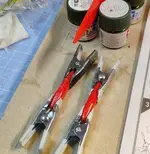
De Havilland DH88 Comet orig pics  (7).webp


A quick question, what primer colour would you use for a metallic top coat? I usually go for a black, but would a lighter primer be a better choice, or does it not really matter? Cheers
 
Look forward to seeing what you do with this Peter. As much as people complain about the age and poor fit, it seems to be a kit that is still being built a fair bit
 
Thread owner
We needed to do a bit of filling, not huge gaps, but basically every join needed some work, Lol!
As this is another guinea pig for my AB adventure, I have decided to go in-flight mode, so less "bits" to worry about, so have made some undercarriage doors, to cover the opening. Did not seem to be the option for in flight mode on the sprue, they will need filing down and shaping a bit more (a bit) at the edges.
I might try some clear plastic discs to simulate moving in-flight props, hence why the sprue props have not been installed.
DeHavilland DH88 Comet pics2  (1) (Medium).webpDeHavilland DH88 Comet pics2  (2) (Medium).webpDeHavilland DH88 Comet pics2  (3) (Medium).webp
 
Thread owner
Was gonna prime it up today, but noticed some of the filler has shrunk back, so couple more gaps to fill (again)!
My Dspaie sander is getting a good workout though, as its great for getting into those little nooks and crannies.... ;)(y)
 
Thread owner
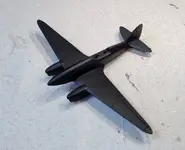
Primed it up a couple days ago,

DeHavilland Comet pics3 (Large) (1).webp
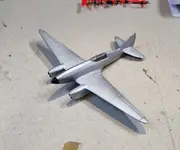
Then set about a metallic finish, using Vallejo steel....
Not bad, but first coat was a bit patchy, second coat I got a couple of blotches! Ah well, still learning...
DeHavilland Comet pics3 (Large) (3).webp
I also painted the cockpit black, or what little of it you can see, and gave the pilots (eg: splodgy heads) a red helmet and flesh coloured face each, but you can't really see it.
DeHavilland Comet pics3 (Large) (4).webp
Gave it a black nose cone, just cos I can......

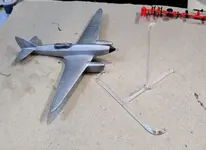
As I'm building this wheels up and in flight, I need a suitable stand. It does not come with one, so cobbled together a stand using old clear sprue bits, I'm think of setting at a jaunty, banking angle.

I am also thinking of something different for the props......;)(y)

It will now get a gloss coat..... Not sure if I'll bother with the decals as I have strayed so far from the original kit anyway?
 
Thread owner
For the props I want clear circles to simulate working, rotating props.
Tried to cut a few perfect, or even half good, little circles few days ago, but they were all awful, mainly due to my sausage like fingers and absolute lack of skill, eyesight, hand eye co-ordination, etc, etc, so....
I bought a circle cutter...
Dspiae circular cutter aug26  (1) (Medium).webp

And what a nice bit of kit it is, just like most other bits from Dspiae....
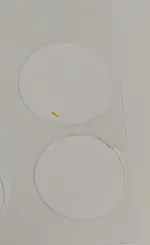
So cut some circles out of some old clear sheet I had lying around...
DeHavilland Comet Prop pics4(Medium).webp
Then used the circular cutter again to cut a mask....
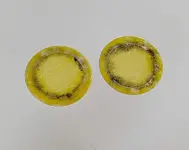
Then applied the mask and gave a light yellow and then a light black paint to simulate props moving...
NB: I wanted the yellow to simulate yellow tipe to the props.... I may tone this down a bit later, it may be too bright, I want it to looks sort of blurred....
DeHavilland Comet Prop pics4 (2) (Medium).webp

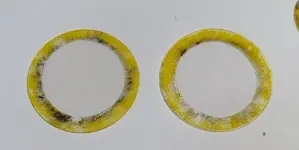
Then removed mask, so we have this....
DeHavilland Comet Prop pics4 (3) (Medium).webp

I will then cut smaller masks for the centre and apply bit more black smudgy paint to simulate props moving near the center.
I will then apply to model and stick on the prop hub/center bit, etc and we'll see what it looks like
 
Thread owner
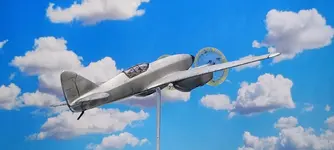
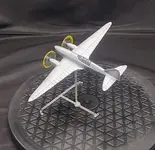
I think this one is now done....(y)
The kit did live up to its reputation of being rather poor, not a very good fit, lots of gaps, bad mouldings, not much detail, not many parts, etc, etc.
However, I still enjoyed building it, and, as it was a only my second air brushed model and therefore a "guinea pig" kit to experiment on, it did not turn out too bad.

New techniques were tried on this model by me, eg: my first metallic paint finish, my first "In Flight" wheels up model plane, my first attempt at producing simulated rotating props, my first attempt at making an in flight stand/support,....

The metallic paint went on ok, ish, (Vallejo steel) the first coat was a bit thin and blotchy, the second coat I overdid a bit and got a couple of splodgy areas! But its all good experience.

The Dspiae circle cutter works great, so I got two good, neat plastic sheet cut outs for the two simulated simulated props. It also worked great for creating the inner masks and then the even small middle mask. I hand painted the yellow and black, using a sort of dry brush technique, my aim being to get a sort of blurred effect. This did not work, as I put too much paint on, but by careful scraping with a scalpel I reduced the paint and even intriduced some line swirls to imitate the spinning effect.....but maybe next time I would try the AB instead to get that blurred effect a bit better.

The "Acme" clear in flight stand worked ok, could have been a bit neater, but I was a bit worried about the plane being at an angle, and getting the attachment point at the correct centre of gravity, so the plane would not tip over, and we sort of got there, its a tiny bit wobbly, but it works!

Here are a few final pics before I pop up a "completed" thread, with more pics.
DeHavillandComet finalpics aug26 (1).webpDeHavillandComet finalpics aug26 (6).webpDeHavillandComet finalpics aug26 (10).webp
 
Back
Top