Theme editor

Scale Model Shop

Rick's 1/48 Hasegawa Phantom FGR2, 1435 Flt Stanley Airport

Status
Not open for further replies.
Thread owner
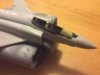
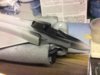
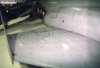
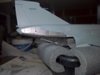
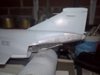
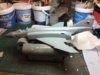
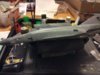
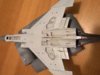
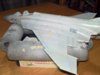
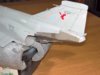
It's been a while since I got some bench time in and all I have managed is to mask the canopy and fit the two fixed sections to the fuselage. I was going to mask these with Tamiya tape but the canopy edges are difficult to see to cut accurately. I pinched the masking set from my Eduard Phantom but these don't fit the Hasegawa kit so I had to order a specific set from Hannants which has added to the delay in progress. Next I can mask the cockpit apertures then get some primer and paint on this beast. And then there is the idea to add some wiring to the area behind the jockey's seat.

View attachment 279824
 

Attachments

  • IMG_2541.JPG
    IMG_2541.JPG
    2.2 KB · Views: 0
Thread owner
Cockpit and canopies masked then painted black before the primer and light grey goes on.
View attachment 280047 View attachment 280048

After primer I applied the pre-shading around targeted areas on the back end. I'm not a great fan of this technique and previous attempts haven't worked for me but I thought I would have another go here because I have seen photos of these looking a bit shabby in this area.

View attachment 280049
 

Attachments

  • IMG_2569.JPG
    IMG_2569.JPG
    2.6 KB · Views: 0
  • IMG_2555.JPG
    IMG_2555.JPG
    2.4 KB · Views: 0
  • IMG_2553.JPG
    IMG_2553.JPG
    2.6 KB · Views: 0
Thread owner
Good choice Rick. The colour of the 74sqd bird is a buggier to get right... I think they were painted in the US prior to delivery and they botched the colour as best they could to the RAF spec.

I'm a bit stumped with the colour of the upper wing. The instructions call out a darker shade for the inner wing, medium sea grey, but all of the photos I can find seem to show the upper wing surface the same colour as the fuselage. Does anyone have any good advice?
 
The Hasegawa painting instructions specified a darker grey for the inner wing sections when i built this kit. But i didnt notice this when i worked on them in the nineties. Doesnt mean its wrong though!.
 
Coming along nicely Rick. Agree that the inboard wing colour looks the same as the rest of the grey!
 
Thread owner
I have been plodding away with the paint job on this over the last few weeks and I think I am happy with it. The underside is quite light but weathering will reduce how glaringly pale it really is. I picked out a few panels on the fuselage in lighter shades. The exhaust is all done with Vallejo metalcote in various colours - jet exhaust for the main part then aluminium for the lighter areas and dull aluminium for individual panels.
The finish on the horizontal stabilisers came about by accident, there were some runs in the paint so I tried to polish it out with very fine micromesh which created this distressed effect, it looks better in real life.

View attachment 280854 View attachment 280855 View attachment 280856 View attachment 280857 View attachment 280858
 

Attachments

  • WP_20170503_12_37_53_Rich.jpg
    WP_20170503_12_37_53_Rich.jpg
    2.6 KB · Views: 0
  • WP_20170503_12_37_26_Rich.jpg
    WP_20170503_12_37_26_Rich.jpg
    2.7 KB · Views: 0
  • WP_20170503_12_37_08_Rich.jpg
    WP_20170503_12_37_08_Rich.jpg
    2.1 KB · Views: 0
  • WP_20170503_12_37_00_Rich.jpg
    WP_20170503_12_37_00_Rich.jpg
    2.3 KB · Views: 0
  • WP_20170503_12_36_47_Rich.jpg
    WP_20170503_12_36_47_Rich.jpg
    2.8 KB · Views: 0
That's looking great Rick, lucky to have that final effect take place on the stabs, it's really effective. About to do this stage on mine, hoping it looks as good.
 
Even the 1/72 F-4C has a myriad of tiny decals on the underside, must be a nightmare in 1/48. It's coming to life Rick, looking good.
 
Thread owner
Even the 1/72 F-4C has a myriad of tiny decals on the underside, must be a nightmare in 1/48. It's coming to life Rick, looking good.

It is a nightmare! But the outcome is worth it, decals defiantly bring the model to life. Even after the wing decals are done I then have to do it all over again with the pylons and weapons.
 
looking nice. Those decals look like they are behaving themselves.
 
Thread owner
I'm part way through the jetpipes, they are painted in a base colour of Vallejo metal colour Jet Exhaust and a wash of Mig black night on the variable nozzle petals. The photo shows a before and after.

View attachment 281798
 

Attachments

  • IMG_2638.JPG
    IMG_2638.JPG
    2.2 KB · Views: 0
Thread owner

Attachments

  • WP_20170526_00_36_02_Rich.jpg
    WP_20170526_00_36_02_Rich.jpg
    2.5 KB · Views: 0
  • WP_20170526_00_36_50_Rich.jpg
    WP_20170526_00_36_50_Rich.jpg
    2.5 KB · Views: 0
  • WP_20170526_00_36_35_Rich.jpg
    WP_20170526_00_36_35_Rich.jpg
    2.4 KB · Views: 0
Status
Not open for further replies.
Back
Top