Theme editor

Scale Model Shop

Mitsubishi A6M2b Zero - Tamiya 1/32 scale

Status
Not open for further replies.
Thread owner
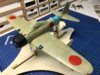
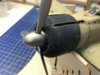
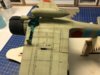
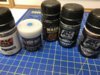
I completed the detail painting, here is an overview.
View attachment 284235
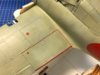
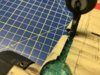
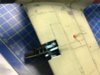
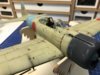
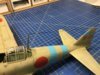
I have just a few decals to apply. I find decalling the most tricky part of the build, using masks and paiting the main markings is so much easier.
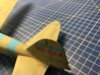
It is the thin decal lines I find most difficult, specially when there is a L shape. Anyway, I got there!!
View attachment 284236
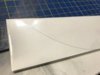
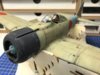
decal solution left some marks that you can see in the pic but they disappeared after a wipe with a damp tissue.
 

Attachments

  • IMG_2282.JPG
    IMG_2282.JPG
    3.6 KB · Views: 0
  • IMG_2283.JPG
    IMG_2283.JPG
    2.5 KB · Views: 0
Thread owner
It's a real beauty!!
The colour looks superb!!!
These AKI Air Series IJN paints are very good and I recommend them to anyone building IJN aircraft. The only colour missing is Aotake and Vallejo have released that in their IJN set. Their Amber Grey is also very good, and very close to the AKI interpretation.
 
Beautiful work Barry , the black basing method really gives a great modulation effect . keep the updates coming , cheers tony
 
Thread owner
after applying the final matt coat I left the Model in our airing cupboard to enable the varnish to cure over night. The humidity has been a problem with this build not enabling the water based paint to cure properly. Henceforth out airing cupboard is renamed the curing cupboard but don't tell the missus.

I the applied the final weathering. It is important to give the Model depth by making sure you get different sheen such as where there have been oil spills and where some fresh metal shown through the paint.

These are the weathering materials used
View attachment 284366
And
View attachment 284371
A few shots as I progressed.
View attachment 284367
View attachment 284368
View attachment 284369
View attachment 284370
Then to final fittings. The wheel legs screw into the wing position where the gun covers are.
View attachment 284372
View attachment 284373
The prop pushed into place.
View attachment 284374
Then the final touch the aerial.
Tamiya provide one from wire. It glued nicely into position on the tail.
View attachment 284376
View attachment 284377
But trying to get it tight to the notch in the mast was beyond my abilities. So I removed it and reverted to my trusty EZ Line.
View attachment 284379
All in all a most enjoyable build. I will post some complete pics in that forum.
 

Attachments

  • IMG_2307.JPG
    IMG_2307.JPG
    3.2 KB · Views: 0
  • IMG_2305.JPG
    IMG_2305.JPG
    1.9 KB · Views: 0
  • IMG_2302.JPG
    IMG_2302.JPG
    2.9 KB · Views: 0
  • IMG_2300.JPG
    IMG_2300.JPG
    3.6 KB · Views: 0
  • IMG_2298.JPG
    IMG_2298.JPG
    2.7 KB · Views: 0
  • IMG_2297.JPG
    IMG_2297.JPG
    3 KB · Views: 0
  • IMG_2296.JPG
    IMG_2296.JPG
    3 KB · Views: 0
  • IMG_2294.JPG
    IMG_2294.JPG
    3.2 KB · Views: 0
  • IMG_2293.JPG
    IMG_2293.JPG
    3.1 KB · Views: 0
  • IMG_2292.JPG
    IMG_2292.JPG
    2.9 KB · Views: 0
  • IMG_2291.JPG
    IMG_2291.JPG
    3.5 KB · Views: 0
  • IMG_2309.JPG
    IMG_2309.JPG
    3.2 KB · Views: 0
Status
Not open for further replies.
Back
Top