Theme editor

Scale Model Shop

Joe's 1/200 Hasegawa Boeing 737-400

Status
Not open for further replies.

flyjoe180

SMF Supporters
Joined
Jan 18, 2012
Messages
13,306
Reaction score
1,096
Points
113
Location
Earth
1/3
Thread owner
Tony's 737 has captured my imagination; I had this 737 in the stash, so I'll join the Civilian Aircraft GB and boost the numbers. I should be able to complete it before the end of September.

It's Hasegawa's 1/200 Boeing 737-400, on eof many 1/200 airliners they produce. Looking at the instruction introduction it's an old kit, but has new-gen decals which look very nicely done. I think I'll finish it in all-white, not a fan of the scheme provided.
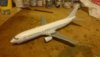
The box top:
View attachment 286249
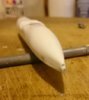
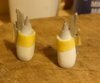
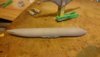
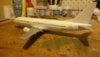
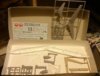
Contents:
View attachment 286250 View attachment 286251
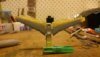
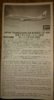
The intro:
View attachment 286252

It's no longer the 'largest member of the 737 family', that now belongs, I believe, to the 737-900/Max.
 

Attachments

  • DSC_0001.JPG
    DSC_0001.JPG
    1.7 KB · Views: 0
  • DSC_0004.JPG
    DSC_0004.JPG
    1.6 KB · Views: 0
  • DSC_0003.JPG
    DSC_0003.JPG
    1.7 KB · Views: 0
  • DSC_0002.JPG
    DSC_0002.JPG
    2.7 KB · Views: 0
Thread owner
I made a start. The fuselage has upper and lower halves, meaning only the sides need to be blended, preserving the aerials. Hasegawa kindly provided a ballast for the wheels-down configuration (you can also pose this on a stand which is provided).

View attachment 286253

View attachment 286254

View attachment 286255

No detail will be lost on the sides, as decals make up the entry, cargo doors and windows!

It looks simple, certainly simpler than Tony's Airfix 1/144 kit, but not as simple as Rick's 747-8 ;)
 

Attachments

  • DSC_0008.JPG
    DSC_0008.JPG
    1.3 KB · Views: 0
  • DSC_0007.JPG
    DSC_0007.JPG
    1.4 KB · Views: 0
  • DSC_0006.JPG
    DSC_0006.JPG
    1.6 KB · Views: 0
Great to have another one in this gb joe. It looks a nice kit and the nose weight is a nice touch ( thats something i forgot on mine ! I had to slot little pieces of lead strip through the windscreen aperture before i fixed the screen!!)
 
Thread owner
Tidied up the seams and sanded smooth. There were some weird wrinkles, probably relating to the ejector pins that were required to be cut out prior to attaching the halves.
View attachment 286372

The small plug that covers the hole if you wanted to use the stand is inserted and sanded smooth. Dry fits show a very tight and snug fit on all parts so far. Painting them is going to be the difficult part, particularly the landing gear which is molded with the doors attached.
View attachment 286373

Missing on these small kits is the APU exhaust. I drilled the exhaust hole out, and will shape it to match from my photo below.
View attachment 286374

View attachment 286375
 

Attachments

  • DSC_0084.jpg
    DSC_0084.jpg
    1.6 KB · Views: 0
  • DSC_012.JPG
    DSC_012.JPG
    2.5 KB · Views: 0
  • DSC_0011.JPG
    DSC_0011.JPG
    1.2 KB · Views: 0
  • DSC_0010.JPG
    DSC_0010.JPG
    1.7 KB · Views: 0
Nice work joe , that reminds me do you know if the -200 had an APU in the tail too? if so ill drill one in mine, cheers tony
 
Thread owner
Nice work joe , that reminds me do you know if the -200 had an APU in the tail too? if so ill drill one in mine, cheers tony
Cheers Tony. Yes the -200 had a different APU but the exhaust area is pretty much the same. The exhaust outlet changes only on the newer NG series.
 
Nice start Joe . You need to add condensation to all the Pax Windows aft of the over wing exits for added realism!.
 
Thread owner
Fuselage, wings and engines primed:
View attachment 287016

For 'Boeing Grey' (seems to be an argument as to exactly what colour shade this is online), I took a punt on light aircraft grey, followed by a darker grey to represent the Boeing Corogard which isn't so much a colour as a protective coating which changes colour from aircraft to aircraft.
View attachment 287017

View attachment 287018

Fuselage and engine cowls are now white, with grey pylons and interiors on the engines. The underside of the pylon will be painted gun metal to present the thin heat shield. The exhausts will be painted steel and weathered to a brownish burnt colour. Some are clean, others are dirty, I guess it depends on the time since a maintenance check. I'll paint eh lip at the rear of the engine black so it doesn't look like a solid white chunk.
View attachment 287019
View attachment 287020
 

Attachments

  • DSC_0040.JPG
    DSC_0040.JPG
    2.4 KB · Views: 0
  • DSC_0039.JPG
    DSC_0039.JPG
    1.4 KB · Views: 0
  • 737400 wing.jpg
    737400 wing.jpg
    1.7 KB · Views: 0
  • DSC_0014.JPG
    DSC_0014.JPG
    2.3 KB · Views: 0
  • DSC_0013.JPG
    DSC_0013.JPG
    1.9 KB · Views: 0
Status
Not open for further replies.
Back
Top