Theme editor

Scale Model Shop

Pete's Tiger

Status
Not open for further replies.

stillp

SMF Supporters
Joined
Nov 17, 2016
Messages
8,323
Reaction score
311
Points
83
1/3
Thread owner
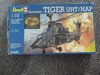
Well, having got the Eurocopter off the workspace, I've got rather a taste for helicopters, and since this is a 12 month GB I might get to finish a second one. Picked this up for a fiver at the Hanslope show; a 1/72 Tiger UHT/HAP. UHT apparently has nothing to do with that funny-tasting milk you get in hotel rooms, but is a German abbreviation for a Multi-role Fire Support Helicopter, HAP being a French Air-to-air Combat and Fire Support Helicopter.
It's a Revell helicopter kit, what could possibly go wrong? (If it's anything like the Eurocopter, at least it'll fit in the wastebin more easily)
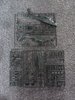
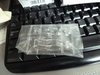
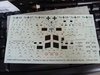
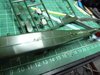
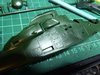
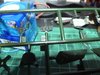
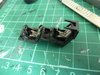
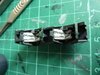
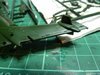
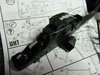
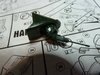
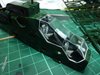
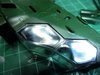
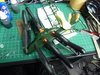
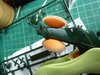
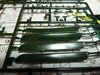
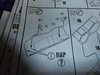
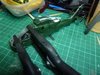
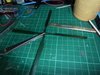
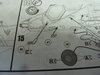
Anyway, here's the box & sprue photos:
View attachment 305025View attachment 305026View attachment 305027View attachment 305028
Mmm, lots of decals!
Enjoy!

Pete
 

Attachments

  • P1140300.JPG
    P1140300.JPG
    3.5 KB · Views: 0
  • P1140301.JPG
    P1140301.JPG
    2.6 KB · Views: 0
  • P1140302.JPG
    P1140302.JPG
    3.3 KB · Views: 0
  • P1140303.JPG
    P1140303.JPG
    3.2 KB · Views: 0
Looks a very detailed kit pete , judging by the number of parts , and yes, those stencils ARE going to be fun! Looking forward to this Cheers tony
 
Thread owner
Hi Tony, I just hope that half the stencils are for the one I choose not to build! Not sure exactly how many parts there are - highest number is 85, but there are some that share the same number, so the total will be more than that.
First impressions are not bad. The fuselage halves had been rather roughly hacked from the sprue, but the seam is going to need quite a bit of filling and sanding anyway.View attachment 305040
View attachment 305041
The surface details isn't bad, but there's a bit of mould damage to clean up.
View attachment 305042
Seats and IPs have some nice detail, partly painted here:
View attachment 305043
Sorry about the lousy photo, very difficult to get a good shot of the seats.
There isn't a decal for the IP, but the moulded instruments should paint up well.

Pete
 

Attachments

  • P1140306.JPG
    P1140306.JPG
    3.7 KB · Views: 0
  • P1140313.JPG
    P1140313.JPG
    3.8 KB · Views: 0
  • P1140304.JPG
    P1140304.JPG
    3.5 KB · Views: 0
  • P1140310.JPG
    P1140310.JPG
    4.1 KB · Views: 0
That looks like a nice kit Peter, I hope it behaves better than the other one. Nice start.
 
Thread owner
Thanks Ian.
I decided to not use the IP decals, which I don't think would have fitted the moulded detail very well, so just did a little dry-brushing (or rather, not-quite-dry-enough-brushing). Doesn't loof too bad. The seat belt buckles were done with an extra fine silver paint marker.
View attachment 305175View attachment 305176
Next job is to touch up the back of the IPs, then the cockpit can go in and the fuselage halves joined.

Pete
 

Attachments

  • P1140314.JPG
    P1140314.JPG
    3.5 KB · Views: 0
  • P1140315.JPG
    P1140315.JPG
    3.4 KB · Views: 0
Hi Pete
Looks fun. Interesting how the cockpit windows are all one piece. Could be a blessing or not. Interior looks good and a useful tip about using the fine silver marker.
Jim
 
Thread owner
Hi Jim, yes, if it fits it'll be a good thing, if not it'll be a bu99er to fix it! I'll find out later today I think.

Pete
 
Thread owner
Well, the fuselage is together - not perfect by any means, but fixable. Biggest problem was that the vertical fin needed forcing into position in two directions, as the angle between the fin and fuselage was slightly different on each half.
View attachment 305298View attachment 305299View attachment 305300
I had to put it in the vice to close up the join at the front of the fin!
Some mismatch on the IP coamings, so I'm now waiting for some Mr Surfacer to dry, then a busy time with the sanding sticks.
View attachment 305302
In the mean time, I've decided to build the French version, and made up the nose gun subassembly:
View attachment 305303
Unfortunately both the trunnions that hold the cannon have sink marks, and the gun itself has an ejector pin mark right on top, hence the filler you can see in the pic.
The one-piece cockpit glazing looks to be a pretty good fit:
View attachment 305304View attachment 305305Just needs a little sanding at the rear. Much better than my last helicopter!

Pete
 

Attachments

  • P1140339.JPG
    P1140339.JPG
    3.5 KB · Views: 0
  • P1140347.JPG
    P1140347.JPG
    3.4 KB · Views: 0
  • P1140345.JPG
    P1140345.JPG
    3.3 KB · Views: 0
  • P1140349.JPG
    P1140349.JPG
    3.7 KB · Views: 0
  • P1140350.JPG
    P1140350.JPG
    3.2 KB · Views: 0
  • P1140317.JPG
    P1140317.JPG
    4.3 KB · Views: 0
  • P1140316.JPG
    P1140316.JPG
    3.9 KB · Views: 0
Thread owner
Thanks Moni and Joe. Yes, no disasters so far, touch wood. The fuselage seam is going to take a few rounds of filling and sanding, and there are quite a few sink marks, but the worst part I've found so far is one rotor blade badly distorted.
View attachment 305364
That's going to need some hot water...

Pete
 

Attachments

  • P1140344.JPG
    P1140344.JPG
    4 KB · Views: 0
Thread owner
I've finished the filling and sanding - at least, until the paint shows up where I've missed. I was a bit worried it might be a tail-sitter, so at the moment it's standing on its nose with some used airgun pellets, some steel shot, and a good glug of PVA in it.

Pete
 
Thread owner
Adding the nose weight was a mistake - it's got a tail wheel, it's supposed to be a tail sitter! :confused:
Never mind, I haven't closed up the top of the fuselage yet, I'll add some weight to the tail.

Pete
 
Adding the nose weight was a mistake - it's got a tail wheel, it's supposed to be a tail sitter! :confused:
Never mind, I haven't closed up the top of the fuselage yet, I'll add some weight to the tail.

Pete

...and strengthen the under carriage! .....:worried:
Looking good Pete.
 
Thread owner
Well, I found the first mistake in the instructions: View attachment 305616parts 35 and 36 are transposed, 35 has a pin to fit into the hole where they show 36, while there's a ridge on the inside of the canopy that fits between those 2 prongs you can see on part 36. No big deal, so on with the canopy:
View attachment 305617
While the Gator's Grip was setting I got on with the rotor - straightened the bent blade, and assembled the 4 blades plus top and bottom parts:
View attachment 305618
Next tasks are to mask the canopy (when I can find a new scalpel blade) and add all the small parts like hand-holds, steps etc to the fuselage ready for painting. However, disaster has struck - I've lost a part!
View attachment 305621
Part number 40 is not on the sprue - it could have caught on something and snapped off any time during this build, so there's not much point in expecting to find it. I'll have to make one. The (slightly simpler) one for the other side is just 4mm long. I'll try a piece of sprue, filed to a rectangular cross-section, and a couple of bits of 0,5 mm brass rod - sounds easy enough if you say it quickly! Wish me luck!

Pete
 

Attachments

  • P1140352.JPG
    P1140352.JPG
    2.8 KB · Views: 0
  • P1140351.JPG
    P1140351.JPG
    3.6 KB · Views: 0
  • P1140353.JPG
    P1140353.JPG
    3.3 KB · Views: 0
  • P1140356.JPG
    P1140356.JPG
    2.6 KB · Views: 0
Thread owner
Thanks chaps. Jim, this one's a walk in the park compared to the last one. Things fit, and the instructions seem to have been written by someone who's actually seen the kit, unlike the EC-145.

Pete
 
Status
Not open for further replies.
Back
Top