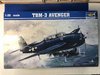
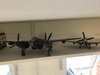
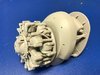
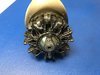
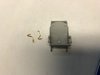
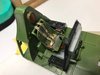
More progress - first the engine is pretty much done. I painted the area that will be visible black and then used two types of the Uschi metal powders, chrome and steel to give it a metallic effect. I still have some engine washes to apply.
View attachment 311640
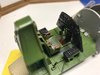
Now to the instrument panel and the 'pit interior.
Trumpeter's instructions fall down because of poor painting instructions. They just provide some Gunze colour numbers without saying what they are (I just know they are Gunze) and not very comprehensively at all. So third party sources are needed to help complete the painting particularly on the inside.
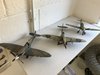
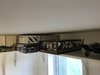
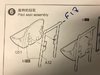
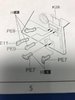
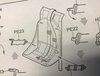
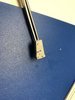
This is an excellent kit but it does have a lot of p.e. and I really do not like p.e. at all. Take this below...
View attachment 311639
It shows a corner of the i.p. and includes the placements of several pieces of p.e. for leavers and controls. The drawing suggests some handy slots to fit the p.e. parts into but these slots are non-existent and while the p.e. looks reassuringly thick and substantial for gluing, they are not, they are tiny. It is even difficult to hold just to file off the 'burrs' they are so small. You need to glue the p.e.'s edge to the flat smooth panel front. I know from experience that any such p.e. does not last 5 minutes and you end up with messy marks and a clean up to do when they fall off and get eaten by the carpet monster. That is if you can get them into place in the first place, that 'gluing area' is just so small. To me that is just a fools errand and it will not really be sen so I am simply not bothering with it. There are some p.e. controls that I might get into place but not those shown in that diagram.....
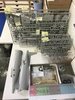
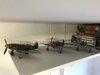
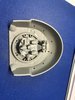
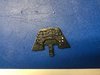
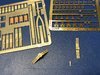
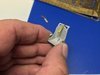
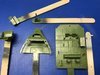
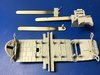
Speaking of the i.p. - it is made up of three parts:
View attachment 311641
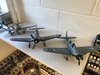
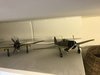
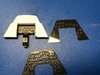
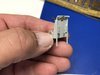
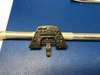
Top left is the back plate which I have painted black and white. The white is to help the instruments that you can see on the film, top right, to stand out when placed over it. The i.p. front at the bottom then fits on top to sandwich the film. I find it a little odd that the front of the i.p., shown above after a coat of black paint, is a transparency. The dials are just holes throuhg which you see the film. Below has the front positioned loosely on top to show roughly how it will look...... I will, of course, need to line them up a bit better than I did below.
View attachment 311642
Its not at all bad but I will need to use something like crystal clear to represent glazing once I have joined these together. before I do that, however, I still have some work to do easiest done while seperate parts. I need to research the Avenger i.p. and add some colour where needed and a bit of weathering. I actually like this system, it works.
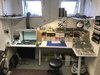
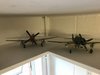
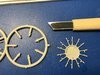
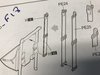
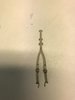
Sometime Trumpy get their numbering wrong, take a look below:
View attachment 311643
Part A12 is mislabelled. I had to search through all the sprues and found it as part F18..... No dount I will eventuall find out where the actual A12 (which looks like a panel) fits....
Anyway - I am happy with progress and I really am loving this kit despite a few foibles.