1/3
I have not posted much over the last yr due to a horrible yr of personal and family issues. But hopefully will be doing more posts from now on. So dug out KGV and it's large pe set, big mistake on my part to attempt that kit with so little ship and pe experience. So over the last few weeks I have been messing about with PE.
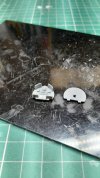
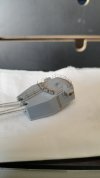
This is my effort with the 8 barrelled pom pom AA mount. Biggest / complex pe I have yet to do battle with. The Eduard plans are shocking. They could really be ignored!
The one to the left is the kits very poor mount and on the right I had to remove the lot! No mention on the plan?
View attachment 513434
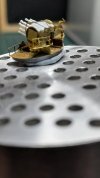
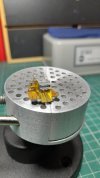
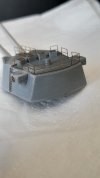
Now completed!
View attachment 513434View attachment 513435View attachment 513436View attachment 513437
Not great but happy so far, will build another so should improve.
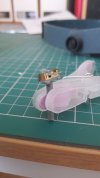
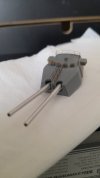
Bofors mount
View attachment 513438
Big difference for me was using a glue looper, very impressived.
Both really improve the kit but the latest 3D pom pom from master models are superb. The detail is brilliant.
Please feel free to criticise or point out issues folks
This is my effort with the 8 barrelled pom pom AA mount. Biggest / complex pe I have yet to do battle with. The Eduard plans are shocking. They could really be ignored!
The one to the left is the kits very poor mount and on the right I had to remove the lot! No mention on the plan?
View attachment 513434
Now completed!
View attachment 513434View attachment 513435View attachment 513436View attachment 513437
Not great but happy so far, will build another so should improve.
Bofors mount
View attachment 513438
Big difference for me was using a glue looper, very impressived.
Both really improve the kit but the latest 3D pom pom from master models are superb. The detail is brilliant.
Please feel free to criticise or point out issues folks