

You are using an out of date browser. It may not display this or other websites correctly.
You should upgrade or use an alternative browser.
You should upgrade or use an alternative browser.
Joe's Tamiya 1/72 DH Mosquito FB.VI
- Thread starter flyjoe180
- Start date
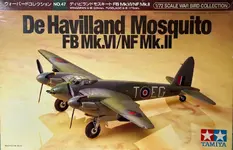
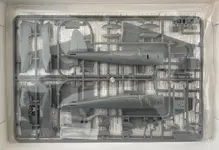
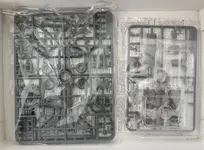
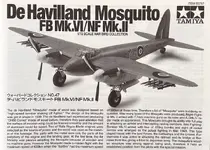
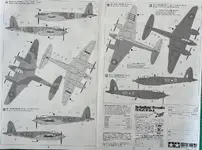
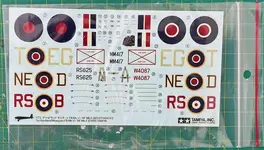

I'll try the Coastal Command scheme Geoff. I can play with variation in the paint. And best of all it has rocketsGreat choice Joe, it’s a lovely kit
Any thoughts of what scheme you’ll be going for?
Geoff.


Darian Frey
Active member
1/3
Looking forward to seeing how this compares to the 1/48th kit also in the GB!


Started the Mosquito. I've been working through the stages and preparing other parts with common colours.
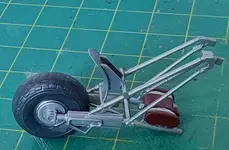
First up the landing gear. Very Tamiya-like construction, if not a little fiddly. I used a mix of red and red-brown for the oil tanks. These parts will receive a pin wash before installation towards the end.
The cockpit, using the supplied decals which snuggled down well with Mr Decal Setter and Softener solutions. Apart from a few defects on the wing roundel decals which I can replace, I don't think these are going to give me too much hassle later.
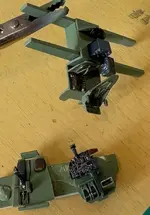
@Geoffers that cavity to the right of the instrument panel is where I believe the navigator's chest-mounted parachute was stored.
A simple wash with brown enamel, once these are dry I will flat coat them and will be ready to start fitting the internals.
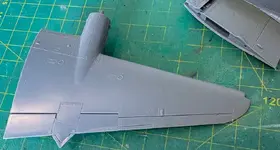
The only parts which have given me any issue are the wings. A very small gap on the underside was dealt with using acrylic putty. The upper rear part that forms into a triangle wouldn't mate no matter what, so Tamiya putty will be used here to blend them in.
First up the landing gear. Very Tamiya-like construction, if not a little fiddly. I used a mix of red and red-brown for the oil tanks. These parts will receive a pin wash before installation towards the end.
The cockpit, using the supplied decals which snuggled down well with Mr Decal Setter and Softener solutions. Apart from a few defects on the wing roundel decals which I can replace, I don't think these are going to give me too much hassle later.
@Geoffers that cavity to the right of the instrument panel is where I believe the navigator's chest-mounted parachute was stored.
A simple wash with brown enamel, once these are dry I will flat coat them and will be ready to start fitting the internals.
The only parts which have given me any issue are the wings. A very small gap on the underside was dealt with using acrylic putty. The upper rear part that forms into a triangle wouldn't mate no matter what, so Tamiya putty will be used here to blend them in.
Last edited:

- Joined
- Jan 26, 2017
- Messages
- 2,806
1/3
Great start Joe 
Thanks for pointing that out it’s very helpful to see.
Mines slightly different being the bomber version but Tony’s right it’s still very similar.
Geoff.
Thanks for pointing that out it’s very helpful to see.
Mines slightly different being the bomber version but Tony’s right it’s still very similar.
Geoff.
Last edited:
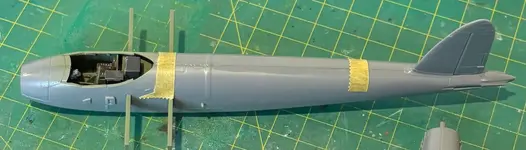
Moving on, I got the cockpit finished and flat coated, then assembled and inserted into the fuselage. A little bit of seam work to do on the fuselage, but overall a nice fit. Thankfully most of it is a smooth surface. Some of the screw or rivet detail on the metal sections of the aircraft is very faint (see around the nose area) so I will enhance them a little.
The seams on the wings have been dealt with, I will see what it looks like under primer later. The Mosquito is going together very well overall.
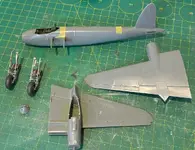
The seams on the wings have been dealt with, I will see what it looks like under primer later. The Mosquito is going together very well overall.
I spent today cleaning up the minor fuselage seams and preparing parts for painting. I need to fix a panel to the canopy. Guessing it's the same canopy moulded in the Mark IV kit which has the bubble in it, vs the flat pane for the fighter-bomber). No photos today, but will update tomorrow with pictures of hopefully the airframe built.
In the meantime I recently visited a museum and took this photo of a postwar FB VI for reference.
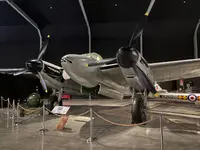
In the meantime I recently visited a museum and took this photo of a postwar FB VI for reference.


At my pace? That was optimistic GeoffCrikey Joe, when I saw the picture when I opened your post I thought you’d finished it
Geoff.


1/3
Coming along very nicely indeed Joe.
Cheers Steve. As expected it's going together very wellComing along very nicely indeed Joe.
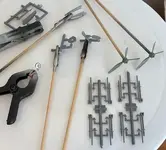
The various parts small ready for paint work
Managed to fit that side panel on the canopy without messing things up too much
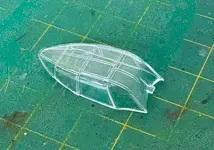
The internal framing is moulded inside the canopy. I tried using the decals provided, which are strips of interior green coloured decal, but they looked horrible afterwards so I remove them all. I decided the best way forward, given that masking the interior framing is all but impossible for me, to paint them on the outside, gloss them and then mask over them for the main scheme.
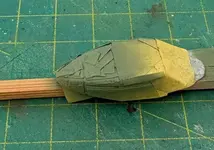
Managed to fit that side panel on the canopy without messing things up too much
The internal framing is moulded inside the canopy. I tried using the decals provided, which are strips of interior green coloured decal, but they looked horrible afterwards so I remove them all. I decided the best way forward, given that masking the interior framing is all but impossible for me, to paint them on the outside, gloss them and then mask over them for the main scheme.
The airframe is pretty much completed ready for primer, just need to mask off the landing gear bays and fit the canopy once it's masked.
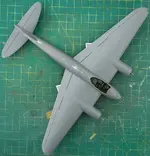
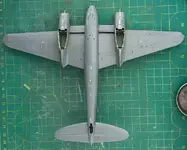
The apparent seam along the aft fuselage in the last photo is an illusion, it is actually smooth!
The apparent seam along the aft fuselage in the last photo is an illusion, it is actually smooth!
Legal Notice
scalemodelling.co.uk is a privately operated online discussion forum. All content posted by members reflects their own views and opinions and does not necessarily represent those of the forum owners or administrators. While reasonable efforts are made to moderate content, no responsibility is accepted for user-generated material. By using this site, you agree to comply with UK law and the forum rules.