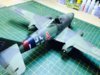
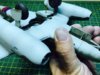
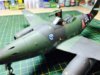
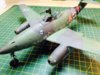
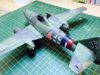
This is a good kit but it does have issues. There was a step at the front fuselage/wing join that needed to be corrected with layers of filler and lots of sanding. A little more filler was needed around the engines fit to wing. Most of all the Trumpeter decals were appalling and I really must remember whenever I do a Trumpy kit to throw away the decals immediatly and buy aftermarket, regardless of how much I may like the scheme provided. The actual markings are a mix of painting, kit decals (some stencils looking very weathered not necessarily deliberately) and spares box. The observant and knowedgable among you might spot two aircraft specific marking as missing....
AKI Air Series acrylics were used along with their washes and pigments. Some Vallejo paints also used.
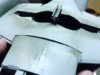
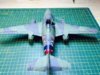
Here are the pics. Sorry they look a bit 'washed out' for some reason. My photography never gets better....
View attachment 116823
View attachment 116824
View attachment 116825
View attachment 116826
View attachment 116827
View attachment 116828
View attachment 116829
View attachment 116830
View attachment 116831
View attachment 229846
View attachment 229847
View attachment 229848
View attachment 229849
View attachment 229850
View attachment 229851
View attachment 229852
View attachment 229853
View attachment 229854
AKI Air Series acrylics were used along with their washes and pigments. Some Vallejo paints also used.
Here are the pics. Sorry they look a bit 'washed out' for some reason. My photography never gets better....
View attachment 116823
View attachment 116824
View attachment 116825
View attachment 116826
View attachment 116827
View attachment 116828
View attachment 116829
View attachment 116830
View attachment 116831
View attachment 229846
View attachment 229847
View attachment 229848
View attachment 229849
View attachment 229850
View attachment 229851
View attachment 229852
View attachment 229853
View attachment 229854


")
")