Theme editor

Scale Model Shop

1/48 Hachette U96 Part 1

Bigfoot57

Well-known member
Joined
Jun 24, 2015
Messages
1,179
Reaction score
301
Points
83
Age
68
1/3
Thread owner
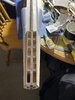
Well peeps here we go again this time something completely different a Frame & Plank kit made from 150 weekly issues collected years ago and been in my stash since then
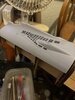
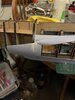
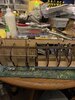
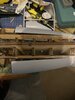
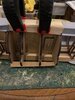
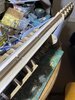
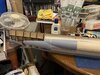
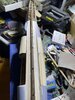
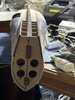
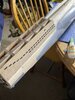
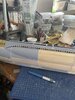
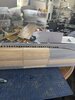
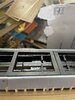
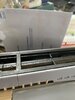
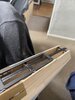
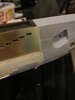
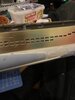
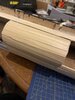
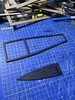
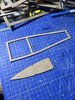
As this is a part work kit there are no sprue shots cause the 1st 20 issues consisted of nothing by 8x6 inch pieces of wood with parts laser cut into them and very accurate too so much so I would say this kit so far has fitted together better than most of the injection moulded kits I done in the past indeed such was the fit in some places glue was unnecessary
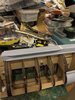
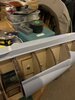
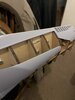
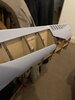
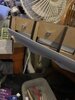
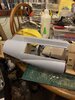
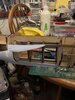
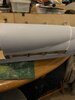
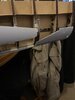
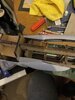
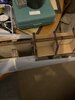
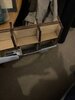
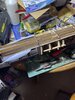
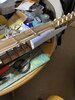
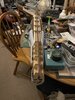
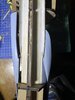
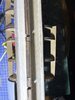
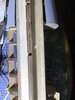
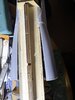
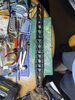
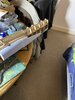
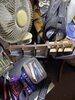
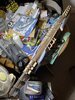
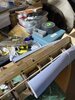
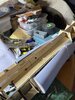
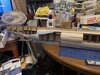
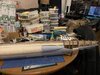
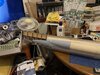
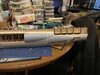
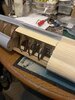
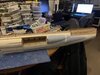
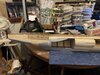
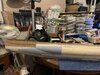
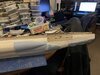
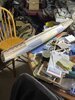
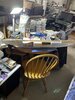
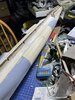
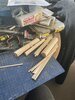
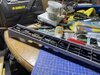
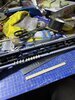
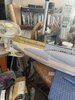
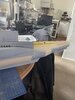
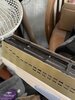
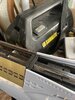
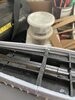
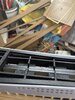
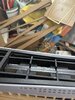
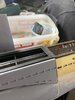
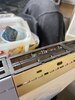
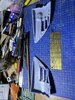
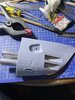
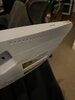
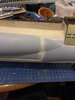
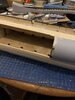
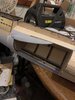
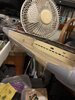
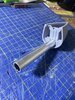
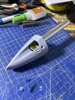
So onto the build so far 1st of is a picture of 1 of 4 bags the kit has been stored in for at least 10 years by my reckoning next are a few pics of the actual build not much to say really just follow the instructions
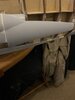
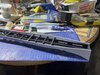
Also this will be a build as it comes I did not get the torpedo room conversion nor any after markets parts what you will see is what is supplied

Regards

ColinA436CC40-7BD8-4A6A-9253-6439211B0284.jpeg7D1050B4-95E5-4F03-B4EC-2F6F86383AC6.jpeg24635AD4-1E80-488B-A810-44124F060A00.jpeg227D0994-3159-470A-B4AB-B162013ECBFD.jpeg
A436CC40-7BD8-4A6A-9253-6439211B0284.jpeg7D1050B4-95E5-4F03-B4EC-2F6F86383AC6.jpeg24635AD4-1E80-488B-A810-44124F060A00.jpeg227D0994-3159-470A-B4AB-B162013ECBFD.jpegFF6B1DA6-BED5-406B-9982-BBC66C53730A.jpegCDB4B132-C349-433C-A4C0-3214B86B7E74.jpeg75F9CC74-F62B-4A85-BDFD-D9AD37F00741.jpegB42DA82E-81E9-4696-A62E-B2F2DCDC44E6.jpeg0F64D64F-D522-4404-A01E-4F18E26F0A21.jpegB391DC5E-7EAE-404F-9447-217DF72090F5.jpeg25A3389E-F473-490C-A6A3-0AA4557B7A8C.jpegF36830EC-1BCE-4D2C-8CC1-695F7A6621B3.jpeg4B54F03A-C668-451E-9610-C2C77F313F3E.jpegAF7651F7-39FC-4B8C-AEB4-CA99E32F44BF.jpegA3039935-89CC-4FC4-8A86-5976DD34115E.jpeg92C50CFE-D2DB-474F-BE69-622A371BE3BD.jpeg0E228E6E-5BE9-46C3-9EE9-E0F012718440.jpegFE93ACFD-42F4-49BE-AA11-CA79ECBA55BC.jpeg
 
Hi Colin
Interesting :thumb2: I am building the HMS Victory cross section, not as big a task as this but it also has laser cut wooden parts. I'm also finding the fit is excellent. It looks as if you are off to a good start.
Jim
 
Thread owner
1/48 Hachette U96 Part 2

Ok so this section deals with parts 20 to 30 and comprises of injection moulded plastic unlike the wooden parts the fit of these parts is awful and a lot of fettling of the both the plastic and wooden attachment points is required
Another thing is the mouldings include the water vents but there not holed all the way through and I could have the patience to open them out I don’t have the skill to do it accurately so what I’ve done is blacked them in and the wiped off the excess leaving just the black in the hollows it looks reasonable and when the sub is finished and painted they should suffice

Next we start the planking but that will be in part 3View attachment 413946View attachment 413947View attachment 413948View attachment 413949View attachment 413950View attachment 413951View attachment 413952View attachment 413953View attachment 413954View attachment 413955View attachment 413956View attachment 413957View attachment 413958View attachment 413959View attachment 413960View attachment 413961View attachment 413962
 

Attachments

  • A2805641-0E2F-4BB2-B124-6D01727BE43D.jpeg
    A2805641-0E2F-4BB2-B124-6D01727BE43D.jpeg
    3.7 KB · Views: 0
  • 0108AABF-D0E1-497C-B55E-DB0D057377D3.jpeg
    0108AABF-D0E1-497C-B55E-DB0D057377D3.jpeg
    4.1 KB · Views: 0
  • AE4F234C-E345-4ABA-B9D1-567B81E0DF4A.jpeg
    AE4F234C-E345-4ABA-B9D1-567B81E0DF4A.jpeg
    3.7 KB · Views: 0
  • 4DFAC94B-C0FA-4298-BEBE-E3E6C5C2EC4B.jpeg
    4DFAC94B-C0FA-4298-BEBE-E3E6C5C2EC4B.jpeg
    3.1 KB · Views: 0
  • 9071A68D-E4C3-407A-A7D2-61D5F99CDB86.jpeg
    9071A68D-E4C3-407A-A7D2-61D5F99CDB86.jpeg
    3 KB · Views: 0
  • 0BBCE753-6E91-4376-B899-9FB52B97D36E.jpeg
    0BBCE753-6E91-4376-B899-9FB52B97D36E.jpeg
    3.5 KB · Views: 0
  • E24619BB-CFC9-4B49-B7FB-B788A3A50355.jpeg
    E24619BB-CFC9-4B49-B7FB-B788A3A50355.jpeg
    4 KB · Views: 0
  • 67945743-8C66-4812-ACA6-CEF7B39070C3.jpeg
    67945743-8C66-4812-ACA6-CEF7B39070C3.jpeg
    3.6 KB · Views: 0
  • C3EA183B-5D45-4B8A-835A-E64815CE43D5.jpeg
    C3EA183B-5D45-4B8A-835A-E64815CE43D5.jpeg
    3.9 KB · Views: 0
  • A0E13683-C9B8-4D27-A7C7-730BD7B5191F.jpeg
    A0E13683-C9B8-4D27-A7C7-730BD7B5191F.jpeg
    4 KB · Views: 0
  • DA9A841A-1F02-4F54-A943-80DE4D1BA5FA.jpeg
    DA9A841A-1F02-4F54-A943-80DE4D1BA5FA.jpeg
    3.1 KB · Views: 0
  • F4815D22-9348-4109-B1E3-2D6EC1E7B11B.jpeg
    F4815D22-9348-4109-B1E3-2D6EC1E7B11B.jpeg
    2.8 KB · Views: 0
  • 56507BA5-D603-40D8-BD6B-D0D17F6EF64F.jpeg
    56507BA5-D603-40D8-BD6B-D0D17F6EF64F.jpeg
    3 KB · Views: 0
  • 24DA3A0E-5C6E-4065-8AE0-427723C4F2A1.jpeg
    24DA3A0E-5C6E-4065-8AE0-427723C4F2A1.jpeg
    3.7 KB · Views: 0
  • 510C7A3B-47E1-4709-B5E6-09A094E6E67A.jpeg
    510C7A3B-47E1-4709-B5E6-09A094E6E67A.jpeg
    3.4 KB · Views: 0
  • DB9AF71B-D761-4AB9-8941-2EEE441E28EC.jpeg
    DB9AF71B-D761-4AB9-8941-2EEE441E28EC.jpeg
    3 KB · Views: 0
  • 633A6E92-8B65-4796-B4F3-3A1BEA80288C.jpeg
    633A6E92-8B65-4796-B4F3-3A1BEA80288C.jpeg
    2.8 KB · Views: 0
Thread owner
1/48 Hachette U96 Part 3

Ok so now we move on to the 1st set of planking which is where the term frame and plank I believe comes from in this case I’ve built the frame now I have start planking it not much to say really just follow the instructions and use the wooden strips as supplied including off cuts to fill in gaps due to the curved structure of the subs deck and hull and a bit of filler
After its all dried Sand it smooth and move on to the next part
This was a deck made from issues 21 to 30 after it was built again sand it smooth and paint it Matt black it’s supposed to be detachable god knows why may find out later in the build
Finally started building up the hull with more planking which is now clamped waiting for the glue to set then any gaps left will use filler which will be sanded smooth once set

Regards
ColinView attachment 414359View attachment 414360View attachment 414361View attachment 414362View attachment 414363View attachment 414364View attachment 414365View attachment 414366View attachment 414367View attachment 414368View attachment 414369View attachment 414370View attachment 414371View attachment 414372View attachment 414373View attachment 414374View attachment 414375
 

Attachments

  • B61CF4FE-445F-405C-89F0-501287E0DE00.jpeg
    B61CF4FE-445F-405C-89F0-501287E0DE00.jpeg
    4.1 KB · Views: 0
  • CBF11122-CC94-407A-BBF8-A3C4DC80C52D.jpeg
    CBF11122-CC94-407A-BBF8-A3C4DC80C52D.jpeg
    3.8 KB · Views: 0
  • 18B26652-92DF-409B-BDE2-2C30198F36FE.jpeg
    18B26652-92DF-409B-BDE2-2C30198F36FE.jpeg
    4 KB · Views: 0
  • 1593F86B-7427-4805-8B3A-2AB3000C417C.jpeg
    1593F86B-7427-4805-8B3A-2AB3000C417C.jpeg
    3.2 KB · Views: 0
  • 628BADEB-8D42-4BC3-B970-5A31070A8131.jpeg
    628BADEB-8D42-4BC3-B970-5A31070A8131.jpeg
    3.4 KB · Views: 0
  • 32385F00-FB18-4763-931F-28435418BBEF.jpeg
    32385F00-FB18-4763-931F-28435418BBEF.jpeg
    3.3 KB · Views: 0
  • B561200B-215E-4D50-8DA4-5BF8A8CFA6A6.jpeg
    B561200B-215E-4D50-8DA4-5BF8A8CFA6A6.jpeg
    3.2 KB · Views: 0
  • F93E612A-C5BD-4012-8C16-29EBC511EEC1.jpeg
    F93E612A-C5BD-4012-8C16-29EBC511EEC1.jpeg
    4.3 KB · Views: 0
  • 5F6D4B89-2308-4A5A-AF51-67D7F1FA6D19.jpeg
    5F6D4B89-2308-4A5A-AF51-67D7F1FA6D19.jpeg
    4.2 KB · Views: 0
  • 16F989A2-556A-4CB2-A9F5-B53BC127F031.jpeg
    16F989A2-556A-4CB2-A9F5-B53BC127F031.jpeg
    3.6 KB · Views: 0
  • 94DA6D61-19B1-421E-A06E-5E75BD26BB5D.jpeg
    94DA6D61-19B1-421E-A06E-5E75BD26BB5D.jpeg
    3.8 KB · Views: 0
  • AF8761DB-FA2C-4116-A895-0355B9DE4AAF.jpeg
    AF8761DB-FA2C-4116-A895-0355B9DE4AAF.jpeg
    4.2 KB · Views: 0
  • F6406E6F-A45D-4041-AECB-59B318D502DB.jpeg
    F6406E6F-A45D-4041-AECB-59B318D502DB.jpeg
    4.3 KB · Views: 0
  • 7332157C-6E37-4761-9163-A0E7C49E21D2.jpeg
    7332157C-6E37-4761-9163-A0E7C49E21D2.jpeg
    4.3 KB · Views: 0
  • AF21E8DD-CF69-4698-A56F-9939CD68994C.jpeg
    AF21E8DD-CF69-4698-A56F-9939CD68994C.jpeg
    4.7 KB · Views: 0
  • 31D21330-D0DD-4338-A9DA-40CDBA152CED.jpeg
    31D21330-D0DD-4338-A9DA-40CDBA152CED.jpeg
    4.3 KB · Views: 0
  • 0F798F10-8472-4246-959C-F4229E3368E7.jpeg
    0F798F10-8472-4246-959C-F4229E3368E7.jpeg
    4.3 KB · Views: 0
What sadist dreamt this kit up. What a monster. Prolly look amazing when completed. PaulE
 
Thread owner
1/48 Hachette U96 Part 4

Just a small update regarding planking well there’s loads of it complete with vast amount of filling and sanding in actual fact I’m surprised they didn’t just use plastic outer panels instead of all the planks you have to apply anyway it is what it is so here’s a few pictures to show how far I’ve got
As this is the 1st frame and plank model I’ve done I hope I’ve done it right it looks ok to me but if any of you fellow modellers spot any obvious errors let me know
Regards
Colin
View attachment 414771View attachment 414772View attachment 414773View attachment 414774View attachment 414775View attachment 414776
 

Attachments

  • FC95D0A3-C77C-4F67-A9E0-B403BD567EA5.jpeg
    FC95D0A3-C77C-4F67-A9E0-B403BD567EA5.jpeg
    4.1 KB · Views: 0
  • 3CA3EC99-24FF-4F17-B380-078FCB798688.jpeg
    3CA3EC99-24FF-4F17-B380-078FCB798688.jpeg
    4.1 KB · Views: 0
  • 463B7DC6-E3E4-4C7E-85DF-1EEF4128FDD6.jpeg
    463B7DC6-E3E4-4C7E-85DF-1EEF4128FDD6.jpeg
    3.9 KB · Views: 0
  • AE0D8B13-3C71-445D-B5A0-B9C0A169932A.jpeg
    AE0D8B13-3C71-445D-B5A0-B9C0A169932A.jpeg
    4.1 KB · Views: 0
  • BB33803F-8C53-47FA-9DB2-51C611C575F5.jpeg
    BB33803F-8C53-47FA-9DB2-51C611C575F5.jpeg
    3.7 KB · Views: 0
  • 3BE3E13C-F741-4FFF-BEAE-39E158964101.jpeg
    3BE3E13C-F741-4FFF-BEAE-39E158964101.jpeg
    3.9 KB · Views: 0
Thread owner
1/48 Hachette U96 Part 5

Well we have made it through stage 1 planking to stage 2 stage 1 consisted of issues 1 to 40
1st off you have to take a razor saw to the starboard side and cut away all the carefully line up and glued support frames to make room for the control room and it’s associated flooring and the engine room space presumably all the planking was necessary to give the model support before cutting away these frames
The port side by contrast is totally enclosed and solid like a tree limb
Next off is a mass sanding of all surfaces to give it a smooth finish with which to begin stage 2

Regards

ColinView attachment 415205View attachment 415206View attachment 415208 View attachment 415209
 

Attachments

  • D257A76F-3180-4798-807B-D802F9BB7298.jpeg
    D257A76F-3180-4798-807B-D802F9BB7298.jpeg
    3.6 KB · Views: 0
  • B1312881-D266-43F8-97C5-B06CE41A2DEB.jpeg
    B1312881-D266-43F8-97C5-B06CE41A2DEB.jpeg
    4 KB · Views: 0
  • 31A7314C-C64D-4AAB-96BC-C7936AFEDA0A.jpeg
    31A7314C-C64D-4AAB-96BC-C7936AFEDA0A.jpeg
    4.1 KB · Views: 0
  • B1F1FA5D-FE53-40D4-A280-D39F8E77C44C.jpeg
    B1F1FA5D-FE53-40D4-A280-D39F8E77C44C.jpeg
    3.5 KB · Views: 0
Thread owner
1/48 Hachette U96 Part 6

Planking 2nd layer is now finished hence my lack of any postings recently as I’ve spent most of my spare time planking there’s a new one for you
Anyway the 2nd layer has been done and roughly smoothed down ready for the inevitable mass sanding that will follow in due course in the meantime here are the latest build photos the model now has taken on the characteristics of a oak tree limb very heavy and dense any type of flimsiest has now disappeared

Regards

ColinView attachment 415636View attachment 415637View attachment 415638View attachment 415639View attachment 415639View attachment 415641View attachment 415642
 

Attachments

  • EBD54EF1-2052-4741-A075-9EE4867DF5FD.jpeg
    EBD54EF1-2052-4741-A075-9EE4867DF5FD.jpeg
    4.3 KB · Views: 0
  • BC74800F-2596-44B5-BE73-FE7DED221595.jpeg
    BC74800F-2596-44B5-BE73-FE7DED221595.jpeg
    4.3 KB · Views: 0
  • 4819E1D9-FFC1-4D92-BCE2-9F01F7D2E9C7.jpeg
    4819E1D9-FFC1-4D92-BCE2-9F01F7D2E9C7.jpeg
    4 KB · Views: 0
  • 3BF85956-5D39-487D-AB32-3D856AC28614.jpeg
    3BF85956-5D39-487D-AB32-3D856AC28614.jpeg
    4 KB · Views: 0
  • E4FA7CFE-A54D-4090-BFEF-7F0AC301F40B.jpeg
    E4FA7CFE-A54D-4090-BFEF-7F0AC301F40B.jpeg
    3.8 KB · Views: 0
  • 4E2A8F1D-187D-4412-994D-97BF9E02A0F6.jpeg
    4E2A8F1D-187D-4412-994D-97BF9E02A0F6.jpeg
    4.4 KB · Views: 0
  • 67709D4B-821A-4A89-94F3-FAAA3B30DEDA.jpeg
    67709D4B-821A-4A89-94F3-FAAA3B30DEDA.jpeg
    3.6 KB · Views: 0
1/48 Hachette U96 Part 6

Planking 2nd layer is now finished hence my lack of any postings recently as I’ve spent most of my spare time planking there’s a new one for you
Anyway the 2nd layer has been done and roughly smoothed down ready for the inevitable mass sanding that will follow in due course in the meantime here are the latest build photos the model now has taken on the characteristics of a oak tree limb very heavy and dense any type of flimsiest has now disappeared

Regards

Colin
HI Colin very nice work on your sub an when will you build that lovely saturn 5 kit under your laptop ?
chris
 
Thread owner
View attachment 415677
HI Colin very nice work on your sub an when will you build that lovely saturn 5 kit under your laptop ?
chris

Chris

The Saturn V was finished see attached there is a build diary in the real spaceships forum on this website

Regards

Colin
 

Attachments

  • 81FCCDCD-DA52-42AE-AE4C-7CFDCBC16D9B.png
    81FCCDCD-DA52-42AE-AE4C-7CFDCBC16D9B.png
    8.6 KB · Views: 0
Thread owner
1/48 Hachette U96 Part 7

Ok now onto the removable deck which is the next phase this was previously constructed and as you can see has now been painted matt black acrylic
Next 4 pieces of reinforcing wood are added 2 to each side bow and stern these have a lot of pre-cut holes in them and are the backs where the brass outer plates will be added later
Also the plastic outer panels to the removable deck are also now added along with 86 10mm wide strips of wood you have to individually cut and sand and glue into place from several 240mm wooden strips supplied in the sequence on the undersurface of the plastic side panels
All the etched detail on the plastic panels I intend to ink in once it’s all painted just to enhance the detail as per the bow and stern baffles
Finally for this section the brass outer panels are glued into place making sure you get them the right side up as the outer skin has a demarcation line etched into it and some reinforcing panels are added to the removable deck and the bow and stern tops of the main hull this now completes 54 issues of the 150

Regards

ColinView attachment 415903View attachment 415904View attachment 415905View attachment 415906View attachment 415907View attachment 415908View attachment 415909View attachment 415910View attachment 415911View attachment 415912View attachment 415913View attachment 415914View attachment 415915View attachment 415916View attachment 415917View attachment 415918View attachment 415919View attachment 415920View attachment 415921View attachment 415922
 

Attachments

  • DA82A086-6200-4499-A136-C2407F36AB10.jpeg
    DA82A086-6200-4499-A136-C2407F36AB10.jpeg
    3.7 KB · Views: 0
  • 114AFB70-256B-453B-9397-7F251C6F65B8.jpeg
    114AFB70-256B-453B-9397-7F251C6F65B8.jpeg
    4.3 KB · Views: 0
  • AB857185-4D2B-47B9-B6B0-3CEF5530DDD1.jpeg
    AB857185-4D2B-47B9-B6B0-3CEF5530DDD1.jpeg
    4.5 KB · Views: 0
  • D554B5FD-4B6A-48BF-8473-B17D16CF84F3.jpeg
    D554B5FD-4B6A-48BF-8473-B17D16CF84F3.jpeg
    3.8 KB · Views: 0
  • CDEDF243-7764-40A7-B218-07C163EBD5E9.jpeg
    CDEDF243-7764-40A7-B218-07C163EBD5E9.jpeg
    4 KB · Views: 0
  • AA20F4E2-D1E4-4C91-96E9-8079F385A93D.jpeg
    AA20F4E2-D1E4-4C91-96E9-8079F385A93D.jpeg
    4.5 KB · Views: 0
  • B6556CBB-633A-4544-BD44-DED076AFF2A1.jpeg
    B6556CBB-633A-4544-BD44-DED076AFF2A1.jpeg
    3.9 KB · Views: 0
  • 1BDB9CEB-BD06-4F5A-A8C0-C938C34F0FD7.jpeg
    1BDB9CEB-BD06-4F5A-A8C0-C938C34F0FD7.jpeg
    3.6 KB · Views: 0
  • 2C9A7C6A-E85C-41CD-A496-FFA4E038B7CD.jpeg
    2C9A7C6A-E85C-41CD-A496-FFA4E038B7CD.jpeg
    3.4 KB · Views: 0
  • 73D88ECC-426D-4381-87BE-CB4EF193A0B2.jpeg
    73D88ECC-426D-4381-87BE-CB4EF193A0B2.jpeg
    3.3 KB · Views: 0
  • B0967C2E-3042-4FE3-9D1F-0D219927D26F.jpeg
    B0967C2E-3042-4FE3-9D1F-0D219927D26F.jpeg
    3.9 KB · Views: 0
  • AC386390-0EF7-4E89-B82F-579C9082DA8C.jpeg
    AC386390-0EF7-4E89-B82F-579C9082DA8C.jpeg
    4 KB · Views: 0
  • 35D0E12F-3B59-4E8A-AA0D-5207574D08D5.jpeg
    35D0E12F-3B59-4E8A-AA0D-5207574D08D5.jpeg
    3.8 KB · Views: 0
  • 9DEE0C09-5BD6-448D-82C4-4E4BE2DA4288.jpeg
    9DEE0C09-5BD6-448D-82C4-4E4BE2DA4288.jpeg
    4.1 KB · Views: 0
  • E123E464-FE7B-403E-BDC8-1E687F000DAD.jpeg
    E123E464-FE7B-403E-BDC8-1E687F000DAD.jpeg
    4.1 KB · Views: 0
  • BFFC0C6B-536B-4434-A9C2-6B5299B4F07C.jpeg
    BFFC0C6B-536B-4434-A9C2-6B5299B4F07C.jpeg
    3.5 KB · Views: 0
  • B32139EC-77A7-4B85-BB6F-359B8ABBAFE1.jpeg
    B32139EC-77A7-4B85-BB6F-359B8ABBAFE1.jpeg
    3.1 KB · Views: 0
  • C778CAD6-EB11-4B1F-B968-A2D30AE01BCE.jpeg
    C778CAD6-EB11-4B1F-B968-A2D30AE01BCE.jpeg
    3.5 KB · Views: 0
  • F4D94563-5C2A-4DDB-9CD1-8F59096B7E7B.jpeg
    F4D94563-5C2A-4DDB-9CD1-8F59096B7E7B.jpeg
    3.9 KB · Views: 0
  • 5A6EC89D-11E1-4F59-8FDD-AF367A7DB2B0.jpeg
    5A6EC89D-11E1-4F59-8FDD-AF367A7DB2B0.jpeg
    3.4 KB · Views: 0
Looking great Colin. You could use thin styrene sheet to cover the planking for a smooth finish? I used a lot of filler when I used planking on my cable car. I used Selleys Permafilla, which is a fast drying and very durable filler that sticks to anything. Which means it could be useful for a smooth transition between the plastic and wood sections. Easy to sand as well. Anyhow, watching with interest, this is a monster.
 
Thread owner
View attachment 416323View attachment 416324View attachment 416325View attachment 416326View attachment 416327View attachment 416328View attachment 416329View attachment 416330View attachment 416331View attachment 416332View attachment 416333View attachment 416334View attachment 416335View attachment 416336View attachment 416337View attachment 4163381/48 Hachette U96 Part 8

Just a small one this time basically fitted stern and bow sections into place along with relevant torpedo tubes filled and sanded gaps the whole model now needs sanding to a silky smooth finish ready for primer
There were several wooden re-enforcing sections which were then painted acrylic matt black 2 of which are shown in the photos there are 6 all told this will be added later onto the removable deck structure
The actual fitting was as follows stern tube has a rotating part that’s the brass piece you can see which you can flip inwards to reveal the stern torpedo tube or put it back in it’s closed position
The tube which is a metal tube was glued into position then threaded through the circular openings on the bulkheads and glued into place along with the actual stern section of the sub
The bow section had several brass fittings added to it including a small copper pipe at the top which you filed to the same profile as the bow section before it was joined together and the 4 tubes were mounted in exactly the same way as the stern tube then the whole bow section was glued onto the front of the sub
I’m at present waiting for delivery of said sanding sheets from evil bay which should be around the 17th so won’t be posting anything further on this build till after then

Regards

Colin
 

Attachments

  • 027DB963-6D41-4A28-B6CF-056018616BC3.jpeg
    027DB963-6D41-4A28-B6CF-056018616BC3.jpeg
    4 KB · Views: 0
  • 3E00B199-08D9-49E1-AEC0-BA782005AEA1.jpeg
    3E00B199-08D9-49E1-AEC0-BA782005AEA1.jpeg
    4.3 KB · Views: 0
  • AB560EF2-6CC3-4257-A88B-B3B8AFB2C50D.jpeg
    AB560EF2-6CC3-4257-A88B-B3B8AFB2C50D.jpeg
    3.9 KB · Views: 0
  • F7680FB5-D7BE-4C05-B24F-59C3ECAF4696.jpeg
    F7680FB5-D7BE-4C05-B24F-59C3ECAF4696.jpeg
    2.7 KB · Views: 0
  • EA6B724E-7F71-4FB8-876B-3525CBAFACE7.jpeg
    EA6B724E-7F71-4FB8-876B-3525CBAFACE7.jpeg
    2.7 KB · Views: 0
  • 07848F75-76BF-4F59-B7E3-AE07BF162C0C.jpeg
    07848F75-76BF-4F59-B7E3-AE07BF162C0C.jpeg
    3.1 KB · Views: 0
  • 4BAB61E7-5F48-4F34-8A9C-21A6F61DE0CB.jpeg
    4BAB61E7-5F48-4F34-8A9C-21A6F61DE0CB.jpeg
    3.1 KB · Views: 0
  • B762BC2E-75FB-41A1-AB88-95A169CB4798.jpeg
    B762BC2E-75FB-41A1-AB88-95A169CB4798.jpeg
    3.5 KB · Views: 0
  • 697DF810-1D27-472D-9499-001696F2F50B.jpeg
    697DF810-1D27-472D-9499-001696F2F50B.jpeg
    3.5 KB · Views: 0
  • 1B9217AF-765F-488F-A2E8-166EC70934FE.jpeg
    1B9217AF-765F-488F-A2E8-166EC70934FE.jpeg
    3.7 KB · Views: 0
  • 7FE0209F-2B64-4E6A-B981-B6751D4872AA.jpeg
    7FE0209F-2B64-4E6A-B981-B6751D4872AA.jpeg
    3.9 KB · Views: 0
  • 76B23620-6A91-424F-B4F4-F0CDCCAA069C.jpeg
    76B23620-6A91-424F-B4F4-F0CDCCAA069C.jpeg
    4.2 KB · Views: 0
  • 223375FC-9BA8-42F6-9A58-982F28F9AA70.jpeg
    223375FC-9BA8-42F6-9A58-982F28F9AA70.jpeg
    4.2 KB · Views: 0
  • AFE9D16D-F21A-44E9-9FD9-31A3B3C1ACDA.jpeg
    AFE9D16D-F21A-44E9-9FD9-31A3B3C1ACDA.jpeg
    4.4 KB · Views: 0
  • BB526656-D250-439F-8BF1-FE4F9F5044B2.jpeg
    BB526656-D250-439F-8BF1-FE4F9F5044B2.jpeg
    4.4 KB · Views: 0
  • DE5C737C-36EB-485D-AEA3-BD6A96052D7E.jpeg
    DE5C737C-36EB-485D-AEA3-BD6A96052D7E.jpeg
    4.3 KB · Views: 0
Back
Top