Theme editor

Scale Model Shop

Airfix 1:72 Willys MB Jeep

pjgtech

SMF Supporters
Joined
Dec 28, 2023
Messages
1,557
Reaction score
1,360
Points
113
Age
61
Location
Kent, UK
1/3
Thread owner
My next project to keep on learning all about this model painting , weathering mallarkey.
I bought a few of these little 1:72 models from Aldi/Lidl, can't remember which?
They are so small and cheap that I will not be too bothered about getting it wrong, its all about the experience and the learning from my mistakes.
Some pics before the build starts.....
Willys Jeep 1_72 Oct24_ (1).jpg Willys Jeep 1_72 Oct24_ (2).jpg Willys Jeep 1_72 Oct24_ (3).jpg Willys Jeep 1_72 Oct24_ (4).jpg Willys Jeep 1_72 Oct24_ (6).jpg Willys Jeep 1_72 Oct24_ (5).jpg Willys Jeep 1_72 Oct24_ (7).jpg
 

Attachments

  • photo243071.jpg
    photo243071.jpg
    853.5 KB · Views: 0
  • photo243075.jpg
    photo243075.jpg
    394.6 KB · Views: 0
  • photo243076.jpg
    photo243076.jpg
    558 KB · Views: 0
  • photo243074.jpg
    photo243074.jpg
    244.4 KB · Views: 0
  • photo243072.jpg
    photo243072.jpg
    224.7 KB · Views: 0
  • photo243073.jpg
    photo243073.jpg
    253.6 KB · Views: 0
  • photo243077.jpg
    photo243077.jpg
    430.6 KB · Views: 0
I bet that's a tiddler! I built a 1/35 and that was pretty small.

No wonder you were asking about magnifiers 🧐
 
These kits represent great value for money and fit together nicely to make fine models. I look forward to seeing how you get on.
 
Thread owner
Update:
Ok, so learning from my first model (Tiger 1:72) I am now going slower, with my second model (Willys Jeep 1:72), boy its small!
This time I am painting what I can on the sprue, taking my time, applying more than one coat of paint, doing the small fiddly bits much more carefully.
Ist go at the wheels went ok, still a bit ham fisted, but by the time I'd done a few (9 in all!) was getting much better, still have to tidy them up a bit, but getting there.
Here's pics of the first coat (very patchy) and then the second coat, not so patchy and getting darker.
I am thinning the paint with some thinners(about 25% thinners to 75%paint), but may go a bit more than that with next coats, (40/60)?
Can I thin acrylics with water, or does it have to be thinners?
Willys jeep 1st coat oct24.jpg willys jeep 2nd coat oct24.jpg
 

Attachments

  • Willys jeep 1st coat oct24.jpg
    Willys jeep 1st coat oct24.jpg
    450.1 KB · Views: 0
  • willys jeep 2nd coat oct24.jpg
    willys jeep 2nd coat oct24.jpg
    319.1 KB · Views: 0
Looking good. In answer to your question, yes, but once you go past a certain dilution they will break down (only you can find that out by trial and error). If you want to make a wash or such you are better using glaze medium to thin the paint because that makes it more fluid, but contains the matrix that binds the paint so it doesn’t break down.
 
I thin Vallejo (model colour mostly) with tap water and have no problems but as Tim says beyond a certain level of thinning the paints become unusable. I find with Vallejo it varies dramatically between different paint colours.

Interesting what Tim says about the Glaze medium properties. I see Vallejo have lots of mediums but I've never used them and don't really understand them. This is something I should look into.
 
I also noted Tim's suggestion. I have not considered Glaze Medium, never heard of it to be honest. Like you - something to look into.
 
Hopefully Tim will correct me if I'm wrong but I think of (and use) glaze medium like a transparent paint, which will reduce the opacity of your colour when mixed in, without having to over thin it.
 
Thread owner
Build update:
Ok so its all built, but not quite finished yet.......boy was this small!
I thought the Tiger tank 1:72 scale was small, but no, THIS is small! Lol.... 🙂

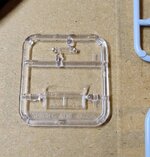
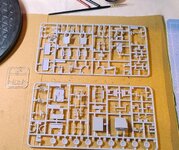
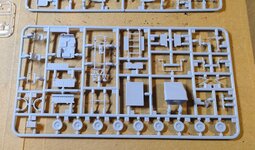
Anyway gave all the bits a final 3rd coat on the sprues, all looked ok, quite nice coverage, etc. (See 1st photo)
So far just used the Airfix mini pots of paint as supplied with the starter kit.

Then started the actual build, all went well, got to the end and realised I had not stuck the dash in the jeep! Oh well, its still a learning curve for me.
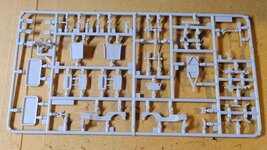
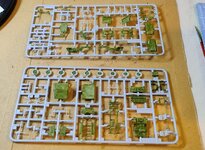
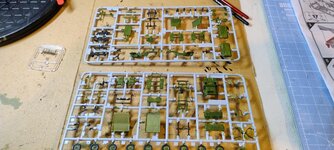
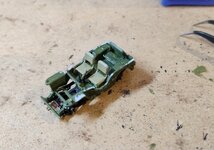
Quickly realised that when taking parts off the sprue, and then filing down any sticky out bits (what are they called?) this takes off the paint you so carefully painted on, Doh! (see 2nd photo)
But, obviously most of the paint is still on the model, so it just meant that I had to go round during and after the build touching up all the areas where paint had come off after filing down. Lesson learnt... 👍

I have not weathered this one at all, but I think I may give it a wash of dirt/grease/fuel type finish, don't want it looking too clean!
So far I have not yet attached the transfers either. Will probably do that tomorrow.
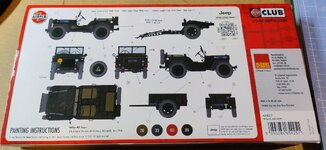
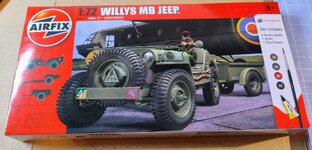
This kit gives the option of two versions, British Airbourne, complete with parachute "crate" and rear jeep mounted machine gun, or US Army, complete with canvas roof. I went for the British one, although there only seems to be transfers with US decals?

Enough waffling, here some pics, bearing in mind how bloody tiny this was, I'm quite please with it, as I say may have a play with some weathering tomorrow?
Last photo is the Willys jeep group next to the Tiger tank (same scale, but you can see how tiny it is).....

Click image for larger version  Name:	willys jeep 23oct24 sprues 3rd coat.jpg Views:	0 Size:	501.9 KB ID:	1237659 Click image for larger version  Name:	willys jeep 23oct24 sprues 3rd coat.jpg Views:	0 Size:	501.9 KB ID:	1237659 Click image for larger version  Name:	willys jeep 23oct24 sprues 3rd coat.jpg Views:	0 Size:	501.9 KB ID:	1237659 Click image for larger version  Name:	willys jeep 23oct24 sprues 3rd coat.jpg Views:	0 Size:	501.9 KB ID:	1237659 Click image for larger version  Name:	willys jeep 23oct24 sprues 3rd coat.jpg Views:	0 Size:	501.9 KB ID:	1237659 Click image for larger version  Name:	willys jeep 23oct24 sprues 3rd coat.jpg Views:	0 Size:	501.9 KB ID:	1237659 Click image for larger version  Name:	willys jeep 23oct24 sprues 3rd coat.jpg Views:	0 Size:	501.9 KB ID:	1237659 Click image for larger version  Name:	willys jeep group with tiger tank.jpg Views:	0 Size:	412.3 KB ID:	1237660
 

Attachments

  • willys jeep mid build paint.jpg
    willys jeep mid build paint.jpg
    284.8 KB · Views: 0
Last edited:
Thread owner
I've also realised that painting first, then glueing seems to show up the glue a lot more! (Using Revell glue), and the glue has "reacted" with some of the (Airfix) paint!
So I suppose I could just paint parts on the sprue but try to avoid any edge areas etc that will be glued.
Or do peeps just remove from sprue first then paint as they go through the build? Cheers
 
Last edited:
Bet you're pleased with that. Enjoyed the process and learned a lot as well.
The whole issue of when in the building you need to paint is quite an issue. Personally I rarely paint on the sprue for two reasons. Firstly, as you found, the paint is removed when the joint nib is cleaned up. Secondly I like to dry fit parts before glueing and again any fit adjustments take off paint. I try to build up as much as I can before painting. Often into larger sub sections. I would rather have a fiddly painting job than risk glue damage. Each to their own however.
 
Thread owner
Bet you're pleased with that. Enjoyed the process and learned a lot as well.
The whole issue of when in the building you need to paint is quite an issue. Personally I rarely paint on the sprue for two reasons. Firstly, as you found, the paint is removed when the joint nib is cleaned up. Secondly I like to dry fit parts before glueing and again any fit adjustments take off paint. I try to build up as much as I can before painting. Often into larger sub sections. I would rather have a fiddly painting job than risk glue damage. Each to their own however.

Yep, think building each mini sub section, then painting in sections, etc is the way to go, Cheers
 
Last edited:
I think you will find that most builders will follow Jims method. Glue as many parts together first before painting. This gives you the opportunity to correct any fit issues by the use of fillers and sanding etc. It involves a really close examination of the instructions first so you can decide what you can fit together. Through experience you will also start to learn that you can deviate from the instructions at times to get a better finish.
Also choice of glues is important. One glue doesn't do all. For very small plastic pieces dont use the normal plastic cement as this will melt the plastic and may ruin the part. CA (super glues) are good for this and usually cause less damage on already painted parts. Keep superglue and plastic cement glue away from clear parts, windscreens, canopies etc, they will fog them up. Use a good PVA glue like Kristal Klear for those jobs. Great effort on the jeep, you look to be really enjoying the hobby.
 
Thread owner
Hmm, made a balls up!
After applying the transfers to the jeep, I stupidly applied MATT varnish, (should have applied GLOSS) then applied the washes, etc and wondered why it look a bit weird? eg: too shiny?
Can I just reapply gloss varnish and then weather again, or will I need to strip the old weathering and matt varnish off, is this even possible?
Its a constant learning process....
 
Thread owner
Ok final update on this one I think.....
Sort of recovered the paint job (a bit) after ending up with a very shiny / glossy finish, by adding some more flat varnish.
Still not anywhere near perfect, but at least it has the dirty, weathered, beaten up look I was after.

Still lots of stupid mistakes though, did not get the wheels perfectly straight, the front bumper is a bit skew-whiff, bodged the painting around the wind shield, the little shovel on the side of the jeep was broken, or I broke it taking it off, can't remember, I sort of tried to straighten it out, but these things are so tiny! So that looks a bit wonky.

But..... still only my second build and I'm still learning as I go.... so happy with it overall.
I think I've got the general paint sequence down now, which will help with the next one....
Some pics of how it looks now.....
willys jeep 2nov24_ (3).jpg
willys jeep 2nov24_ (2).jpg
willys jeep 2nov24_ (5).jpg
willys jeep 2nov24_ (6).jpg
willys jeep 2nov24_ (1).jpg
willys jeep 2nov24_ (8).jpg
willys jeep 2nov24_ (10).jpg
 
That's very good for your 2nd model. These got knocked about in service so don't worry about things not being straight.
Pete
 
Well done Peter. You have thrown yourself in at the deep end by attempting weathering on your models. I have been at this for years and still struggle with weathering techniques. Make no doubt about it, many of the modellers that you see on this site produce work of such a high standard that I consider them extremely talented artists. This hobby is an art. Keep at it and enjoy the journey.
 
Back
Top