Theme editor

Scale Model Shop

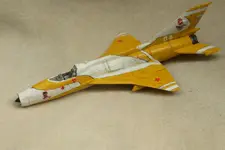
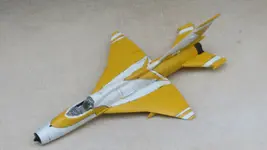
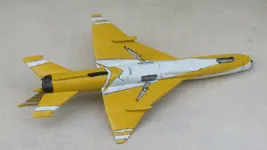
Chris' Trumpeter 1/144 Chengdu J-7E

SO there no chance of me gettin any then as in still have a fair amount of masking coming on my other kits ? an very handy if it bends around corners
chrisb
 
Thread owner
SO there no chance of me gettin any then as in still have a fair amount of masking coming on my other kits ? an very handy if it bends around corners
chrisb
I've seen it advertised in Air and Military model mags, but that was more than a year ago now, I think. I'll see if I can find out

I'm also thinking I'm not going to do the cheat line, though I do have some very fine pens to use. It's only on the drawing of the scheme (and no photos!), and none of the August 1 team shows such cheat lines on any of their 'planes.
Have I actually given up on a detail idea?

Maybe
 
Thread owner
Okay, apparently Humbrol do a flexible masking tape, but I can only find that on Amazon, not on their own site.
There's lots of different ones on eBay, but the only one I've found that looks like the one I'm using is by Guagemaster, though not in the 2mm size I used. The stuff I have is a bit thicker than ordinary yellow masking tape, but stays sticky and stuck down, and certainly cuts well

Some of the other stuff I've found is so difficult to make stay stuck until I actually want to pull it off!
 
Okay, apparently Humbrol do a flexible masking tape, but I can only find that on Amazon, not on their own site.
There's lots of different ones on eBay, but the only one I've found that looks like the one I'm using is by Guagemaster, though not in the 2mm size I used. The stuff I have is a bit thicker than ordinary yellow masking tape, but stays sticky and stuck down, and certainly cuts well

Some of the other stuff I've found is so difficult to make stay stuck until I actually want to pull it off!
CHEERS Steve for the info
chrisb
 
Thread owner
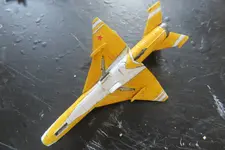
Ah, to hell with it. Yeah, I've gone and done it
IMG_3940.webpIMG_3941.webp
As I discovered from my Tintin Arado, this Humbrol spray yellow is not keen on stuff going on top of it. The tail cone needs some more Burnt Iron

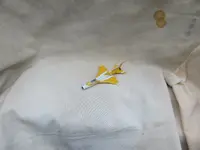
Still, these pictures make the 'plane look seventy-second not 144.

Hmm...
How about this
IMG_3942.webp
Now that is more like proper viewing distance!
 
Thread owner
Well, if I can get another three-or-four of these kits, I might do all five aircraft of the team
And an August 1 team version, seeing as that has different badges to the blue 01 'plane...
 
Wow, they really are tiny - and then you do major surgery on them too? I stick to 1/48 generally to avoid the fiddly bits in 1/72 - I have no idea how you work on these, but I am very impressed nonetheless.
 
Thread owner
Wow, they really are tiny - and then you do major surgery on them too? I stick to 1/48 generally to avoid the fiddly bits in 1/72 - I have no idea how you work on these, but I am very impressed nonetheless.
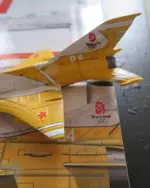
While there are etch sets for 1/144, even I think that's pushing it a bit far!
Although...

Originally, waaay back, we were going to build a 1/72 MiG-21 collection, but that didn't get past the first two for, reasons. Now, you see, like with me going from 1/35 to more 28mm, I can get more stuff in a smaller space. And it's cheaper too. The 1/144 J-7 cost about £3.50. There was a 1/48 version, that now goes for ten times that on eBay
 
Thread owner
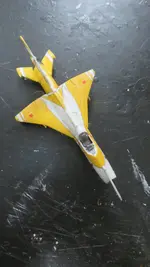
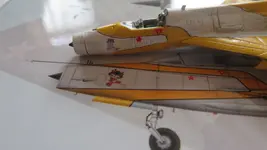
On with the markings. PLAAF stars are from the F-7-II, cut to size. All the logos are hand painted, the black is 0.1 mm fineliner pen.
Does it actually say 'Beijing 2008' on the tail? Maybe

Did a very light wash of some acrylic Flesh Wash, just to highlight (lowlight? shadow) some of the pan lines
Then an overall spray of Mr Color semi-gloss spray to seal everything in. Could have gone with matt, as the August 1 J-7s don't appear shiny at all in the photos I've seen
IMG_3956.webpIMG_3957.webp
The logos are the second attempt. The initial try, which I didn't photo, was all done in fineliner markers. Unfortuanetly, even leaving it overnight, I managed to smudge some of them. Pity, because they came out almost as good as the painted versions here. Was that an 005 brush?
 

Attachments

  • IMG_3954.webp
    IMG_3954.webp
    490.9 KB · Views: 1
Last edited:
Thread owner
Finally all the fiddly bits
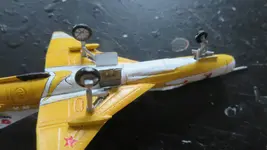
The undercarriage on the kit is a little too tall, especially the nose wheel, so that needs just a trim. And, thankfully, it doesn't sit on it's tail, though I may need some weighting in later 'planes

All the u/c doors are moulded in one piece, so they have to be split apart, which is especially annoying for the outer main doors. Also the main and forward doors have tabs on them, which actually get in the way of mounting the doors properly. The nose doors fix too narrow to get the nose leg to go in!
IMG_3958.webp
And one of the stars went missing
IMG_3959.webp
Pitot attached
IMG_3961.webp
Undercarriage fitted, with a few extra rod bits of detail added on
And that's about finished, except for the canopy, which is already fitted as you can just see

So, over to a completed thread
 
Back
Top