Theme editor

Scale Model Shop

Colin M's Trumpeter 1:72 fairey Gannet mk 1 / 4

Status
Not open for further replies.
Thread owner
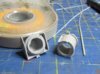
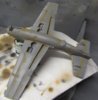
So, the tail sitting issue continues. Hence any redundant plastic is being removed. The pic below shows the excess radome plastic removed, if it's not needed, it can't stay.


View attachment 110034


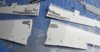
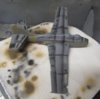
And yet more lead in the leading edges of the wings.


View attachment 110035


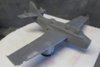
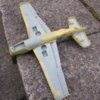
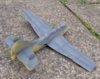
The wings are now attached, and I think I'm there, no tail sitting, but what a heavy little 1:72 it's turned out to be !

View attachment 223057

View attachment 223058
 

Attachments

  • Chopped.JPG
    Chopped.JPG
    2.8 KB · Views: 0
  • IMG_1191.JPG
    IMG_1191.JPG
    2.1 KB · Views: 0
Looking good Colin. It's amazing how much weight is needed in such a little model! Nice job on the canopies as well mate. Should be a straight run to the finish line now, I'll look forward to the next installment.
 
Designers the world over stripping and tearing at aircraft structures to make them lighter. Then comes along Colin and his bag of lead.


Nice job Colin, hopefully that avoids any tail sitting.
 
Thread owner
\ said:
Designers the world over stripping and tearing at aircraft structures to make them lighter. Then comes along Colin and his bag of lead.
Nice job Colin, hopefully that avoids any tail sitting.
Tail sitting is a very serious affliction - even the big ones get it wrong sometimes. :eek:


View attachment 110085


View attachment 223108
 

Attachments

  • vulcan19.jpg
    vulcan19.jpg
    1.8 KB · Views: 0
Thread owner
An update, but not much interesting.


It's primed. However the Halfords primer was rubbish. It just didn't atomise very well so I had to sand it back quite hard to remove the rough finish it left me with.


View attachment 111654


The 'Sky' areas have been pre shaded with what I hope is a complimentary colour - we'll see.


View attachment 111655


The upper surfaces which will have (extra) Dark Sea Grey on them get a black pre-shade.


View attachment 111656


I might get a bit of top coat on tomorrow. Back to enamels for this one, only because I've already got the paints ready to go.


Colin M...

View attachment 224677

View attachment 224678

View attachment 224679
 

Attachments

  • Primer.JPG
    Primer.JPG
    2 KB · Views: 0
  • Underside preshade.JPG
    Underside preshade.JPG
    3 KB · Views: 0
  • Upper preshade.JPG
    Upper preshade.JPG
    2.9 KB · Views: 0
Colin how have you done your pre-shading? have you used a mask on one side and feathered the other side? Model is looking good by the way looking forward to more updates.
 
Thread owner
\ said:
Colin how have you done your pre-shading? have you used a mask on one side and feathered the other side? Model is looking good by the way looking forward to more updates.
I just held a small piece of card (business card type thing) in place by hand. Masking would have produced a really hard line. This produced a very slightly fuzzy leading edge, and a well feathered trailing edge. It takes me a lot longer than the normal way of pre-shading, and may not be worth the extra effort. We'll see after the top coat is on.
 
Thread owner
Paint applied. The brown pre-shade on the under side was probably a touch too light. It's visible, just.


View attachment 112178


The upper side came out ok. Maybe a touch more paint would have been better - I think I need better lighting in my garage (where I spray) The pre-shading was done in a different style which like and will try again on the next suitable build.


View attachment 112179


Colin M....

View attachment 225201

View attachment 225202
 

Attachments

  • Lower.JPG
    Lower.JPG
    3.6 KB · Views: 0
  • Upper.JPG
    Upper.JPG
    2.8 KB · Views: 0
Thread owner
It's finished. Pics in the completed SIG section.
 
Status
Not open for further replies.
Back
Top