G
Guest
Guest
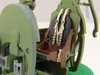
Hi Jim just caught with this a nice clean and tidy start, will be keeping a eye on your progress, good luck sir.
Pete.
Pete.

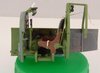
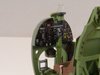
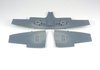
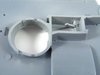
Nicely done!And this bit of PE was just taking the wee-wee :crying: It is one piece from the fret folded up.
View attachment 299347
Off for a lie down!
Jim
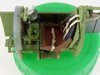
That's a new one on me too.Never seen the clear parts on wheel spokes like this
scalemodelling.co.uk is a privately operated online discussion forum. All content posted by members reflects their own views and opinions and does not necessarily represent those of the forum owners or administrators. While reasonable efforts are made to moderate content, no responsibility is accepted for user-generated material. By using this site, you agree to comply with UK law and the forum rules.