
You are using an out of date browser. It may not display this or other websites correctly.
You should upgrade or use an alternative browser.
You should upgrade or use an alternative browser.
Gregg's Corvette. Revell 1/72
- Thread starter ojays
- Start date
Only managed a little work recently, busy with family matters.
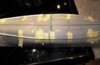
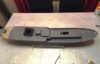
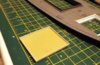
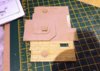
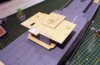
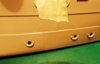
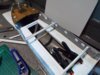
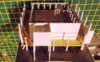
Opened up rear hatch for access to rudder linkage, raised a framework around main hatch to prevent water ingress.
A little primer blown over to highlight imperfections.
Opened up rear hatch for access to rudder linkage, raised a framework around main hatch to prevent water ingress.
A little primer blown over to highlight imperfections.
Attachments

Coming along nicely.
If you need any info just let me know. I have a very good book on the Flower Class.
Are you going to do the hull rivets?
Not doing the hull rivets as too time consuming and modelling time for me is scarce.
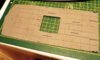
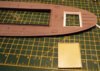
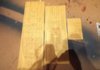
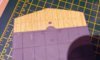
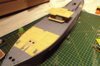
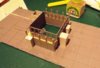
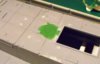
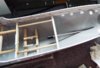
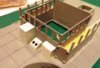
Started on the wooden decking tonight, easier than I thought it would be.
Instead of trying to apply as full sheets, I cut them into sections so it was easier to ease out any trapped air bubbles.
The decking will get weathered later as it looks too new to be a working ship.
Instead of trying to apply as full sheets, I cut them into sections so it was easier to ease out any trapped air bubbles.
The decking will get weathered later as it looks too new to be a working ship.
Attachments
-
 Wooden decking 3.JPG3.4 KB · Views: 0
 -
 Wooden Decking 2.JPG3.1 KB · Views: 0
 -
 Wooden Decking 1.JPG2.9 KB · Views: 0
 -
 Wooden Decking 01.JPG2.1 KB · Views: 0
 -
 Wooden Decking 5.JPG2.3 KB · Views: 0
 -
 Wooden Decking 6.JPG2.9 KB · Views: 0
 -
 Wooden Decking 10.JPG2.8 KB · Views: 0
 -
 Wooden decking 9.JPG3 KB · Views: 0
 -
 Wooden decking 8.JPG3.5 KB · Views: 0
G
Guest
Guest
The decl looks really good. How will you weather it?
The decl looks really good. How will you weather it?
Using washes and pastels, practice on some of the spare decking first.
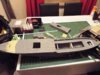
made a start on some of the superstructure and first piece of PE
Attachments

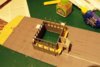
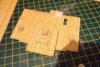
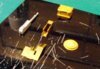
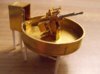
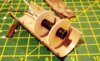
I have been trying out the Gator Thin Glue for the first time, must say I'm impressed so far.
I have been using it on the 2 pounder PE set from GLS.
Not my best work but struggling with fat numb fingers and dodgy eyesight, so started on the larger parts first.
Still lots of smaller items to add yet, also cut off the kit platform pillar and filled with plasticard and green stuff.
Photo's are captioned incorrectly, told you my eyesight was u/s.
Attachments


G
Guest
Guest
Looking good, a vast improvement over the kit supplied parts. Is the gator glue a PVA glue?
Looking good, a vast improvement over the kit supplied parts. Is the gator glue a PVA glue?
Not sure if it a true PVA, however I have found it to be very useful already.
It allows you time to adjust the part you are fitting, and initially it is quite flexible, but left to dry it becomes solid.
You must keep the bottle agitated as it does appear to separate if left to stand for any length of time.
I use this as well and can say that even if it does separate a good shake and its as good as new. I have yet to try the thin but watered down the original one is just as good. Might take a bit longer to dry though.You must keep the bottle agitated as it does appear to separate if left to stand for any length of time.
When I did my GLS sets all the larger parts got soldered up.


Just a little update.
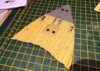
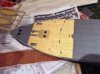
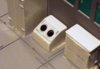
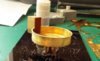
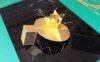
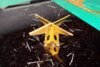
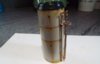
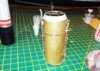
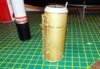
On New Years day while walking our little dog, I found 20 or so expended rockets laying around from the New Year celebrations.
I collected as many stems as I could find and put them in my modelling cupboard, thinking they might be useful sometime.
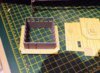
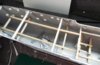
Well that time came a couple of days ago when I decided to make some waterproof internal decks/partitions.
Waste not want not!View attachment 283588 View attachment 283589 View attachment 283590
On New Years day while walking our little dog, I found 20 or so expended rockets laying around from the New Year celebrations.
I collected as many stems as I could find and put them in my modelling cupboard, thinking they might be useful sometime.
Well that time came a couple of days ago when I decided to make some waterproof internal decks/partitions.
Waste not want not!View attachment 283588 View attachment 283589 View attachment 283590
Attachments
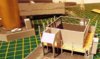
Managed to get some work done over the last few weeks in between moving and family matters.
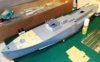
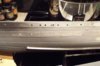
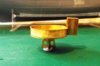
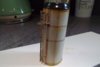
Using the GLS pre-rolled funnel I incorporated the Graupner smoke unit. I also decided to weather it before fitting.
I also made a start on the bridge assembly, but left out the windows to allow through flow of air to the motor and NHIMS.
Using the GLS pre-rolled funnel I incorporated the Graupner smoke unit. I also decided to weather it before fitting.
I also made a start on the bridge assembly, but left out the windows to allow through flow of air to the motor and NHIMS.
Attachments
G
Guest
Guest
Great work don't know how I missed this but will be watching future installments
G
Guest
Guest
Wow!!! Magnificent work!! Looks great so far ")
Legal Notice
scalemodelling.co.uk is a privately operated online discussion forum. All content posted by members reflects their own views and opinions and does not necessarily represent those of the forum owners or administrators. While reasonable efforts are made to moderate content, no responsibility is accepted for user-generated material. By using this site, you agree to comply with UK law and the forum rules.