Theme editor

Scale Model Shop

Hasegawa 1\48 Mitsubishi Zero

Status
Not open for further replies.

Dave W

New member
Joined
Jan 8, 2011
Messages
4,713
Reaction score
0
Points
0
1/3
Thread owner
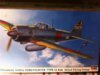
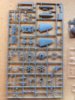
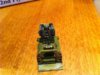
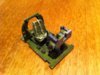
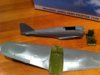
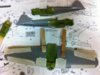
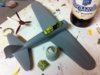
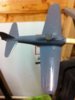
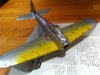
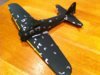
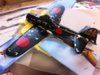
After the disappointmentof messing up my Henschel 129,i've decided not to sulk and to move on to another build.This one is a very nice Hasegawa kit.Its got some of the best cockpit detail i've ever seen in a kit.Im building this because i havent done a Japanese aircraft for 40 years and i want to have a go at the salt paint chipping technique.

View attachment 37449View attachment 37454View attachment 37450View attachment 37451View attachment 37452View attachment 37453

View attachment 41630

View attachment 41631

View attachment 41632

View attachment 41633

View attachment 41634

View attachment 41635

View attachment 154656

View attachment 154657

View attachment 154658

View attachment 154659

View attachment 154660

View attachment 154661
 

Attachments

  • IMG_1021.jpg
    IMG_1021.jpg
    2.8 KB · Views: 0
  • IMG_1048.jpg
    IMG_1048.jpg
    3.3 KB · Views: 0
  • IMG_1044.jpg
    IMG_1044.jpg
    3.1 KB · Views: 0
  • IMG_1045.jpg
    IMG_1045.jpg
    2.9 KB · Views: 0
  • IMG_1046.jpg
    IMG_1046.jpg
    3.2 KB · Views: 0
  • IMG_1047.jpg
    IMG_1047.jpg
    2.5 KB · Views: 0
Thread owner
View attachment 37458View attachment 37459View attachment 37460

The cockpit is consists of a floor,two sides,a back wall and other detail parts.The kit instructions say to fit the sidewalls to the floor assembly.Then join the fuselage halves and insert the cockpit from underneath.I was concerned that there would be a gap between the top edges of the cockpit insert and the fuselage cockpit opening.So after a dry run to make sure everything would fit properly i opted to glue the side walls to the fuselage sides.Then i had a problem over which interior colour to use.The instructions are not very clear about this.So i opted for the 'Aotake' colour.On Tony Yak faces advice i painted the cockpit and well wells/doors silver.After that had dried i mixed up some Tamiya clear blue and clear green.I thinned this with IPA and sprayed the gear bays and doors.As usual for me i did a bit of research AFTER i'd started the build.I found out Mitsubishi built Zero interiors were painted green!.So i've sprayed the cockpit interior green.Not sure what to do about the gear bays now.Would they have been the same colour as the cockpit or would they have been as i have done?.Im sticking with green for the cockpit.Just a few details to paint

View attachment 41636

View attachment 41637

View attachment 41638

View attachment 154662

View attachment 154663

View attachment 154664
 

Attachments

  • IMG_1072.jpg
    IMG_1072.jpg
    2.8 KB · Views: 0
  • IMG_1073.jpg
    IMG_1073.jpg
    2.9 KB · Views: 0
  • IMG_1074.jpg
    IMG_1074.jpg
    2.4 KB · Views: 0
Should be ok just painting the cockpit again dave, from what i can gather the wheel wells were aotake on all variants , its just the cockpit that varied depending on which factory made it. Both mitsubishi and nakajima used a green colour for the cockpit but it was a different green for each factory, i think the mitsubishi green was a sort of medium olive green. Heres a link that has a good selection of paint call outs for all parts of the airframe , cheers tony http://books.google.co.uk/books?id=NFjEKC2RNbUC&pg=PA70&lpg=PA70&dq=a6m+zero+wheel+well+interior+colour&source=bl&ots=R9L7miDwIQ&sig=-NYnxxSc1jaqNPh-LGarpe6PPxQ&hl=en&sa=X&ei=OlLvTsfXDcmChQfq-9zECA&ved=0CB8Q6AEwAA#v=onepage&q&f=false P.S. the aotake looks great!
 
Thread owner
The fit of parts on this kit is excellent .The fuselage seems only needed a light sanding with 600 grit and a polish with a sanding sponge.The cockit is well detailed out of the box.All i've done is drill the holes in the seat and add some Eduard seat belts.The experts on www.rivetcounter.com would be horrified as i've used USAF belts!.I figured it would be a waste of time trying to get some Jap belts through the christmas post.And i reckon they are better than nothing at all.This kit really is great value for £20.

theView attachment 37526View attachment 37519View attachment 37520View attachment 37521

View attachment 41671

View attachment 41672

View attachment 41673

View attachment 41674

View attachment 154697

View attachment 154698

View attachment 154699

View attachment 154700
 

Attachments

  • IMG_1080.jpg
    IMG_1080.jpg
    2.5 KB · Views: 0
  • IMG_1079.jpg
    IMG_1079.jpg
    2.8 KB · Views: 0
  • IMG_1082.jpg
    IMG_1082.jpg
    2.6 KB · Views: 0
  • IMG_1077.jpg
    IMG_1077.jpg
    2.9 KB · Views: 0
Thread owner
Im at the painting stage now.Done the prop Tamiya 'hull red' as per Tony 'Yak Faces' suggestion.I've painted the engine and glued it inside the cowling.Then i spent some time masking the three parts of the canopy.Quite tricky as they are very thin and it would be easy to break them.I've then given the model a coat of Vallejo grey primer.Starting to use these paints more and more now.Im finding them a revelation after years of enamels.I buy the Vallejo Air ones as i can just put as much as i need in the cup of my airbrush and off i go.And clean the airbrush with water afterwards.Fantastic paints.Now i've got 'imodelkit' app on my iphone its easy to find the right colour.Once the primer is dry i will spray the model Vallejo Aluminium.Then im going to attempt the salt chipping technique.I will post the results good,bad or disasterous!.View attachment 37559View attachment 37560

View attachment 41704

View attachment 41705

View attachment 154730

View attachment 154731
 

Attachments

  • IMG_1091.jpg
    IMG_1091.jpg
    3.2 KB · Views: 0
  • IMG_1093.jpg
    IMG_1093.jpg
    2.6 KB · Views: 0
Looking good so far Dave good luck with the salt method i'm sure it will turn out alright for you
 
Top work dave,looks a really excellent kit, good luck with the salt , cheers tony
 
Thread owner
Hopefully i will get to try the salt today.Am currently in quu at M & S.Picking up christmas grub!.
 
Thread owner
View attachment 37747View attachment 37748View attachment 37749

After a couple of coats of Vallejo Air Aluminium i decided to try using Maskol masking fluid instead of salt for the paint chipping.After applying the stuff with a cocktail stick i sprayed the yellow leading edge areas.Im finding these Vallejo Air paints good to work with.Only problem is they won't dry very quickly in my shed at this time of the year (cold).So i have to bring the model into the kitchen to dry the paint.That done i sprayed on Jap Navy light grey on the lower surfaces and Jap Navy green on upper surfaces.For this i used Tamiya acrylics thinned with Isopropyl alcohol.These paints went on very well and only took a few minutes to dry in my shed.Next i carefully removed the masking fluid with tweezers and a cocktail stick to expose the aluminium underneath.I think its worked ok,your comments as always are welcome

View attachment 41881

View attachment 41882

View attachment 41883

View attachment 154907

View attachment 154908

View attachment 154909
 

Attachments

  • IMG_1101.jpg
    IMG_1101.jpg
    2.7 KB · Views: 0
  • IMG_1103.jpg
    IMG_1103.jpg
    2.7 KB · Views: 0
  • IMG_1104.jpg
    IMG_1104.jpg
    3 KB · Views: 0
Hi Dave. congrats on your build mate-all thumbs way up!

I did the same kit a while back and it was an absolute blast to build due to the exelent quality.

I post a pic of the one I painted in Tamiya IJN grey acrylic over humbrol 11 silver and used salt chipping to show how easy it works with great results.

Just a a matter of interest to all (no critique from me mate) the weathering I see on the airplanes that I work on and re-spray will most of the time be on the leading edges of the wings, near the wheels. Undersides of the wings just rear the wheels and the same under the stabilizers due to debrise from the wheels. You might even see some oil or grease from moving parts in the same area.

Where ever a pannel is regularly removed eg. gunbays cowlings they take allot of wear and tear especially arround the fastners.

Another area that wears down to bare metal or primer in the walkways on the wings and the canopy sills as the parachute packs scuff them.

The bottom of the seatpan the same thing.

The Japanese planes seem to have had a problem with the primer ,hence the sharp "crisp" chipping rather than a more even wearing off of the paint.

The prop usually has paint missing on the leading edges and the back surface ,almost never the front (unless it was a pusher prop)

Hope it helps.

Theuns

View attachment 41924

View attachment 41925

View attachment 41926

View attachment 41927

View attachment 154950

View attachment 154951

View attachment 154952

View attachment 154953
 
Thread owner
Thanks for your comments Theuns.Im a B1 licensed aircraft engineer myself and know what you mean about areas where the paint chips or is eroded on leading edges etc.I've tried to show this on my model without going over the top.The masking fluid i used worked quite well,but i put a bit too much on in some places.This is the first time i've attempted to do a bit of paint chipping.Hopefully the next one i do will be better.I fancy doing a Jap seaplane like the 'Rufe'.Loads of scope for paint wear on one of those.
 
Thread owner
View attachment 37803View attachment 37804View attachment 37805View attachment 37806

I've glued the engine and cowling on.Then i gave the whole model two coats of Kleer and applied the decals.I wasnt happy with my first atempt at the 'Aotake' paint, so have redone it in the flap and wheel wells.Next job is to gloss coat the model them apply a wash and some exhaust stains.My chipping may not be totally realistic but this model is really an experiment.Anyway,i like it.

View attachment 41930

View attachment 41931

View attachment 41932

View attachment 41933

View attachment 154956

View attachment 154957

View attachment 154958

View attachment 154959
 

Attachments

  • IMG_1109.jpg
    IMG_1109.jpg
    3.3 KB · Views: 0
  • IMG_1108.jpg
    IMG_1108.jpg
    2.8 KB · Views: 0
  • IMG_1110.jpg
    IMG_1110.jpg
    3 KB · Views: 0
  • IMG_1111.jpg
    IMG_1111.jpg
    3.1 KB · Views: 0
Dave the nice thing about this forum is that there are no "rivet counters" here to spoil the fun for the rest of us who build for fun, so if you are happy then you have totally succeeded in the goal!

As a matter of interest, how do you do things like exhaust and gun staining? with the airbrush?

I do it with chalk pastel powder drybrushed over a matt or satin coat and then seal it in with a gloss coat for the washes. I find that i have more controll with the drybrushing for such fine work and will even use it for some pre-shading in the future.

Theuns
 
Thread owner
Theuns,I've only done exhaust stains a couple of times and used an airbrush.I found it quite tricky and am going to use your method on this model.I've bought some oil paint to experiment with.So this model will probably get some oil stains in unlikely places!.
 
\ said:
Dave the nice thing about this forum is that there are no "rivet counters" here to spoil the fun for the rest of us who build for fun, so if you are happy then you have totally succeeded in the goal!Theuns
Well said Theuns. We're all on a learning curve. I think that Zero looks good.

I stand to be corrected,Japanese aircraft not really being my thing,but I don't think that any primer was used at all. The paints obviously needed a primer and this led to the rather severe chipping and flakeing that we often see.

Cheers

Steve
 
Dave good alternative to the salt ,some of the chipping was extreme and some not heres a good color pic

I am not an expert about the primer but from what I've read while researching for my Jap builds it was a hit or miss affair at best and toward the end not used very much if at all due to supply and the need to speed production. Another pic of how bad it could be

there are some good pics on this site as well

Walkarounds (Real Japanese Aircraft Photos)
 
Thread owner
Thanks for the link Trey.I've added it to my home screen for future use.
 
Status
Not open for further replies.
Back
Top