Theme editor

Scale Model Shop

Jambo's Airfix Mitsubishi Ki-46 II 'Dinah' 1/72

Status
Not open for further replies.

Jambo

New member
Joined
Dec 29, 2014
Messages
80
Reaction score
0
Points
0
1/3
Thread owner
Well I quite fancied this group build, as I thought it sounded like fun for everyone to be building kits at the frugal end of the scale.

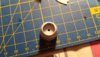
Turning up at the local model shop there were plenty of kits to choose from, but I decided I didn't fancy a European theatre single engine WWII plane for some reason, I built quite a lot when I was younger and just fancied something I'd never done before. I briefly considered some tanks before settling for no apparent reason on a Mitsubishi Ki-46 II rather liking the look of the twin engines on the box art, I left the shop a whole £8 lighter.

So here we go:

Box & receipt:

View attachment 95712
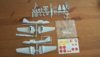

Parts & transfers:

View attachment 95713


There seems to be a fair amount of flash on the parts along with some imperfections in the mouldings which should keep things interesting. I suspect this is a rather old kit with some nice fresh instructions, but at least the transfers are recent so shouldn't be any issues with those :)

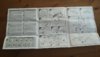
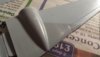
Instructions look very simple compared to the 1/12 Tamiya bike kit I'm working on!

View attachment 95714


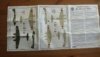
Colour pictures, a complete novelty for me!

View attachment 95715


Not made a decision on paint scheme yet, will have a little think and see what I fancy. I don't have many colours in the required ranges anyway so will have to buy a few regardless. I think the red transfers over the dark green might come up quite dull in practice, I don't have an airbrush so will be using the hairy sticks and wanted something with a colour scheme that wouldn't show that up too badly. There's also yellow transfers for the leading edges of the wings which might be a blessing or a curse depending on how good they are and how well it all fits.

Thinking cap time.

Jambo

View attachment 208735

View attachment 208736

View attachment 208737

View attachment 208738
 

Attachments

  • 20150102_111310.jpg
    20150102_111310.jpg
    2.1 KB · Views: 0
  • 20150102_111555.jpg
    20150102_111555.jpg
    2.1 KB · Views: 0
  • 20150102_111541.jpg
    20150102_111541.jpg
    1.9 KB · Views: 0
  • 20150102_111519.jpg
    20150102_111519.jpg
    2 KB · Views: 0
Thread owner
Having had a chance to assess, the model and instructions:

1) The instructions make references to colours which Humbrol have discontinued

2) The colour references may relate to Acrylic or Enamel paints at any given time

3) Just because you were told to paint something one colour in step 8, doesn't mean it will have a different colour on the full colour page at the back.

I expect I'll be referencing colours used on similar planes in other kits or just taking a best guess using an online colour chart.

Jambo
 
Thread owner
Right,

I've been mulling this one over and actually had my first chance in a week or so to sit down with the kit yesterday not a lot of time, but a start is a start right?

Gordon Gekko was quite clear when he said "green is good" or at least I'm pretty sure that's what he meant, so it'll be going green. With the build a little stalled I decided just to get some pieces off the sprue and cleaned up ready for glue & paint:

View attachment 96921


Flash city, a little time with the knife & file required here.

View attachment 96924


Detail nuts need not apply.

View attachment 96922

View attachment 96923


Not the smoothest of surfaces there's a sort of blotchiness and bumpiness to the plastic, I think the wet & dry is going to get a bit of work here. The panel lines are raised which means if I'm not careful I'll remove what detail there is off the kit. I thought about smoothing these off and scribing the panel lines, but I've never done this before and if I'm not careful I'll just over-complicate this and never start, which is silly. So this is pretty much going to be a straight out of box build, with some artistic licence used where convenient in terms of colours and markings etc.

I'm mostly using Tamiya colours and have X-5 Green, does anyone know how close this is to say "Dark Green" / "Dark Green 2" which seem to be the preferred colours for Japan aircraft? I can live with a little off but a lot would look strange I think.

Secondly in terms of masking and brush painting, I can imagine masking tape is rather more effective using air brush as the paint lands from above, if I'm brush painting is there a lot of point masking up or is this just going to give me a false sense of security before the paint goes everywhere anyway?

Jambo

View attachment 209944

View attachment 209945

View attachment 209946

View attachment 209947
 

Attachments

  • 20150114_213411.jpg
    20150114_213411.jpg
    2.7 KB · Views: 0
  • 20150114_213329.jpg
    20150114_213329.jpg
    2 KB · Views: 0
  • 20150114_213205.jpg
    20150114_213205.jpg
    2.3 KB · Views: 0
  • 20150114_213035.jpg
    20150114_213035.jpg
    2.5 KB · Views: 0
Hi Jambo , Tamiya do a few Japanese colours in their range , XF 11 to XF 14 .The IJ army Green (XF 13 ) and IJ army Grey (XF14) should be perfect , But i would advise getting some Acrylic flow enhancer if youre thinking about brushing Tamiya acrylics. These paints are designed for airbrushing and are nearly impossible to brush larger areas with - the paint dries very quickly and wont stand any overbrushing without lifting the first application. A few drops of flow enhancer will keep them wetter longer and hopefully ease the application , cheers tony

p.s a coat of primer first will also help the paint stick better
 
Thread owner
Thanks Tony,

I suppose the main reason I've ended up with this combination is the 1/12 Tamiya bike I've started, which meant I got the paints for that kit, and trying not to buy too much stuff as I don't have a dedicated indoor mancave, this all gets packed up before bed and I didn't want to buy a rubbish air brush or spend a fortune.

I've got plenty of Halfords primers so can use them as I've seen they are approved elsewhere. Is flow enhancer the same as acrylic thinner? Or are these two entirely different beasts?

Jambo

Sent without a real keyboard
 
Flow enhancer or flow aid can be bought in art shops, it works by lowering the surface tension so the paint flows better. I always put some the water I use for thinning acrylic paints ( about1%).

Never tried it with tamiya paints as I tend to use Vallejo.
 
Yes the Halfords acrylic primers are what i use on every model, theyre excellent. I usually use the grey one . As Dave says flow enhancer can be got from art shops or Hobbycraft , I use the windsor and newton ,one its a totally different beast to thinners . tony
 
Thread owner
Not actually dead, just rather busier than I'd intended to be over winter in the garage working on a race bike for this year...

So, the wings are together and the cockpit is assembled and primed. The paints and magical substances suggested by Tony & Dave have been purchased, but I'm not quite there yet.

View attachment 98068


View attachment 98070


I've decided not to be too fussy about the interior colours as every reference sheet seems to take a different route here and it won't be massively detailed in any case as there are no large windows in the cockpit as there's a fair bit of framework involved. None the less I'll try not to make a complete mess of it!

Jambo

View attachment 211091

View attachment 211093
 

Attachments

  • 20150125_222434[1].jpg
    20150125_222434[1].jpg
    1.9 KB · Views: 0
  • 20150125_222823[1].jpg
    20150125_222823[1].jpg
    1.7 KB · Views: 0
Status
Not open for further replies.
Back
Top