Theme editor

Scale Model Shop

Joe's SIG Airfix F-4 Phantom

Status
Not open for further replies.

flyjoe180

Active member
SMF Supporters
Joined
Jan 18, 2012
Messages
13,310
Reaction score
1,108
Points
113
Location
Earth
1/3
Thread owner
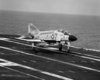
Thanks to Ian sorting out my senior moment, I have stumbled upon the Phantom 2013 SIG Build. I haven't participated in anything like this before. I rediscovered my ancient Airfix 1/72 Phantom last night by coincidence.

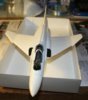
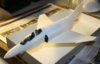
I will build it as a F-4J of VF-31 'Tomcatters'. It will be basic and out of the box. I have already noticed it will have a few issues, particularly the canopy which is missing the small glazing in the frame work between the canopy sections. Should be interesting. Cheers.

View attachment 58670

View attachment 58671

View attachment 60532

View attachment 60533

View attachment 173558

View attachment 173559
 

Attachments

  • IMG_1444.jpg
    IMG_1444.jpg
    2.5 KB · Views: 0
  • F-4J_Phantom_II_VF-31b.jpg
    F-4J_Phantom_II_VF-31b.jpg
    2.3 KB · Views: 0
Looking forward to seeing this build and the fix for the missing canopy part! cheers Trey
 
Thread owner
Thanks Trey. The canopy part is not missing, it just doesn't exist. The centre frame is solid, no provision for any glazing. I sense adventure in my future.
 
Yes indeed that will be a poser for sure! I'm sure you'll get the best of it tho;)
 
Nice one Joe With the canopy just drill it out and use some crystal clear Should sort it out
 
Here i go,sounding like a rivet counter again, but those windows are /were curved on the real thing.Changed a few during my RAF service.Might be difficult to replicate with crystal clear.Then again it's 1/72 so they are probably very small and it might work.Or you might be able to get a one piece replacement vacuform canopy.
 
Thread owner
The 1st of March came round (NZ time) and so I started on my Phantom SIG build.

I have thought about the canopy issue.

View attachment 59141

I can buy a replacement canopy. This will cost extra money which I don't want to spend. I could buy another F-4 kit and steal the canopy, but it would have to be extremely cheap and the canopy would have to be a complete piece, i.e. contain the affected area and include the framing. The next one is to paint the side windows in. A browse on the web shows a few people have done this and it doesn't look too bad. But it isn't the best option I don't think, a bit of a cop out but a good last resort. Another option is to drill into the frame and file the shape of the missing window and glaze it with that crystal clear stuff as Dave suggested, but I don't have any at the moment. I am experimenting with PVA. I'm also experimenting with various types of clear plastic which are being glued to some spare plastic parts. Once dry, I will mask off the window shape and blend the various types of plastic into the frame to see which one works best and suits the rest of the glazing. If that works, I think this is the way I will go. In the meantime, progress has been made.

The crew:

View attachment 59140

The cockpit has been attached and the fuselage halves are together:

View attachment 59142

The Airfix kit has a moving tailplane mechanism, a nice little touch:

View attachment 59143

To say the cockpit is bare is an understatement. I gave the RIO a panel (actually a WWII cockpit instrument panel from an old model), and I sealed the back with some plastic and painted it. At least now one cannot see right through the fuselage!

View attachment 59144View attachment 59145

The wings were built and attached, and this is where I am at as of the end of day one:

View attachment 59146View attachment 59147

I sense much filler in my near future.

View attachment 60936

View attachment 60937

View attachment 60938

View attachment 60939

View attachment 60940

View attachment 60941

View attachment 60942

View attachment 60943

View attachment 173962

View attachment 173963

View attachment 173964

View attachment 173965

View attachment 173966

View attachment 173967

View attachment 173968

View attachment 173969
 

Attachments

  • IMG_1473.JPG
    IMG_1473.JPG
    1.3 KB · Views: 0
  • IMG_1452.jpg
    IMG_1452.jpg
    1.3 KB · Views: 0
  • IMG_1474.jpg
    IMG_1474.jpg
    2.5 KB · Views: 0
  • IMG_1475.jpg
    IMG_1475.jpg
    1.7 KB · Views: 0
  • IMG_1483.jpg
    IMG_1483.jpg
    2.7 KB · Views: 0
  • IMG_1484.jpg
    IMG_1484.jpg
    2.6 KB · Views: 0
  • IMG_1490.jpg
    IMG_1490.jpg
    2.8 KB · Views: 0
  • IMG_1491.jpg
    IMG_1491.jpg
    2.5 KB · Views: 0
Blimey Joe, you'll have yours done before I get mine out of the box :P 
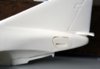
On your canopy issue, I reckon the pva will be fine....fingers crossed !!

Cheers, Neil
 
Thread owner
Thanks Neil. Unsure how to get the PVA to conform over the gap. Any ideas in case my clear plastic experiment goes horribly wrong??
 
Very good start Joe, hope some one comes through with a probable resolve for the canopy

Jim.
 
Well your gong to be finished before we start at that rate. lol

If you can cut the offending window panel out, you will have two options. One fill it with kristal klear. Just take a drop on a tooth pick run it around the hole and make the blob meet up. Sound tricky but its simple enough.

Because its fluid, its a good idea to be able to rest the subject so that the 'window' is laying down. It can sag to the bottom if its one of the larger ones.

Solution two is a plastic sandwich wrapper or some other hard plastic packing. You can cut it with a sharp knife and even shape it with heat. thus you might be able to replicate the curve before you glue it in the opening....

Ian M
 
Thread owner
Thanks for the tips Ian, will report back within the next few days with an update.
 
Thread owner
I have cut plastic for the missing windows. I used a colour profile which I worked out was 1/45 scale, and worked from there. I will position the glazing once the priming has been done.

View attachment 59258View attachment 59259View attachment 59260View attachment 59261View attachment 59262

Then I moved on to do some cleaning up of the airframe, fuel tanks, bombs and other parts. A few small tidy up items aside, the next step should be priming.

View attachment 59263View attachment 59264

I was looking at the decals sheet and looking for any issues. Can anyone spot a problem with these?

View attachment 59265

View attachment 61053

View attachment 61054

View attachment 61055

View attachment 61056

View attachment 61057

View attachment 61058

View attachment 61059

View attachment 61060

View attachment 174079

View attachment 174080

View attachment 174081

View attachment 174082

View attachment 174083

View attachment 174084

View attachment 174085

View attachment 174086
 

Attachments

  • IMG_1503.jpg
    IMG_1503.jpg
    1.7 KB · Views: 0
  • IMG_1507.jpg
    IMG_1507.jpg
    3.4 KB · Views: 0
  • IMG_1511.jpg
    IMG_1511.jpg
    2.3 KB · Views: 0
  • IMG_1513.JPG
    IMG_1513.JPG
    1.3 KB · Views: 0
  • IMG_1502.JPG
    IMG_1502.JPG
    1.8 KB · Views: 0
  • IMG_1497.jpg
    IMG_1497.jpg
    1.7 KB · Views: 0
  • IMG_1496.jpg
    IMG_1496.jpg
    1.6 KB · Views: 0
  • IMG_1492.JPG
    IMG_1492.JPG
    1.4 KB · Views: 0
Coming along nicely Joe.At this rate you will be finished before Ive started!.Cant seeing anything wrong with the decals.
 
Thread owner
Thanks chaps. The decals are supposed to be for VF-31 Tomcatters. These fuselage decals have VF-91 on them. Should be easy to fix though.

There has been a lot of filling and sanding. Many annoying things such as the Sparrow missiles which will be partially imbedded under the fuselage have ejector marks on the side of the fins that will show. The fuel tanks were attached by their ends, causing deformation to the nose caps. More sanding and a bit of filling and then hopefully I might get some primer on it later today. I have found that white plastic is not an easy colour to work with.
 
Thread owner
Progress report.

I spent some time on the accessories. Bombs, Sparrows, exhausts, wheels and landing gear are all being finished off for final construction:

View attachment 59548View attachment 59549View attachment 59553

I made a template for the side windows and cut clear plastic to fit. They are now fitted and along with the canopy parts, are all masked. The clear side windows were my biggest fear, but they appear to have worked well. It took four attempts to get them looking right and fitted flush. I know they are supposed to be curved but that was beyond my skill level for this scale. I'm glad I won't have to paint them on after wards though.

View attachment 59550View attachment 59551

Bomb racks and landing gear doors, apart from the main doors which are fitted to the main legs, are fitted:

View attachment 59552

And this is where I am at as of today:

View attachment 59554

Next step is a prime coat and then the main colours will go on. I can't wait to see the end of filling, sanding and that horrible white plastic. Hopefully this will be reasonably easy from here on.

View attachment 61332

View attachment 61333

View attachment 61334

View attachment 61335

View attachment 61336

View attachment 61337

View attachment 61338

View attachment 174358

View attachment 174359

View attachment 174360

View attachment 174361

View attachment 174362

View attachment 174363

View attachment 174364
 

Attachments

  • IMG_1514.jpg
    IMG_1514.jpg
    3.3 KB · Views: 0
  • IMG_1518.JPG
    IMG_1518.JPG
    2.8 KB · Views: 0
  • IMG_1520.jpg
    IMG_1520.jpg
    1.8 KB · Views: 0
  • IMG_1521.jpg
    IMG_1521.jpg
    2.1 KB · Views: 0
  • IMG_1522.jpg
    IMG_1522.jpg
    1.9 KB · Views: 0
  • IMG_1523.JPG
    IMG_1523.JPG
    2.3 KB · Views: 0
  • IMG_1528.jpg
    IMG_1528.jpg
    2.7 KB · Views: 0
Status
Not open for further replies.
Back
Top