Theme editor

Scale Model Shop

More trees to grow !

  • Thread starter Thread starter Guest
  • Start date Start date
G

Guest

Guest
Thread owner
As many of you know I grow "seafoam " or Teloxys aristata. Which are perfect for Silver Birch trees. Going to add to this with growing some Asparagus Fern Plumosus.

View attachment 373889 .
Having seen "Shovelheads " (Ray ) and Paul's ( Scotties) pine trees I've just ordered 3 plants. Really wanted seeds , but not much choice of vendor, they were either from the US or China.

Roll on next week when they are delivered. :smiling3:.
 

Attachments

  • 1582462516841.png
    1582462516841.png
    8.8 KB · Views: 0
Hi John Percy Thrower Race
Watching with interested. Where did you buy your ferns? Are they indoor or outdoor plants? You can see how ignorant I am regarding green things - plants and Russian armour :hungry: You're knowledgeable about both.
Jim
 
Asparagus ferns are the only way to go for 1/35 pines IMHO. They always look great. PaulE
 
Thread owner
Hi John Percy Thrower Race
Watching with interested. Where did you buy your ferns? Are they indoor or outdoor plants? You can see how ignorant I am regarding green things - plants and Russian armour :hungry: You're knowledgeable about both.
Jim
Hi Jim, in this country they would be normally grown indoors, away from full sunlight. Needing a light misting or placed over a bed of pebbles and well draining soil. Think I have read they can cause irritation to skin so latex gloves will be the order of the day. They can reach 1.5 m in height according to several sites, but the ones I've seen in peoples houses were never that size. Mrs R has asked where I might be growing these ? I mentioned the kitchen window cill, "Mmm " was the reply :smiling: Its already full .
Bought mine from a grower on E Bay:anguished: should be here on Friday.

Thanks Pete, don't why I didn't look there in the first place, as I have an account, they are where I buy the "seafoam " or Teloxys aristata from.
I've just ordered a packet of seed, only 9 in the packet , thank you for reminding me.:thumb2:


Asparagus ferns are the only way to go for 1/35 pines IMHO. They always look great. PaulE

I agree entirely Paul. They have such a fragile look about them, but use them as you say and they look perfect.:thumb2:

While I was buying the plants, I sent for some round Balsa in 5 and 6 mm dia in 200 mm lengths. Also ordered some Glycerine for the treatment part. Want to be ready when every thing is set up .
 
I got mine from a local garden centre. And after chopping off a lot of leaves for my dio. they have all grown back good and strong.
 
Thread owner
Afternoon all .
Though I ought to make a start on the branches. The plants have settled in well, and are putting up new shoots.

First thing was to remove the tallest stems and lay them out on some paper.
2020_7.jpg

Possibly not enough to complete the 7 trees but a start.

In the past when doing the sea foam I've held the plants in the solution and put quite a few in the bucket. This time as these are so delicate I've laid them in the solution and covered with cling film to keep the dust out.

2020_8.jpg
The mix is straight forward, equal parts warm water to Glycerin.

2020_11.jpg2020_12.jpg

One meat container from the supermarket and an ice cream tub with the " branches " in .

Don't know what Paul did to his but I will keep these in the solution for a couple of days to allow the osmosis to occur, then remove and spray with clean water to retain the shape.

The trunks are ready, having being marked with a saw blade, painted with a couple of wash coats.


IMG_20200312_134510574.jpgIMG_20200312_134510574.jpg

IMG_20200312_134507838.jpg

Hope this in interesting to some , any comments or suggestions more that welcome if you have done these before.

John.
 
Looking good John. I did the same but after they had soaked in the mix they were removed layed between sheets of kitchen towel and a few heavy books placed on top. for a few days.
 
Hi John
Most interesting. Hope the fronds don't go all floppy and soggy. I watched a YouTube video and the fronds were dunked in the solution and when taken out looked almost like mush - rather useless. Your idea sounds spot on.
Look after yourself. We are staying in as much as possible and shopping at quiet times and avoiding crowds. Hands are sore they have been washed so much. Not panicking but taking advice onboard and being cautious.
Jim
 
John,

I have always struggled with undergrowth and tree's - so yes - this is informative.
Do you mark the trunks by dragging the saw blade along the length of the "trunk" ?

Paul.
:smiling2:
 
Thread owner
Looking good John. I did the same but after they had soaked in the mix they were removed layed between sheets of kitchen towel and a few heavy books placed on top. for a few days.
Thanks Paul, just what I need to know. Didn't think about the heavy books :thumb2::thumb2::thumb2:

Hi John
Most interesting. Hope the fronds don't go all floppy and soggy. I watched a YouTube video and the fronds were dunked in the solution and when taken out looked almost like mush - rather useless. Your idea sounds spot on.
Look after yourself. We are staying in as much as possible and shopping at quiet times and avoiding crowds. Hands are sore they have been washed so much. Not panicking but taking advice onboard and being cautious.
Jim
Hi Jim, well that had occurred to me that it might well happen with them being so thin, but reading Paul's method of using a heavy book has given me more hope.
Doing all supermarket shopping on line and keeping in the house and garden as much as possible, like you just trying to take care. Mrs R has taken to spraying me with various chemicals she has in stock !!!:smiling2:.


John,

I have always struggled with undergrowth and tree's - so yes - this is informative.
Do you mark the trunks by dragging the saw blade along the length of the "trunk" ?

Paul.
:smiling2:
Hi Paul, yes I firstly gave the dowel a wetting after the sanding to shape. This helps to raise the grain, so that further washes don't have such a dramatic effect and you end up with a woolly mess.

Sanding was carried out with my 100mm large sander that I used at work, certainly saved time, but can be done by hand and a then I used a very thin toothed blade. After I'd applied another coat of wash the very thin saw marks faded so I then used a small-hack saw instead. This time the marks have survived.
Hope this helps.

Very cool Dzhon. PaulE
Cheers Paul. The next couple of days will be interesting to sat the least !

Thanks Guys.
Jpohn.
 
How are they coming along mate??. Looks a great idea. You may be able to solve all our climate change issues with your mini woodland scenes :cool: :thumb2:
 
Morning Mr R,
looks like your having fun with nature :thumb2: All very interesting stuff:nerd:
 
Thread owner
How are they coming along mate??. Looks a great idea. You may be able to solve all our climate change issues with your mini woodland scenes :cool: :thumb2:

Morning mate, will give you a ring later. Things are looking ok at the moment all I can see is a pile of books:smiling:

Nice idea, you could start a new business mate :smiling:

Cheers
Hi Wouter, thanks mate, that thought had crossed my mind. :thinking:


Excellent John - really must try this sometime

Thanks Simon, you ought to.

Morning Mr R,
looks like your having fun with nature :thumb2: All very interesting stuff:nerd:

Hi Si, I am, all good fun.


Well at least we can get in the garden and the weather has been great these last few days. Don't know about most of you but haven't had the full on mo jo for some time. I do a bit, than go into the garden where there is plenty to do. I pressed the first batch as Paul suggested and they are now sitting in the cave, still in between kitchen roll with a couple of steel bars holding them flat.


Mean while I did another batch.


2020_4.jpg
Not very much in the base of the super market meat trays, very handy for this sought of thing. Well spaced out, remembering what Jim has said about seeing some in a real mess.
To keep them submerged I put a second tray on top

2020_5.jpg

Then filled with enough water to hold it down.

This was covered up and left for 3 days, seemed long enough to me with the section s being so thin.

Next came the drying, now getting them out of the mixture and them keeping them flat was the important thing, using a pair of tweezers and lifting from the stalk and then lowering into some clean water to remove the excess mix. Then again using the same method of handling they were laid out on the paper, this kept the " branch " from folding up and becoming really hard to untangle.

From then on a gentle pressing of paper towel removed the majority of the water, after this a full covering and.

2020_2.jpg

a gentle application of warm air, at this point it was very easy to blow the whole lot away, so a little at the time was called for.

2020.jpg

Once the warm air treatment had finished they were placed on more dry paper and covered up with a top layer. Full permission was granted to keep them in the front room and here they are to this day.

2020_2b.jpg


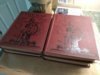
Those sharp eyed will notice the subject of the books. I was given these by a friend when her husband died, brilliant photos and text from news papers at the time.

At the same time I plated some seeds, these are now up and growing well , when fully grown they can cover 1mtr so will go into the garden , as long as they are sheltered they should be ok winter wise.

Just up.

2020_2.jpg

Not 100 % germination only had 8 seed so 50 % success

Today we have .

2020_5.jpg
Sitting in the kitchen, along with the 3 indoor ones.

2020_6.jpg

Thanks for looking in.
Comment and abuse from certain members more than welcome.
John.
 

Attachments

  • 2020_3.jpg
    2020_3.jpg
    2.4 KB · Views: 0
Most impressive Dude 2,

You've got this down to a science for sure. Dr. Livingtree I presume???

I'll get me coat on...…………………………...………..
 
Back
Top