Theme editor

Scale Model Shop

Phils' 1/48 Eduard Fw190 D9

Status
Not open for further replies.

PhilJ

New member
Joined
May 14, 2015
Messages
1,145
Reaction score
0
Points
0
1/3
Thread owner
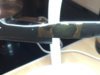
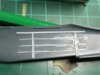
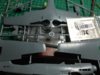
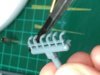
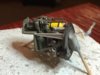
This is my next venture, I purchased some weekend edition D9 overtrees from eduard along with there cockpit PE about six months ago fairly cheaply.


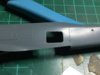
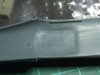
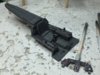
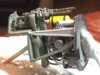
I have some HAD decals that I purchased for it as I wanted to do one of the jv44 "gal lands circus" schemes but not sure if I'll keep that for my profipack edition. The detail looks really decent though I hear this do suffer from fit problems, so lots of dry fitting I guess.


Thanks for looking


View attachment 242170

View attachment 242171
 

Attachments

  • image.jpeg
    image.jpeg
    2.3 KB · Views: 0
  • image.jpeg
    image.jpeg
    2.9 KB · Views: 0
Thread owner
Just playing about with my cheapo multi drill last night and some new micro drill bits last night, bored the exhaust pipes out, it's delicate work but well worth it I reckon.


Before:View attachment 242172

After:

View attachment 242173
 

Attachments

  • image.jpeg
    image.jpeg
    2.5 KB · Views: 0
  • image.jpeg
    image.jpeg
    2.7 KB · Views: 0
Great work on the exhausts Phil, you've got way more patience than me!


I've nearly finished the Eduard D-11 weekend edition & there's a few points you might want to know about.


Firstly, get the wing spar fitted absolutely accurately. If this is wrong, you'll be fighting the kit all the way down the line.


The gun bays need a bit of scratchbuilding IMHO, there's not much in there. But if you leave them closed, the fit of the covers isn't great, especially around the fuselage - that's why I decided to leave mine open.


The cowling was a PITA to fit, a lot of dry-fitting & sanding of the mating surfaces helps.


The landing gear is tricky to fit, mine never came out quite right.


Now many of these issues might be down to my natural cack-handedness, but forewarned is forearmed ;)


Cheers


Patrick
 
Thread owner
\ said:
Great work on the exhausts Phil, you've got way more patience than me!
I've nearly finished the Eduard D-11 weekend edition & there's a few points you might want to know about.


Firstly, get the wing spar fitted absolutely accurately. If this is wrong, you'll be fighting the kit all the way down the line.


The gun bays need a bit of scratchbuilding IMHO, there's not much in there. But if you leave them closed, the fit of the covers isn't great, especially around the fuselage - that's why I decided to leave mine open.


The cowling was a PITA to fit, a lot of dry-fitting & sanding of the mating surfaces helps.


The landing gear is tricky to fit, mine never came out quite right.


Now many of these issues might be down to my natural cack-handedness, but forewarned is forearmed ;)


Cheers


Patrick
Thanks for the advice on the spar Patrick, I'm aware that if you get the early stages wrong these can be a pig so I'll be dry fitting all the way.


I have a couple of different mg 131's coming to try out and will be doing a little bit of scratch build throughout ... Well maybe.


Cheers
 
Thread owner
A little work on the office has been done, hopefully the postie will be dropping some machine guns through in the next couple of days and will I'll begin on the mounts and back of engine.View attachment 242802
 

Attachments

  • image.jpeg
    image.jpeg
    2.8 KB · Views: 0
The dials look quite nice mate. Is that the decals or the pe?


BTw, the side consoles really do stand out


John
 
Thread owner
\ said:
The dials look quite nice mate. Is that the decals or the pe?
BTw, the side consoles really do stand out


John
Hi John


Sorry for the slow reply on this one, they're the eduard PE set, mixed the colours to match in with them aswell and it has worked out well I reckon.
 
Thread owner
These came through todayView attachment 243026

This is the about the third time I have purchased gun barrels from Master, let me say they are well worth the small amount you have to pay for them.

The MG131's have tiny little cooling holes drilled in them they are pucker. As for the Aires full gun the detail is decent enough as you would expect but the barrels don't touch the Masters so I will probably implement the both as a finished gun.


I have also purchased some hollow brass tubing from Albion alloys to make up my wing armaments this time.
 

Attachments

  • image.jpeg
    image.jpeg
    2.7 KB · Views: 0
I'm a big fan of the Master products.They are superb. I will have to get the set they have just released for my Tamiya 1/32 Mosquito.
 
Thread owner
\ said:
I'm a big fan of the Master products.They are superb. I will have to get the set they have just released for my Tamiya 1/32 Mosquito.
Definitely Dave, they're worth their weight in gold.... Which is why I work in 1/48 scale, lol
 
Looks nice Phil. 1:48 is a nice scale for the add ons. I've tried to stop myself using PE in 1:72. That stuff is really small.
 
Thread owner
\ said:
Looks nice Phil. 1:48 is a nice scale for the add ons. I've tried to stop myself using PE in 1:72. That stuff is really small.
I have wondered about that, I sometimes struggle with 1/48 let alone 1/72! I have a couple of 1/72 kits that I might trade in that case.
 
Thread owner
A little progress. The mg 131's were made with Aires resin body and master turned brass barrels. A little bit of hosing/wiring was added by way of scratch and putting it all together was getting rather fiddly in the end and bits kept moving out of place and pinging off, so a little weathering was added and the guns and back end of engine were put together.


Any criticism welcome as always.


View attachment 243533


View attachment 243532

View attachment 243534
 

Attachments

  • image.jpeg
    image.jpeg
    2.8 KB · Views: 0
  • image.jpeg
    image.jpeg
    2.7 KB · Views: 0
  • image.jpeg
    image.jpeg
    3.1 KB · Views: 0
Amazing what a difference a metal barrel will make and they are not always that expensive for the quality they add. Great work on this one Phil.
 
That's looking very good Phil! As Graham said, the AM barrels do add a lot of realism.


I'm currently being tempted by the new Eduard A-9, although the complexity & fit issues might put me off
 
Thread owner
\ said:
That's looking very good Phil! As Graham said, the AM barrels do add a lot of realism.
I'm currently being tempted by the new Eduard A-9, although the complexity & fit issues might put me off
I have the Eduard A-9 in the stash also, there's over well over 200 pieces in that one and it looks incredible but I have heard horrors about these 190 kits
 
\ said:
I have the Eduard A-9 in the stash also, there's over well over 200 pieces in that one and it looks incredible but I have heard horrors about these 190 kits
Maybe I'll wait until you get round to doing that one then ;)
 
Thread owner
So I have decided to make things difficult for myself again, this time opening a rear service hatch and showing a aux fuel tank, stored engine crank ect, more shots will follow with extra progressView attachment 243789

View attachment 243790


The plastic is too thick to look like a realistic panel so I thinned from the inside with my cheapo lidl multi tool I kept checking my progress by shining a light through it.View attachment 243791


I then drilled some holes, cut and sanded the hatch being careful to leave the detailed hinges at the topView attachment 243792


A 1/32 bomb from a box of spares I purchased was glued together then cut to size.


After heating it and slightly squeezing it into a more elliptical shape I added a top and bottom with plasticard.View attachment 243793


Plasticard trimmed I cut and added some thin metal braces/straps. Granted it's not perfect but once painted weathered and in your not going to see 80% of it so should be fine.View attachment 243794


Detail added to interior of opposite panel, still more to be done...


View attachment 243795
 

Attachments

  • image.jpeg
    image.jpeg
    2.7 KB · Views: 0
  • image.jpeg
    image.jpeg
    2.2 KB · Views: 0
  • image.jpeg
    image.jpeg
    2.2 KB · Views: 0
  • image.jpeg
    image.jpeg
    2.1 KB · Views: 0
  • image.jpeg
    image.jpeg
    2 KB · Views: 0
  • image.jpeg
    image.jpeg
    2.3 KB · Views: 0
  • image.jpeg
    image.jpeg
    2.4 KB · Views: 0
Status
Not open for further replies.
Back
Top