Theme editor

Scale Model Shop

Pushing Back .......

toto

Active member
Joined
Apr 22, 2026
Messages
125
Reaction score
196
Points
43
First Name
Tom
Location
Edinburgh
1/3
Thread owner
Ok,

my second attempt to kick my Diorama off.

It's 1944 and the allies are pushing the Germans back across Europe towards Berlin.

Somewhere in Europe the allies have just called in an air strike to soften up a local pod of German invaders to provide the catalyst for the allied ground troops to push them back into a retreat.

We are taking this up just after the successful air strike where the allies are making their presence felt ..... big time.

" Well done Philip, Gerrys on the run ...... leave the rest to us ". " Our pleasure Crawford..... time for tiffen I think .... over and out "

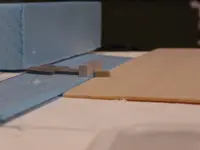
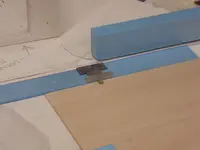
and the scene gets set ..... first images of the new construction on their way soon.

toto
 
Thread owner
Ok baseboard insulation foam cut and stuck to plywood base .....

P1010562.webp

nearly done ....

P1010563.webp

one corner left to go ....

P1010564.webp

and we are there .....

I have since given it an all over coat of very thin plaster slurry just to roughen the surface up a little. ..... just something I do.

I want to heighten the terrain at one end ( allies end ) just to get away from a perfectly flat board. I'm just trying to visualise the merging of the allies end and the Gerrys end. It will be separated by a cobble road.

I'll also be looking through my stash of plaster building casts to create a bombed out building from which to base Gerry's cover for a machine gun nest amongst other things.

more as it comes.

toto
 
Thread owner
so .....

as I mentioned, a quick, very thin application of plaster to thr base and filling in the base board joins .....

P1010571.webp

I can sand these down and fill further where ever required.

Then I started to pay attention to my first structure to be planted and done a bit of a mock up .....

P1010566.webp
enter stage left the " Great Northern Roads " offering of a storehouse ruin. Could be anything actually.

I started to play around with the building ( yet unbuilt ) in different locations in " Gerry's Corner " as this will be where their machine guns and infantry hide out. I bored holes up through the base of the plaster casts and inserted wooden dowels with which I secured them temporarily to the foam base. They can still be moved anywhere .... but for now ..... its here as below.

P1010567.webp

a bit like this ....

P1010568.webp

and a bit further away .....

P1010570.webp

Something planted and I can now start measuring and plotting out other features as I fix the idea's in my head.

more later.

toto
 
Thread owner
OK ..... we continue after a few hums and haws .......

Building number two committed to the scene .... in the form of .....

P1010572.webp

another Great Northern Roads kit ...... this time the workshop ruin ...... A pretty similar " semi industrial " theme as the first " stores ruin " building.

P1010573.webp

and here is a gander at it temporarily fixed to the baseboard via softwood dowels .....

P1010574.webp

this time from the rear ......

P1010575.webp

from a bit of a distance just for a sense of scale .....

P1010576.webp

and showing my doodlings on the foam to mark out the general layout of the street. There will be medium height walls erected on the corner just opposite the latest building. As most of you will have gathered .... I'm making this up on the hoof.

The explosion scene that I spoke of will still be going ahead ( looking forward to that ) its just a question of where will give maximum effect.

Plenty room around the buildings to incorporate different types of vehicles and armour from both sides.

I will be doing some due diligence on this set up before committing to " firming up " my idea's to allow for any changes. The build will be started with the setting out of the cobble roads and pavements. Then the addition of some walls of various heights possibly made from blue board.

The sizes of the road and pavement widths are just temporary and as a guide to work to. They could well end up narrower or wider depending on what pleases my eye.

More leter and hope it is of interest.

regards

toto
 
Last edited:
Thread owner
As mentioned ..... some blue foam to mark out where the walls will be going. they are indicative as the wall thickness etc is presently too thick. These will be scaled down before carving in the surfaces etc.

P1010577.webp

I'm sure you get the picture. thinning down the walls should be a bit simpler as I have a Proxxon foam cutter. Makes a great job of it.

P1010578.webp

this time from a different angle .....

P1010579.webp

and the last for now ...... you'll be glad to know .... :D

I think I am going to start laying down the kerb lines and working out the cobblestone roads and pavement levels.

I'll post up if I get any more progress if there is interest in the build.

many thanks

toto
 
Thread owner
Next step and in order to get some of the infrastructure in place, I'm turning my attention to the roads and pavement. My first issue is that the roads are too flat. does not look convincing enough even once the cobblestones go down.

Soooooo ....... I'm going to introduce a camber .... just slight but hopefully it will manage to be seen in the finished article. My problem will be at the Tee junction but I'll worry about that later. I have some thin balsa wood for this which will be lifted slightly on the roads centre line by means of a thing balsa strip.

I want to do a few measurements first to gauge the height of the kerb stones and what effect the addition of the balsa will have on the finished cobble level. A few random shots will follow to let you see what I am doing. The balsa wood I have at the moment looks thin enough but I wont know for sure if I need to go thinner. I'm hoping not as once the Balsa is installed I will be going over it with a very light coat of thinned down PVA glue to assist adherence of the cobbles later.

Ohhhhh the joys ........ back later.

cheers

toto
 
Thread owner
one or two images for scale purposes ....

P1010592.webp

it looks like the kerb line will need to be lifted in order to give a sufficient increase in height between the road and the pavement .....

P1010593.webp

maybe see the difference here better ..... to me ..... just not enough ....

P1010594.webp

and another last one for now ...... really must go and play around a bit more to get the right look.

cheers for now

toto
 
Thread owner
OK ..... pavements heightened ..... its starting to take shape.

P1010600.webp

we are on our way this time .....

P1010601.webp

now thats progress .....

P1010602.webp

and some more .....

P1010603.webp

and that is it until I have had something to eat. I will start on the Balsa wood camber on the roads later .....

cheers for now.

toto
 

Attachments

  • P1010599.webp
    P1010599.webp
    209.2 KB · Views: 1
  • P1010598.webp
    P1010598.webp
    208.6 KB · Views: 1
Thread owner
Hi Scottie,

Im laying some balsa strip to encourage a slight camber at the moment. Dont know how much more I'll get done tonight but I'll be right back into it tomorrow. Hoping to het the balsa sheet down toletme start on the cobbles and kerbstones. Fingers crossed.

Cheers for now

Toto
 
Thread owner
My last for today

the balsa is going down ....

P1010604.webp

made a start but getting tired now ....

P1010605.webp

should be good to start from where I've left of tomorrow.

So tomorrow ..... finish off the main road and then start getting some kerbs and cobbles down with a bit of luck. I will certainly have to cast more kerb stones as I don't have anywhere near enough. I should have enough cobble stones to make a good start and give an idea of where this is leading. I'll need to cast more paviours too. So .... a bit of a mixed day tomorrow but for now its goodnight from me and time to sit back with a nice red wine and go looking on the internet for more inspiration.

cheers for now

toto
 
Thread owner
A few domestics to do before I get started today. Once I get going, I will complete the balsa sub surface for the roads and give it a total wash in diluted PVA with a little plaster through it. That should seal it for when I start laying cobbles and kerbstones etc.

I will need to check to see if I have cast any plaster manhole covers and drains etc ...... probably not so some time out will be needed for that. ..... just slows things down but looks better breaking up the mass created by the large cobblestone area.

I will then have a decision to make ...... do I progress with laying the paviours at this stage. The casts are quite thin and delicate and if anything were to be dropped on them, there is a severe risk of damage...... to be decided.

Toto
 
Thread owner
Hi John,

It is a big board but I generally struggle to compress. The scene. There are some large area for development but hopefully I'll come up with little details / cameo's to fill them without going overboard and spoiling the main scene.

Any idea's fordetail etc always welcome.

Thanks for tuning in.

Toto
 
Thread owner
Ok ..... back in the mancave and more progress on installing the camber for my cobblestone roads.

P1010605.webp

here is where we left off ....

P1010607.webp

and with the assistance of one of these .....

P1010608.webp

its a bit of a breeze .....

P1010609.webp

left a bit of a gap at the join but did not bother taking it back off ( covered in glue ) to straighten the cut. There will be a PVA / Plaster coat goes on this so I'll mix up a little bit plaster filler for this and simply sand it down.

P1010610.webp

another view .....

P1010611.webp

and one last photo for now.

time to move onto finishing off the ends and let the glue set.

back later.

cheers

toto
 
Thread owner
Hi minitnkr,

I'm in two minds. Either inside one of the buildings or maybe the junction of the road. Open to suggestions though.

If its in a building, it would have to be the larger of the two as thats where Gerry is going to be hanging out. It maybe a little awkward as the blast is ariel. The bomb would have to have come from the rear of the building .... no harm in that

toto
 
Thread owner
ok ....... ends done .....

P1010612.webp

number one .....

P1010613.webp

two .....

P1010617.webp

and the final one .... three.

I have two filetts at the junction but will probably just do a bit of plaster grout in these once I see the form the curved kerbstones take ...... speaking of which ..... they are up next once the glue has had a little longer to dry.

back soon

toto
 
Thread owner
OK ..... looking forward .......

P1010624.webp

A little appreciation of how the kerb stones will be fitting in .....

P1010625.webp

I have not planted them very well as this is for illustration only for now ..... but you get the idea .....

P1010626.webp

and with a few cobbles as well. These little suckers will be laid ..... one at a time ....... 😵‍💫 ..... but laid they will be.

For now ..... I need to see how much the pavement needs to be built up with foam in order to get the paviors level with the top of the kerb. Once that is done ..... stick the foam down then give the whole road, pavement etc a spray with a brown undercoat prior to laying kerbs, cobbles and paviors ...... nothing to it really .....

cheers for now

toto
 
Thread owner
OK ..... just to let you see where this element is leading too ......

P1010627.webp

I've worked out how high I needed to raise the pavement by and started cutting the foam ....

P1010628.webp

I'm sure you can see where this is heading so I'll cut back on the images .....

P1010629.webp

last one for now.

cheers toto
 
Back
Top