Theme editor

Scale Model Shop

Revell 1/48 B-25J Mitchell “Jaunty Jo” - My First Big Build

Joined
Nov 20, 2026
Messages
34
Reaction score
68
Points
18
First Name
Renat
Location
Odesa, Ukraine
1/3
Thread owner
Hi everyone!
Welcome to my first build thread!
The model is already about halfway through construction, so this won't be a traditional build log starting with an unopened box. But before sharing the build itself, I'd like to tell you a little about the aircraft and why I chose it.

Why the B-25 Mitchell?​

I originally decided to build a B-25 after watching the TV series Catch-22. I really liked the aircraft and wanted to have one on my shelf.
What I didn't realise at the time was that the particular aircraft represented by my kit had fought on the other side of the world! While Catch-22 is set in the Mediterranean theatre, my Mitchell served in the Pacific.

A Little History​

The North American B-25 Mitchell was one of the most versatile American medium bombers of WWII, serving in several theatres of war.
The B-25J was the final major production variant, with 4,318 aircraft built. It appeared in both glazed-nose and solid-nose configurations and could carry an impressive amount of forward-firing firepower.
In the Pacific, B-25s became particularly famous for low-level attacks against Japanese shipping, airfields, and other ground targets. These missions were effective, but also extremely dangerous.

The Story of “Jaunty Jo”​

My model represents B-25J-10-NC “Jaunty Jo” (serial number 43-36192), which served with the 498th Bombardment Squadron, 345th Bombardment Group, better known as the Air Apaches, of the Fifth Air Force.
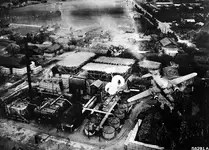
On 26 May 1945, Jaunty Jo took part in a low-level attack on an oil refinery on Formosa (modern-day Taiwan).
During the attack, anti-aircraft fire hit the aircraft's left fuel tank. The damaged bomber was photographed shortly before it crashed near the target.
Sadly, all five crew members lost their lives.
Learning about the fate of this particular aircraft made the project much more meaningful to me. What started as a model inspired by a TV series became a small tribute to a real aircraft and its crew.
For anyone interested, here's the historical reference I've been using:
https://pacificwrecks.com/aircraft/b-25/43-36192.html
1795189264765.webp

About the Build​

The kit is Revell's 1/48 B-25J Mitchell, based on the old Monogram tooling.
I'm still fairly new to scale modelling, and this is my first project of this size and complexity. I mostly paint with brushes and acrylics, although I'm seriously considering getting an airbrush.
The kit has been quite challenging, particularly the fit of some parts. I've already spent what feels like an eternity filling and sanding seams! 😄
But I'm learning a lot along the way, including masking, painting small details, weathering, and restoring panel lines.
Since the model is already partially assembled, I'll start by sharing its current state and some of the work I've done so far.
I'd really appreciate constructive criticism, advice, and suggestions. I'm looking forward to learning from more experienced modellers and sharing my progress.

Thanks for reading!
 
Thread owner
Now, let me tell you a little about what I've done so far, starting with the kit itself.
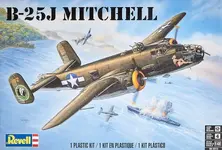
As I mentioned earlier, I chose the Revell B-25J Mitchell in 1/48 scale (kit No. 85-5512).
Since this was my very first model, I didn't put too much thought into choosing the kit. As a result, I ended up with one based on Monogram tooling dating back to 1977.
And believe me, that decision has come back to haunt me more than once during the build! 😄
But more on that later...
1795192217661.webp

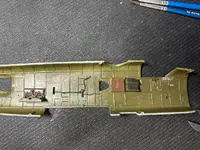
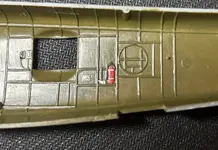
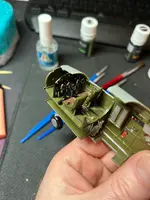
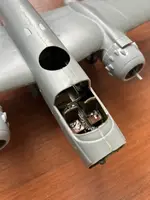
As you would expect, I started with the cockpit and interior.
Back then, I knew absolutely nothing about weathering, so I simply painted everything in the basic colours, adding a few little details of my own here and there just to make things look nicer.
There's a special kind of satisfaction in spending hours painting tiny details that absolutely nobody will ever see once the fuselage is closed up. 😄
By the way, I have a sneaking suspicion that I installed the seats incorrectly. But I've decided not to fix them. I think I'll let this model serve as a reminder of all the mistakes I've made along the way.
1795192552871.webp
1795192575007.webp
1795192602152.webp
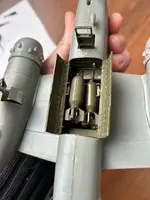
Next came the bomb bay, joining the fuselage halves, attaching the wings and tail assembly, and installing the landing gear.
Unfortunately, I don't have any photos of the individual stages. But what I do have are some very painful and unforgettable lessons learned along the way:
1. FILL AND SAND EVERYTHING AS YOU GO!
Don't leave all the filling and sanding until later, when some areas have become almost impossible to reach.
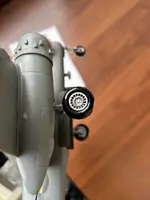
2. DON'T ATTACH ANYTHING THAT STICKS OUT BEFORE SANDING!
Landing gear, hatches, antennas, guns - anything that can get in the way. Ideally, leave those parts off until after painting whenever possible.
3. SCALE MODELLING DOES NOT REWARD IMPATIENCE!
I was so eager to get the fuselage, wings and tail assembled that I rushed through the process.
And I paid for it with HOURS of extremely tedious and frustrating filling and sanding.
Lesson learned. The hard way. 😄
1795193173814.webp
1795193200299.webp

Then came my first attempt at weathering the already assembled parts. Seriously, don't do this. 😄
I used two enamel washes from AMMO by Mig Jimenez: A.MIG-1602 PLW Deep Grey and A.MIG-1614 Neutral Brown.
The results were... well, let's just say there's plenty of room for improvement!
But please don't judge too harshly - this was my very first time using washes, and I definitely learned a few important lessons along the way. 🙂
Hopefully, I'll do a better job when I get to weathering the fuselage and wings!
1795193546225.webp
1795193562580.webp
1795193574892.webp

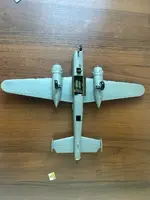
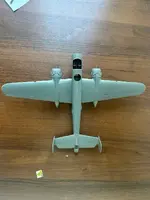
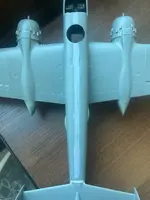
And this is where my Mitchell stands today, after the first round of filling, sanding, and checking the seams with primer.
As you can see, it's still far from perfect. 😅
There's plenty of work ahead, including fixing the consequences of my own mistakes. As the saying goes, I've made my bed, and now I have to lie in it!
There's still a lot of sanding to do. A LOT. And I mean A LOT. Then there's finishing the remaining assemblies, priming, painting, and, of course, weathering.
I'll keep sharing my progress here - whether it's a success or a complete disaster. We'll see how it goes! 😄
I'd really appreciate any advice, constructive criticism, or just a friendly chat.
Although there's no need to tell me I'm terrible at this - I'm already well aware of that! 😂
Thanks for following along, and see you in the next update!
1795193902738.webp
 
A great looking aircraft, not one I've built since I was a kid. I can see you're having a bit of fun with the kit, but hey, it's all part of the learning experience. Great work so far Renat.
 
Thread owner
A great looking aircraft, not one I've built since I was a kid. I can see you're having a bit of fun with the kit, but hey, it's all part of the learning experience. Great work so far Renat.
Thanks so much, Colin! Really appreciate the kind words! 😊

Oh, I’m definitely having plenty of fun with this kit - especially all the filling and sanding! 😂

But you’re absolutely right, it’s all part of the learning experience, and I’m enjoying the journey despite all the challenges.

Thanks again for the encouragement!
 
Thread owner
We could probably do a deal there !
I have a feeling I’ll soon be bombarding this forum with questions about choosing my first airbrush! 😄

But I’m trying to resist the temptation for now, as I’ve already spent roughly the price of a real B-25’s wing on modelling tools, paints and supplies! 😂
 
You've certainly git a kit that requires a lot of basic skills to get it looking right, which is ideal for the start of your modelling journey. An airbrush will transform your experience for the better, once you get the hang of it.

Nice work on the Mitchell Renat, it is coming along very nicely.
 
Thread owner
You've certainly git a kit that requires a lot of basic skills to get it looking right, which is ideal for the start of your modelling journey. An airbrush will transform your experience for the better, once you get the hang of it.

Nice work on the Mitchell Renat, it is coming along very nicely.
Thanks so much, Joe!))

Yes, it’s definitely not an easy kit, and I seem to run into a new challenge at every step. To be fair, a lot of that comes down to my own lack of experience, which is why the build is progressing so slowly.

But on the bright side, I’m gradually learning all sorts of essential modelling skills - how to properly remove parts from the sprues (and why having the right tools makes such a difference!), how to test-fit and adjust parts, when to use different types of glue, and of course, sanding, filling, painting, and much more.

So while this Mitchell is certainly testing my patience, it’s also giving me plenty of opportunities to learn and improve. And that’s definitely a good thing!
 
That's a really interesting but quite sad background story for this aircraft. Certainly not an easy kit to build. Looks like you're off to a good start. With a kit like this you have to expect a lot of filling and sanding.
 
Thread owner
That's a really interesting but quite sad background story for this aircraft. Certainly not an easy kit to build. Looks like you're off to a good start. With a kit like this you have to expect a lot of filling and sanding.
Yes, the story of the aircraft is certainly a sad one. But I find it fascinating to build a model knowing the history of the real aircraft behind it. It becomes a little journey into history, and somehow the whole experience feels completely different.

And you’re absolutely right about filling and sanding! I’ve already discovered that the hard way, and I’m sure I’ll be getting plenty of practice! 😄
 
Thread owner
It’s coming together nicely Renat 🙂

You could have chosen an easier kit as your first but this way you are certainly learning lots of useful skills.

Geoff.
Thanks, Geoff!))

Yes, if I could go back in time with everything I’ve learned so far, I might choose something a bit easier for my first build. Or maybe I wouldn’t!)))

I actually like the fact that, even though progress is slow, this kit keeps pushing me to learn new techniques.

For example, I’ve just picked up a scriber for the very first time, and I’m now trying to figure out how to restore some of the panel lines I managed to destroy while sanding.

And a special thank you to Revell for all those lovely raised panel lines and rivets! 😂
 
great progress renat , its definitely not the easiest kit to start with . I made this years ago and remember using lots of filler and losing most of the panel lines ! But the most important thing is youre enjoying it and its all good practice . Cheers tony
 
Thread owner
great progress renat , its definitely not the easiest kit to start with . I made this years ago and remember using lots of filler and losing most of the panel lines ! But the most important thing is youre enjoying it and its all good practice . Cheers tony
Thanks, Tony! 😄

Yes, this kit is really putting my determination to become a scale modeller to the test! But so far, my determination is winning! 😂
 
Back
Top