Theme editor

Scale Model Shop

Revell 1/87 Camouflaged German Light Goods Locomotive BR 50.

spanner570

New member
Joined
May 26, 2009
Messages
15,599
Reaction score
613
Points
0
1/3
Thread owner
I have to diverse with my model making. To construct the same theme/type would drive me insanitary!... :upside:

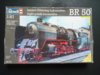
I realise there will be little interest in the build, but here's something a bit away from the norm. I'm going to try and paint the model in the German WW2 early 'Digital' camouflage.

P1250744.JPG

Cheers.

Ron
 

Attachments

  • P1250744.JPG
    P1250744.JPG
    2.9 KB · Views: 0
Thread owner
Thanks Jim. Welcome aboard. I'm sure you will have no problem finding a seat!
 
Thread owner
Grass mowed, so plenty of time left today for my den.
A nice model to put together.

Here's the progress.

Main chassis, cylinders, drive wheels, front bogies, brake blocks and those two cylinder thingies on the top fitted.
If anyone decides to build a loco, it is important to get the wheels spot on. See those solid lumps on the lower part of the wheels? They must all line up.
P1250657.JPG

....because the ones on the other side are turned through 90 degrees. Get this part wrong or forget to do it, and the con-rods, running gear etc. just won't fit.
P1250658.JPG

There you go. One 2-10-0 off and running!

Cheers.
Ron
 
Wow, quartering! Chassis looking good. I think the cylinders are the air brake reservoirs.....
 
Thread owner
Thanks Tim. Good info. I wondered what they were.
Just goes to show I know now't about chuff chuffs. I'll stick to brewing beer and wine.. :smiling4:
 
Thread owner
All the wheel connecting bits added, no glue used. All the various linkages are fixed in place with 'snap in' pins. Thus, everything turns! I just tried it once, but no more, as it's all a bit frail.
The initial care in lining up all the wheels properly pays dividends at this stage.
I've also brushed on some grey primer.
P1250659.JPG


P1250660.JPG

Tim, if you read this, would you be so kind as to name any important bits please? Thanks.

The nearest I've got to knowing the bits and bobs was when I train spotted in the late '50's and into the '60's, and was allowed on the footplate of various steam engines when they were either in the sheds or stationary at a platform. Even then the driver talked a foreign language as he showed this snotty little creature what lever did what!

Different times, or what?!

Cheers.
Ron
 
The nearest I've got to knowing the bits and bobs was when I train spotted in the late '50's and into the '60's, and was allowed on the footplate of various steam engines when they were either in the sheds or stationary at a platform. Even then the driver talked a foreign language as he showed this snotty little creature what lever did what!
What ron forgot to tell us is this was the 1850’s!
and yes george stephenson was very technical with his footplate explanations , heres an image of the very event , you can see young ron nicking coal while mr stephensons back is turned! 777380F6-97C6-4ECD-AD0A-D617C2DC53F2.jpeg
 
Thread owner
......you can see young ron nicking coal while mr stephensons back is turned!

Bit of respect young squirt!

Anyway, you are wrong. Yes, that is me in the picture, but I'm not nicking coal, I'm heading for the beer barrel you can see at the back of Mr. Stevenson's loco!
 
Thread owner
On to more mundane things....

I've made, and fitted the long lump of metal thing that presumably people walk along and the front buffers etc. fit on.
P1250664.JPG


P1250665.JPG

Cheers.
Ron
 
Hi Ron
Looking good already and a surprising level of detail for this small scale.
Jim
 
That’s the footplate Ron......from the other picture, back to front, Brake actuating cylinder, cab steps (I think), the long one joining all the wheels is the connecting rod, can’t remember what the rod connecting the cylinder to the wheel is Called, but that’s What makes the wheels go round, the smaller rods all enable the piston valve to shove steam in the cylinder at the right time, on the cylinder the top one is the piston valve, and the lower one is the drive cylinder, and the bit sticking out the front is the drain cock cock.....there is a reversing lever on there as well, this enables the gear to be set up so it can go backwards.....
 
Back
Top