Hi,
It's about time I post the build on the completed 109 which I promised. For those who would like to see the completed kit, just click on the link here
I've had this kit in the stash when I was still in artschool. So by the time I decided to build it, the decals were absolutely horrible, crumbly and brittle. I coated them with a flexible varnish just in case they would shatter on contact with water.
Please bare with me as I only managed to salvage some of the pictures from the old forum so they might be a bit jumbled up in sequence
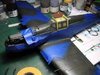
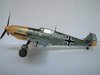
I was quite surprised that the instruction sheet was in part colour...quite a big thing in those days. The box art featured Helmut Wicks markings and camo livery. There's another set of markings for an iconic Battle of Britain BF109 with red lion not sure what it is with wings.
View attachment 321093
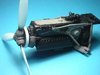
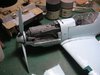
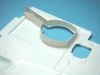
I planned to do a simple build and not super detail the engine so I slapped it together and it looked pretty good...if only I had the time and patience to detail it.
View attachment 321094 View attachment 321095
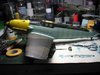
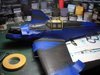
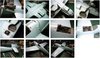
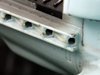
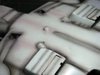
Sprayed all interior parts with RLM grey...that's what I thought until I checked the bottle ...it was German grey. No problem, I would spot spray larger surface areas with the right colour to get the weathered look.
View attachment 321096 View attachment 321097
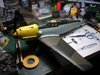
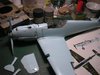
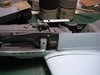
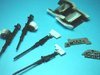
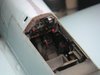
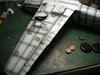
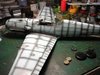
I checked the overall fit by dry fitting and good thing I did as the engine top didn't fit and bits had to be sliced off. The gap at the wing root was brought on by the weight of the wing but would disappear when glued together to create the dehydral. Of the two canopy versions supplied I chose the early less squarich one to depict a Battle of Britain version.
View attachment 321098 View attachment 321099
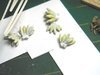
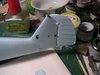
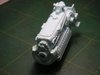
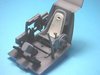
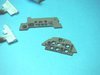
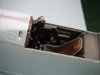
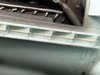
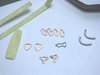
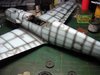
Besides the flaps and elevators the kit comes with a few more working parts like the rudder and main undercarriage. It was apity to leave the engine in flate monotone colour so I darkened certain parts with semi-gloss black and dry brushed with steel to bring out the raised detail.
View attachment 321100 View attachment 321101
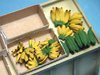
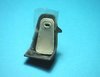
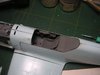
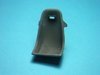
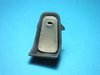
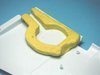
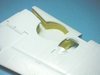
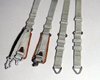
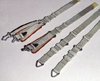
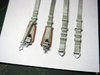
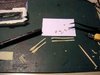
The seat looked rather plain and was crying for an addition of some leather padding made from two part putty. The cellotape was to prevent the putty from sticking and once cured was removed for easy painting.
View attachment 321102 View attachment 321103 View attachment 321104 View attachment 321105
More next showing how I tackled adding side walls to the wheel well.
Cheers,
Richard
It's about time I post the build on the completed 109 which I promised. For those who would like to see the completed kit, just click on the link here
I've had this kit in the stash when I was still in artschool. So by the time I decided to build it, the decals were absolutely horrible, crumbly and brittle. I coated them with a flexible varnish just in case they would shatter on contact with water.
Please bare with me as I only managed to salvage some of the pictures from the old forum so they might be a bit jumbled up in sequence
I was quite surprised that the instruction sheet was in part colour...quite a big thing in those days. The box art featured Helmut Wicks markings and camo livery. There's another set of markings for an iconic Battle of Britain BF109 with red lion not sure what it is with wings.
View attachment 321093
I planned to do a simple build and not super detail the engine so I slapped it together and it looked pretty good...if only I had the time and patience to detail it.
View attachment 321094 View attachment 321095
Sprayed all interior parts with RLM grey...that's what I thought until I checked the bottle ...it was German grey. No problem, I would spot spray larger surface areas with the right colour to get the weathered look.
View attachment 321096 View attachment 321097
I checked the overall fit by dry fitting and good thing I did as the engine top didn't fit and bits had to be sliced off. The gap at the wing root was brought on by the weight of the wing but would disappear when glued together to create the dehydral. Of the two canopy versions supplied I chose the early less squarich one to depict a Battle of Britain version.
View attachment 321098 View attachment 321099
Besides the flaps and elevators the kit comes with a few more working parts like the rudder and main undercarriage. It was apity to leave the engine in flate monotone colour so I darkened certain parts with semi-gloss black and dry brushed with steel to bring out the raised detail.
View attachment 321100 View attachment 321101
The seat looked rather plain and was crying for an addition of some leather padding made from two part putty. The cellotape was to prevent the putty from sticking and once cured was removed for easy painting.
View attachment 321102 View attachment 321103 View attachment 321104 View attachment 321105
More next showing how I tackled adding side walls to the wheel well.
Cheers,
Richard
Attachments
-
 bf10.jpg1.7 KB · Views: 0
 -
 bf9.jpg2.5 KB · Views: 0
 -
 bf8.jpg2.9 KB · Views: 0
 -
 bf7.jpg3.2 KB · Views: 0
 -
 bf6.jpg3.1 KB · Views: 0
 -
 bf5.jpg2.3 KB · Views: 0
 -
 bf4.jpg2.6 KB · Views: 0
 -
 bf3.jpg2.1 KB · Views: 0
 -
 bf2.jpg2.6 KB · Views: 0
 -
 bf11.jpg1.5 KB · Views: 0
 -
 bf12.jpg1.7 KB · Views: 0
 -
 bf13.jpg2.4 KB · Views: 0
 -
 bf1.jpg2.9 KB · Views: 0


")