Theme editor

Scale Model Shop

Roberts Tamiya 1/48 Swordfish ( with extras)

Status
Not open for further replies.
Thread owner
Small update
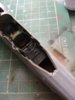
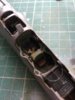
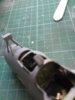
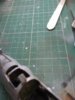
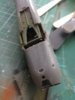
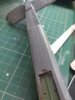
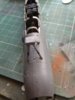
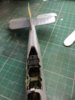
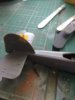
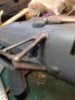
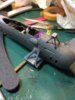
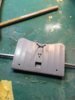
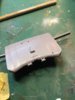
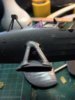
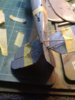
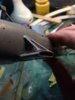
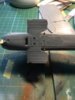
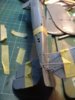
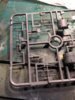
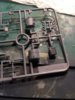
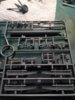
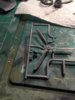
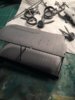
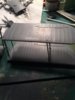
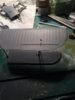
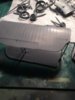
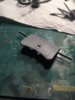
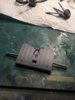
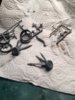
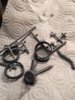
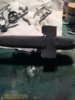
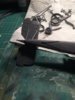
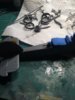
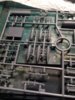
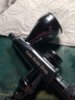
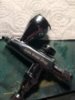
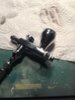
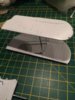
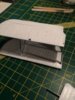
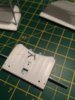
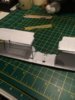
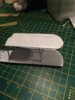
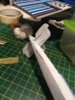
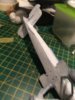
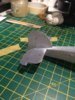
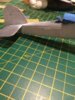
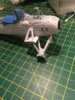
I've finally got the fuselage sealed up and placed the tail unit in place. The fit was a bit tricky obviously getting the cage in the exact position ( lords of dry fitting etc ) Onve the interior was given plenty of washes and correctly sealed it was a good fit. There are some fine seam lines I'll have to treat but I'm on to John at SMS to get some good fine sealer I have only mr surfacer 500 and squadron green and red so maybe I need to invest in a few more finer fillers.
View attachment 274874 View attachment 274875 View attachment 274876 View attachment 274877 View attachment 274878 View attachment 274881 View attachment 274882 View attachment 274883
 

Attachments

  • image.jpeg
    image.jpeg
    2.8 KB · Views: 0
  • image.jpeg
    image.jpeg
    2.5 KB · Views: 0
  • image.jpeg
    image.jpeg
    2.6 KB · Views: 0
  • image.jpeg
    image.jpeg
    2.5 KB · Views: 0
  • image.jpeg
    image.jpeg
    2.4 KB · Views: 0
  • image.jpeg
    image.jpeg
    2.5 KB · Views: 0
  • image.jpeg
    image.jpeg
    2.6 KB · Views: 0
  • image.jpeg
    image.jpeg
    2.4 KB · Views: 0
  • image.jpeg
    image.jpeg
    2.5 KB · Views: 0
  • image.jpeg
    image.jpeg
    2.5 KB · Views: 0
Thread owner
Mini update
I have arrached the lower wing/ fuselage struts at the fuselage part but not the wing root just yet as this will aid me in the alignment of the wings/ undercarriage at a later stage ( I read this somewhere ) also I have attached the tail struts and tail/ fuselage support.
The fuselage glazing and cockpit glazing has been given a humbrol maskol coat to protect it when it comes to spraying.
Next are the wings ( more study and more dry fitting
Enjoy
Comments welcome
View attachment 274884 View attachment 274885 View attachment 274886 View attachment 274887 View attachment 274888 View attachment 274889 View attachment 274890 View attachment 274891 View attachment 274892
 

Attachments

  • image.jpeg
    image.jpeg
    2.6 KB · Views: 0
  • image.jpeg
    image.jpeg
    3 KB · Views: 0
  • image.jpeg
    image.jpeg
    2.5 KB · Views: 0
  • image.jpeg
    image.jpeg
    2.5 KB · Views: 0
  • image.jpeg
    image.jpeg
    2.8 KB · Views: 0
  • image.jpeg
    image.jpeg
    2.8 KB · Views: 0
  • image.jpeg
    image.jpeg
    2.7 KB · Views: 0
  • image.jpeg
    image.jpeg
    2.6 KB · Views: 0
  • image.jpeg
    image.jpeg
    2.9 KB · Views: 0
Thread owner
Primer primer and more primer but here's the thing it went down so well and with the new mini A/ b I got from John at SMS I had no stoppages from start to finish. Ok there is a bit of getting used to the single action a/b but it is really spectacular.
I used some old foam to pack the cockpit before separating.
The wings have been assembled prior to priming but I'll attack the raging and bracing once the camo is on the wings.
I intend to build up the 3 sections of wings and spray in one s will I hope give an even camo pattern.
Pics of primed progress

View attachment 274982View attachment 274995 View attachment 274983 View attachment 274984 View attachment 274985 View attachment 274986 View attachment 274987 View attachment 274988 View attachment 274989 View attachment 274990 View attachment 274991 View attachment 274992 View attachment 274993
 

Attachments

  • image.jpeg
    image.jpeg
    2.5 KB · Views: 0
  • image.jpeg
    image.jpeg
    3.1 KB · Views: 0
  • image.jpeg
    image.jpeg
    2.9 KB · Views: 0
  • image.jpeg
    image.jpeg
    3.3 KB · Views: 0
  • image.jpeg
    image.jpeg
    3 KB · Views: 0
  • image.jpeg
    image.jpeg
    2.8 KB · Views: 0
  • image.jpeg
    image.jpeg
    2.7 KB · Views: 0
  • image.jpeg
    image.jpeg
    2.6 KB · Views: 0
  • image.jpeg
    image.jpeg
    2.3 KB · Views: 0
  • image.jpeg
    image.jpeg
    2.3 KB · Views: 0
  • image.jpeg
    image.jpeg
    2.5 KB · Views: 0
  • image.jpeg
    image.jpeg
    2.5 KB · Views: 0
  • image.jpeg
    image.jpeg
    2.5 KB · Views: 0
  • image.jpeg
    image.jpeg
    2.9 KB · Views: 0
  • image.jpeg
    image.jpeg
    3 KB · Views: 0
  • image.jpeg
    image.jpeg
    2.6 KB · Views: 0
  • image.jpeg
    image.jpeg
    2.6 KB · Views: 0
  • image.jpeg
    image.jpeg
    2.6 KB · Views: 0
  • image.jpeg
    image.jpeg
    2.7 KB · Views: 0
  • image.jpeg
    image.jpeg
    2.6 KB · Views: 0
Thread owner

Attachments

  • image.jpeg
    image.jpeg
    2.9 KB · Views: 0
  • image.jpeg
    image.jpeg
    3.3 KB · Views: 0
  • image.jpeg
    image.jpeg
    3 KB · Views: 0
  • image.jpeg
    image.jpeg
    2.8 KB · Views: 0
  • image.jpeg
    image.jpeg
    2.7 KB · Views: 0
  • image.jpeg
    image.jpeg
    3.1 KB · Views: 0
  • image.jpeg
    image.jpeg
    2.5 KB · Views: 0
  • image.jpeg
    image.jpeg
    2.6 KB · Views: 0
  • image.jpeg
    image.jpeg
    2.5 KB · Views: 0
  • image.jpeg
    image.jpeg
    2.4 KB · Views: 0
Really great looking model Robert you should be proud. I like these old biplanes and look forward to watching your progress.
 
Good work so far Robert, all those little fiddly bits that need priming! I tend to realise I've missed a bit in most of mine
 
Thread owner
Well it's Ben a while since I got on with this project so thought I'd show you where I'm up too.
The undercarriage is on and aligned correctly ( even used a spirit level ). I've given the undersides a 2 coat of Vallejo white paint 71.001. I'll prob give a final thinned mist coat before I seal with clear.
Once this is all finished and dry I'll start masking up ready for the top camo pattern.
Engine is compleated now and weathering to start next ( oil etc stains )
Pics and comments welcome
View attachment 277053 View attachment 277054 View attachment 277055 View attachment 277056 View attachment 277057 View attachment 277058 View attachment 277059 View attachment 277060 View attachment 277061 View attachment 277062 View attachment 277063
 

Attachments

  • image.jpeg
    image.jpeg
    2.7 KB · Views: 0
  • image.jpeg
    image.jpeg
    2.8 KB · Views: 0
  • image.jpeg
    image.jpeg
    3 KB · Views: 0
  • image.jpeg
    image.jpeg
    2.8 KB · Views: 0
  • image.jpeg
    image.jpeg
    3 KB · Views: 0
  • image.jpeg
    image.jpeg
    2.6 KB · Views: 0
  • image.jpeg
    image.jpeg
    3.3 KB · Views: 0
  • image.jpeg
    image.jpeg
    3.1 KB · Views: 0
  • image.jpeg
    image.jpeg
    3.3 KB · Views: 0
  • image.jpeg
    image.jpeg
    3.1 KB · Views: 0
  • image.jpeg
    image.jpeg
    3.2 KB · Views: 0
Nice to see the old dear moving along again.
 
Thread owner
Thanks guys for the positive comments.
I'm hoping to get some more done this weekend.

Regards

Robert
 
Status
Not open for further replies.
Back
Top