Theme editor

Scale Model Shop

SE5a CONSTRUCTION BEGINNING TO . . .

Status
Not open for further replies.
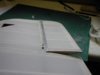
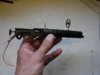
Looking every inch an SE5a now Grahame, can't wait to see her painted up ready to go.

Regards..........Mark
 
Thread owner
I’m also looking forward to getting some colour on, but what colour is the question? The answer would at first appear simple; PC10, but that is where the problems really begin! I’ve done a lot of research and the only firm conclusion I’ve arrived at is that nobody knows what colour PC10 should be.

PC10 was not primarily a colour, PC stands for Protective Coatings and protection of the fabric from UV light, fuel and other contaminates was its main purpose. As such it was as much about the under coats as the final colour coat and more about the quality (ie proportions of solids to solvents etc) than the actual colour of the paint. Only later in the war as aircraft became more capable and any aircraft caught on the ground was a “sitting duck” the idea of using the paint as camouflage was developed but the colour seems to have varied from a fairly bright green through many shades of brown to almost black.

I did find a recipe for “PC10”; it was like something from Shakespeare


"Eye of newt and toe of frog,

Wool of bat and tongue of dog,"

Seriously it had several variables, use this or this, and measured some ingredients in so many “handfuls” so it’s not surprising that the colour varied.

I’ve decided to use “Warbird Colors” from http://fighteraces.co.ukfor no better reason than it is a shade of PC10 that I like, an added advantage is that it’s water based, but it’s not cheap!
 
Hello Graeme, I'm using the PC10 from the Warbirds chap, Im hoping to be spraying it in the next week or so. Are you spraying or brushing?

Giles
 
Thread owner
Giles

It was very rare indeed for any WW1 aircraft to be spray-painted so brush painting using a soft brush is the best method for a realistic finish. The under surfaces were just clear doped linen (CDL) and I’m still debating whether to use the “linen” paint or to “age” the Solartex by staining it; apparently cold tea does the job but I’ll have to do some experimenting first.

I’ve heard good reports about Warbirds paint so I hope they’re born out in practice, I like the sound of it; water based and fuel proof!

Grahame
 
Thread owner
In my reply to Giles above I stated “It was very rare indeed for any WW1 aircraft to be spray-painted”; I should of course have added the caveat “ to the best of my knowledge from the research I have done.” in fact that caveat should be inferred for any “fact” about the original SE5a that appears anywhere in this thead!

The Internet is a wonderful thing but it can sometimes be a case of too much of a good thing and you can get contradicting information. Whist researching PC10 all the references I found referred to brushing the paint but I also found a photo of an SE5a which appeared to have sustained some damage to the fin, the repair had the (silver?) undercoat applied and it appears to have been sprayed on.

So we appear to have photographic evidence of spray painting but there is no write up about the photo so we don’t know really what it shows, it’s just conjecture, the photographic technology at the time wasn’t the best so it may not even really be spray-painted.

I suppose, if you’re trying to reproduce the model as it would have been during WW1 and not as a restoration, you can do whatever you like and no one can prove any different.
 
All this talk about spray painting - does anyone know when spray painting first became widespread?
 
I painted my SE5 last night with the Warbirds PC10 - I'll be posting pics to my build in a day or so. It is a little bit on the olive green side of things, but the sparying went well. I'm not very experienced with spraying, but the paint seemed easy to work with. The reason I chose to spray rather then brushing is although I want to make my model as scale as possible I also like a smooth paint finish! My brushing is very poor!
 
Hey Grahame, I'm thinking of brushing on my linen paint rather than spraying - do you think a soft brush will help reduce the appearance of brush lines?

Giles

PS I've updated my build with pics of the PC10 - olive stylee!
 
Thread owner
Giles

I’d use a soft brush about 20mm wide and don’t over brush too much, the finish shouldn’t really show brush marks as such but it’s definitely not a “spray” finish. Don’t be too worried about the finish; remember that they didn’t have the filtered air painting booths that are used today! Your models looking good by the way, I can’t remember if I’ve already posted a link to your build thread somewhere in this thread but here it is anyway.

http://www.rcmf.co.uk/4um/index.php/topic,33284.0.html

Grahame

My experiment of “aging” the Solartex by staining with cold tea has failed; a great pity, I like to get away with using “free” materials! The fabric just wouldn’t take up the colour, perhaps it has to be a natural material such as silk, it’s a long time since I read the article and I honestly can’t remember details.
 
Cold tea will not adhere to the Solartex as you have found out,this is due to the glaze finish,try using watered down artists acrylic paint,yellow ocre should do the trick applied very thinly,once applied give a quick coat of Krylon clear to seal the finish.

To thin the paint buy some acrylic medium,this is better than water as it will assist in adhering to the Solatex.
 
Thread owner
Thanks for the tip Barry but if I'm going to have to use paint and "fork out some readies" I might as well use the warbirds "linen" paint; it's all ready to apply, fuel proof and it will ensure that there's no reaction with the rest of the paint.
 
Are you covered?

Grahame

I am proposing to cover with Ceconite (if I ever get that far!). I had never heard of it but apparently it is light, strong, has the right appearance and is CAA approved for light aircraft - but more tedious to apply. I have bought a bit for experimentation, complete with it's adhesive, and I shall make some wing pieces for trials. I am especially concerned to achieve the under-camber but glueing to the bottom of the ribs could give an uneven appearance. On the other hand stitching, although realistic, could be considered more WRAF than RAF (very politically incorrect!). We shall see, the experimentation is the fun. Or do you know of this material? Have you (or anyone else) ever used it? Any input welcomed, I am Solartex these days (having come from tissue, water spray and dope this is all a bit new)
 
Grahame,

I'm going to be painting on my linen tonight, so we'll see how it looks. I've got a great SE5 book - SE 5/5a Aces of World War 1 - which has some great colour schemes so I'll be making a final decision on them soon.

Thanks for the tips on roundels - I might get that for this weekend, we'll see.

Linney - I was worried about the underside of the wings, I covered with nylon, but it worked just fine. I used some pins on a couple of ribs if it looked like lifting.

Giles
 
Thread owner
Linney


I have to admit that I’ve got no knowledge of Ceconite but personally I’d use Solartex every time; it’s designed for models, it’s a proven method that’s easy to work with and looks good. You say that Ceconite is light but compared to what? It’s designed for full size aircraft not models. I’ve stitched my wings to ensure that the under camber stays in place but most people don’t bother and they obviously don’t have any trouble so I suppose it’s down to a matter of personal choice.


Grahame


A nice feature on the SE5a is the metal “tread plates” on the lower wing stubs; they have a ridged non-slip surface. It wasn’t clear when I made them if the ridges would look the part so I gave them a lick of paint and tried a bit of weathering before gluing them in place and I’m very pleased with the results.


View attachment 262957


To produce the parallel ridges I made a jig from20swg piano wire and tinplate. I then embossed the ridges using a length of 10swg piano wire ground to a smooth point.


View attachment 262958


It took a bit of experimenting to get it right; at first the wires were too long and opened out as I scribed the grooves
 

Attachments

  • tread plate 2.jpg
    tread plate 2.jpg
    1.6 KB · Views: 0
  • tread plate 1.jpg
    tread plate 1.jpg
    1.8 KB · Views: 0
I've been scratching my head wondering how to do these plates. They're perfect! Thanks for sharing. You have been a great help to me with my plane.

Steve
 
Ceconite is a commercial fibreglass process used on light aircraft and control surfaces,the adhesive is very much like balsa cement except a lot heavier,once fixed into place it can be heat shrunk just like Solartex,the process can be used as a substantial replacement for standard Irish linen and flax materials which sadly although accurate have a very poor resistance to the suns rays,even when treated with red tautening dope and silver cellulose finishes which acts as a ultra violet light barrier to slow down damage to the fabric.

The above refers to the full sized materials as opposed to any that are used for modelling which I am not aware of,how do I know about it ? well was the first person in the UK to use it on the control surfaces of a De Havilland Heron aircraft.
 
Thread owner
Thanks for the run down on Ceconite Barry, it certainly doesn’t sound like a modeling material to me and I’m glad you’re finding the thread helpful Steve; sharing ideas and information is what it’s all about, how would we manage without Lithoplate?


Talking of which, I’ve just fitted the aileron gap covers made from the stuff.


View attachment 262959


I don’t want to upset any farmers but the covers certainly look a bit “agricultural” but it’s how it’s done on the full size. The cover is bent at an angle to allow the aileron to move; looking from the rear you can see the gap between the cover and the aileron.


View attachment 262960


The bend in the cover may well be able to be reduced once the correct amount of aileron deflection required has been determined during the test flights.


The cover is split for the aileron horn. In this photo you can also see the drainage holes, I’m not sure whether or not they’ll be visible in flight only time will tell.


View attachment 262961


The cover has a frayed tape fairing it to the wing. A thing to remember about frayed tapes is that all the edges are frayed. Because Solartex has an adhesive on one side, to start a fray you have to nick the material so you can’t actually fray all the sides. The best thing to do is to fray the long sides and then “fray” the ends when the tape is cut to length.


View attachment 262962


To do this cut lots of small nicks with a scalpel, turn the tape over and repeat from the other side; it looks right when it’s been ironed in place but a straight cut stands out like a sore thumb.
 

Attachments

  • rib tape.jpg
    rib tape.jpg
    1.7 KB · Views: 0
  • aileron 3.jpg
    aileron 3.jpg
    1.5 KB · Views: 0
  • aileron 1.jpg
    aileron 1.jpg
    1.7 KB · Views: 0
  • aileron 2.jpg
    aileron 2.jpg
    1.9 KB · Views: 0
Thread owner
I was planning on making a start with the paint next week but if this nice weather keeps up flying will take precedence! In the meantime there’s a few bits and pieces to make.


The fairings for the screen are “plunge moulded” as one unit, cut in half, glued to a litho plate base and given a coat of silver Solarlac.


View attachment 262963


This is where they fit virtually hiding the screen side pillars.


View attachment 262964


The Vickers front sight starts as 2 rings and some brass rod and tube.


View attachment 262965


Holes are drilled in the rings, which are still quite thick at this stage for ease of handling and the unit assembled over the template ready for soldering.


View attachment 262966


The outer ring is a bit too small but to get it correct I’d have to buy a 3m length of 25mm tube, which seemed a bit much considering I only needed about 6mm! As I had some 22mm I decided to use that, it’s near enough for me.


When it’s been soldered the inner “cross hairs” are removed and the rings filed down to a reasonable thickness.


View attachment 262967
 

Attachments

  • vickers 16.jpg
    vickers 16.jpg
    1.8 KB · Views: 0
  • vickers 15.jpg
    vickers 15.jpg
    2.1 KB · Views: 0
  • vickers 14.jpg
    vickers 14.jpg
    1.7 KB · Views: 0
  • screen 4.jpg
    screen 4.jpg
    2.2 KB · Views: 0
  • screen 3.jpg
    screen 3.jpg
    1.8 KB · Views: 0
Thread owner
The Vickers is now finished with front and rear sights, the copper “pipe” is for the interrupt.


View attachment 262970


The Vickers in position.


View attachment 262971


The magneto handle is made from brass sheet with 2 bead-ended dress makers pins, the larger one has the bead cut in half, epoxied to it.


View attachment 262972


The base is litho plate; placing the litho plate on some scrap 1/16th balsa, positioning a suitable washer and giving it a firm tap with a tack hammer forms the large ring. With the position marked the litho plate is turned over and the forming around the washer finished off with some hard balsa.


View attachment 262973


Although I’ve worked with litho plate for many years it never ceases to amaze me just how versatile it is and what complex shapes can be easily formed. A lick of paint, some subtle weathering and the jobs done, but I won’t fit it to the model until after the PC10 paint job.


View attachment 262974


I think that’s all the “ bits and pieces” made but I’ll take a good look at all my reference photos just to make sure, it’s amazing what you (I) can miss!
 

Attachments

  • magneto 2.jpg
    magneto 2.jpg
    2 KB · Views: 0
  • magneto 1.jpg
    magneto 1.jpg
    1.8 KB · Views: 0
  • vickers 18.jpg
    vickers 18.jpg
    2.8 KB · Views: 0
  • vickers 17.jpg
    vickers 17.jpg
    2 KB · Views: 0
  • magneto 3.jpg
    magneto 3.jpg
    2.1 KB · Views: 0
Thanks for all the posting makes very interesting reading

Can I ask a question please in Vickers picture

copper “pipe” is for the interrupt
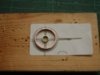
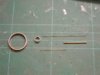
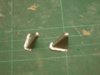
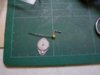
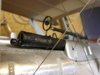
did this work hydraulically from 'Engine oil' or a seperate supply and where any other systems hydraulic on aircraft that earlyThanks

Regards Tony
 
Status
Not open for further replies.
Back
Top