Theme editor

Scale Model Shop

Spanner's Airfix 1/72 Fw190 A-8. Eastern Front.

spanner570

New member
Joined
May 26, 2009
Messages
15,599
Reaction score
613
Points
0
1/3
Thread owner
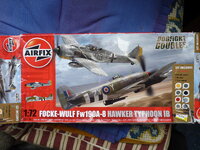
This kit came to me as part of the 'Dogfight Double' kits from our good mate LeeW. Thanks Lee.
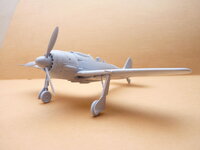
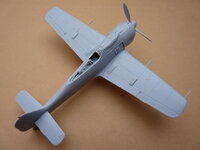
I built the Typhoon a while back, so now on to the 'Butcher Bird'.

Alan and I had some great chats via P.M.'s, particularly, if it isn't seen, why glue it together? We both agreed that sometimes it's a good call. So, with all due respect to one great and sadly missed fella, what follows is a little of that sometimes.

Using a brush, I will be using those little pots supplied with some Airfix kits. As I've painted mottling on a few aircraft before, and by way of a change, I will be painting the aircraft in an Eastern Front camouflage.(Or trying anyway!)

Well travelled box art.

Click image for larger version  Name:	P1390157.jpg Views:	86 Size:	495.9 KB ID:	1246751

No decals......
Click image for larger version  Name:	P1390158.jpg Views:	86 Size:	576.5 KB ID:	1246750

Cheers.
Ron
 

Attachments

  • P1390157.jpg
    P1390157.jpg
    495.9 KB · Views: 0
Thread owner
Thanks chaps.

Update.
The model went together so simply and quickly, with no issues, that I forgot to take any stage build pickies. Sorry.

Apart from fitting the seat to the tub, no other work has been done to the cockpit. I have built a few of these 190's and even without the pilot, precious little can be see by way of detail. Once the pilot is in and the canopy fitted, nothing at all. So that is one of Al's and I's "Sometimes"

Ready for painting.
P1390161.jpg

P1390163.jpg

P1390162.jpg

Cheers.
Ron
 

Attachments

  • P1390161.jpg
    P1390161.jpg
    122.6 KB · Views: 0
  • P1390163.jpg
    P1390163.jpg
    191.3 KB · Views: 0
Thread owner
Thanks boys.

I always paint the lightest colour first on an aircraft, this is usually the underside. However, because my 190 will be in winter camo. i have to brush on the white upper surfaces first. No big deal, it just feels a bit strange.

Two brushed on coats of pot No. 22 proved to give me enough coverage. There are a few streaks, these i will leave. It seems daft to remove these to give a squeeky clean surface because when weathering, they would be painted in at a later stage anyway! So I tend to 'weather' as I go on my merry way with brush in hand.....In any case, this will be an operational 190, not factory fresh.

Click image for larger version  Name:	P1390165.jpg Views:	0 Size:	135.4 KB ID:	1247006 Click image for larger version  Name:	P1390166.jpg Views:	0 Size:	159.8 KB ID:	1247007 Click image for larger version  Name:	P1390169.jpg Views:	0 Size:	127.9 KB ID:	1247008 Click image for larger version  Name:	P1390168.jpg Views:	0 Size:	181.6 KB ID:	1247009

When brush painting large surfaces such as aircraft wings, look out for 'gatherings' of paint at the underside wing edges. Flatten out these with your brush. It will look a mess, but when you add the underside colour, any smudges will vanish. Trust me, I'm a Doctor!

Next I will brush on the underside colour. Then add any detail work. Then start on the camouflage proper.

Cheers.
Ron
 
Thread owner
Thanks chaps.

Steve, if the little tips and suggestions i throw in during brush painting a model helps folks, then I'm a very happy bunny!

Main underside surfaces done. The colour is a pale blue/grey. The camera hasn't quite caught it properly.

Don't worry about the mess on the nose section. That is the beauty of brush painting. No need to be too careful or mask anything, as future coats of paint will obliterate any 'Over runs'

P1390170.jpg

Next up the detailing. Then the fun really starts when I attempt the camouflage!

Cheers and thanks for having a blimp...

Ron
 
When you ATTEMPT the camo... You put the air brush painters to shame Old chap!
 
Thread owner
Thanks Ian, but it's simply me wanting an easy life. Constantly cleaning an A.B. and all the faffing with masking tape isn't on the agenda...... Wink wink!

Detailing started and a bit of yeller too. Plenty of 'Touching up' yet Matron!.....

I'm also fed up with knocking off the cannons,(One missing in these pictures and the antenna)so I'm going to snip the remainder off, then glue them all back on at the end of the build.

Click image for larger version  Name:	P1390174.jpg Views:	1 Size:	193.7 KB ID:	1247212 Click image for larger version  Name:	P1390175.jpg Views:	1 Size:	195.9 KB ID:	1247213 Click image for larger version  Name:	P1390177.jpg Views:	1 Size:	295.3 KB ID:	1247214 Click image for larger version  Name:	P1390178.jpg Views:	1 Size:	154.2 KB ID:	1247215 Click image for larger version  Name:	P1390179.jpg Views:	1 Size:	233.6 KB ID:	1247216

Now for the 'Fun' bit!

Cheers.
Ron
 
Last edited:
You've done well with that yellow. I find it a horrible colour to paint whether with an airbrush or a brush.
 
You are really flying along with this Ron. Just caught up on your last few days posts..

Nick
 
Thread owner
Thanks Jim and Nick.

I've dropped a bo****k!
I've just noticed the yellow fuselage band is way too close to the rear of the aircraft by at least 4mm! It might not have been noticed on the finished model(or folks would be too kind to mention it) but I would know.
So back to the bench with brush in hand I go.......

Such is the lot of us model makers.
 
Thread owner
Here you go, JIm.


A bit of 'Lady Luck' works wonders! Ready for it's final coat and general tidying up of the colour edges.

The original yellow was where that small indent is.

Bit of a tip for anyone else daft enough to make a similar mistake. Don't paint over the original yellow. Concentrate your efforts on the new band of colour only. If you do paint the original at the start, the colour will go progressively darker and you will never match the two shades. Once happy with the match, only then finally paint the whole thing. The trailing edge white is straight forward. Just use enough coats of white to obliterate the yellow, blending in each one to the original.

Click image for larger version  Name:	P1390181.jpg Views:	0 Size:	171.7 KB ID:	1247421

Cheers.
Ron
 
Last edited:
Back
Top