Theme editor

Scale Model Shop

Tamiya 1/48 Lancaster

Status
Not open for further replies.

Dave W

New member
Joined
Jan 8, 2011
Messages
4,713
Reaction score
0
Points
0
1/3
Thread owner
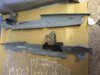
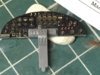
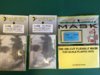
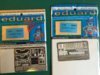
This is my next build .I bought the kit around 5 years ago.But I wanted to wait until I'd acquired some experience with weathering before I built it. I've got a few extras for it.The Mask set will make masking the turrets easier. And the brass gun barrels are a big improvement on the over sized plastic ones in the kit. This is an old kit not up to Tamiyas current high standards.But it's not that bad either.When I built one around 25 years ago, I remember the engine cowlings being a bad fit.Looks like Tamiya have up dated these parts as there are separate sprues with finely engraved cowling parts that weren't in the original kit.The decal sheet has been updated as well.Ive still got some from my first kit and the red on the roundels was way too bright.This ones much better.The kits been built on here a few times,so I haven't included any sprue shots.I will make a start this evening.View attachment 118344

View attachment 118345

View attachment 118346

View attachment 231367

View attachment 231368

View attachment 231369
 

Attachments

  • image.jpg
    image.jpg
    3.3 KB · Views: 0
  • image.jpg
    image.jpg
    2.8 KB · Views: 0
  • image.jpg
    image.jpg
    3.2 KB · Views: 0
I have dipped in and out when possible Dave. I have been busy with family things,jobs Swsbo wants doing and I started a new job. After 11 years of doing care work I needed a change.
 
I thought I saw this in your workbench snap on another thread. Your thought process on weathering skills development is wise I think, that's why I haven't started my eduard Mig-21's yet.
 
The cowling to wing fit is still not great. I had to cajole mine into fitting.


My wings also had a raised line running the length of the wings which doesn't exist on the real thing. That too I sanded off, which was a right pain. I read somewhere that when Tamiya measured up a Lancaster back in the 70s it had tape applied to the wing for some reason and this is what they molded as a result. No idea if that's true or not :) .


There is some issue with the rear turret. It might have been that the gun supports are backwards in the instructions but it's been a while and I'm not sure.


I left the interior alone, but there's room for improvement.


Cheers


Steve
 
Thread owner
\ said:
The cowling to wing fit is still not great. I had to cajole mine into fitting.
My wings also had a raised line running the length of the wings which doesn't exist on the real thing. That too I sanded off, which was a right pain. I read somewhere that when Tamiya measured up a Lancaster back in the 70s it had tape applied to the wing for some reason and this is what they molded as a result. No idea if that's true or not :) .


There is some issue with the rear turret. It might have been that the gun supports are backwards in the instructions but it's been a while and I'm not sure.


I left the interior alone, but there's room for improvement.


Cheers


Steve
I will bear your comments in mind.Im aware of the raised lines but will probably leave them alone.There are also thick raised ribs on the ailerons which I will probably sand off.Apparently the vertical bracing struts by the navigators position are half inch too far forwards as well.Not sure if they can be seen through the canopy though.
 
subscribed, this is going to be a good watch! lots of good pics please haha
 
Hi Dave


This promises to be a cracker. Seen a few excellent built examples (some on this forum) and I'm sure you set to join them. The after market stuff will make a big difference and the masks are sure to help with complex glazing.


Best of luck with the Lanc I'll be sure to stay tuned.


Cheers


P
 
I left the interior as there really isn't much visible through the canopy. Obviously if you get close up with a torch you might see something, but you can't do that with mine as it's on a high shelf :)


Cheers


Steve
 
Thread owner
\ said:
I left the interior as there really isn't much visible through the canopy. Obviously if you get close up with a torch you might see something, but you can't do that with mine as it's on a high shelf :)
Cheers


Steve
I've only bought a basic etched cockpit set and seat belts as I don't expect to be able to see much through the canopy. Eduard do a fair amount of after market stuff for this kit.You could spend a small fortune on it.
 
\ said:
I've only bought a basic etched cockpit set and seat belts as I don't expect to be able to see much through the canopy. Eduard do a fair amount of after market stuff for this kit.You could spend a small fortune on it.
You could indeed! I did toy with the idea of doing a detailed and open (obviously) bomb bay but chickened out in the end.


Cheers


Steve
 
\ said:
I've only bought a basic etched cockpit set and seat belts as I don't expect to be able to see much through the canopy. Eduard do a fair amount of after market stuff for this kit.You could spend a small fortune on it.
I did, built it all, looked great fastened it up and can't see a thing, I know its there though and have a brag sheet showing it for shows :)


I even replaced all the bomb bay and installed the PE set, again you can't see a thing lol


Adrian
 
Thread owner
View attachment 118382

View attachment 118383

View attachment 118384

View attachment 118385

I've glued all the windows to the fuselage halves.Most were painted over on the real aircraft.So I've put those ones in with superglue as im not worried about them fogging.There are 4 individual ones I've put in with Gator grip.Need to mask them before spraying the interior.Instructions say to paint the cockpit area German grey!.Research suggests most were black forward of the main spar and interior great aft of it.So that's what I'm going with. I've also glued the Eduard photo etched pilots and flight engineers instrument panels in place.View attachment 231404

View attachment 231405

View attachment 231406

View attachment 231407
 

Attachments

  • image.jpg
    image.jpg
    2.6 KB · Views: 0
  • image.jpg
    image.jpg
    3 KB · Views: 0
  • image.jpg
    image.jpg
    3.1 KB · Views: 0
  • image.jpg
    image.jpg
    2.6 KB · Views: 0
Status
Not open for further replies.
Back
Top