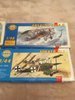
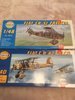
Heres the kits i’ll be mashing up and altering big style for my stop the pigeon builds . I’m not sure yet how many i’ll be doing , but at least two, one with a catching contraption ( undecided as yet) and one in the general cartoon style with extra wings , tail etc. Like dave I think I might try and make one of the pilot figures look a bit like dick dastardly , hes got loads of flash to carve into shape ! View attachment 292849View attachment 292850

You are using an out of date browser. It may not display this or other websites correctly.
You should upgrade or use an alternative browser.
You should upgrade or use an alternative browser.
Tonys stop the pigeon entry
- Thread starter yak face
- Start date
- Status
- Not open for further replies.
Well theyre cheap as chips and big enough to get your teeth into ( or any other cutting tools you might fancy !) although i did consider getting a couple of the wingnut wings kits and chopping those up :tongue-out3::tongue-out3::tongue-out3::tongue-out3:Nice one Tony.
Is it just me or is it looking like that the Smer kits are the ones to use for this GB.
Well theyre cheap as chips and big enough to get your teeth into ( or any other cutting tools you might fancy !) although i did consider getting a couple of the wingnut wings kits and chopping those up :tongue-out3::tongue-out3::tongue-out3::tongue-out3:
Talking of Wingnut Wings - has anyone had a look at the Scale-a-ton website videos? You can see why these kits cost so much.
G
Guest
Guest
Watching...Tony :smiling::smiling::smiling:
Well ive made a start on the first one. This will just be a cartoon style aircraft , the pigeon catching contraption is to follow. The one ive started with
is the Fokker Dr1 and what a Fokker it is! Just like Ians Walrus View attachment 293427View attachment 293428View attachment 293429its covered in flash and sink marks and has the decal locations applied as raised detail! I think this is an old Hawk kit or something , whatever ,its certainly been round the block a few times. Im going to chop the rear fuselage and extend it and add an extra wing from plastic card. The Dr1 is a mental looking plane anyway with the scolloped trailing edges and triangular tailplane so its a great start to chop up into something cartoony. Heres a few pics of the surface detail(?!), more updates at the weekend as im away for the night tomorrow
is the Fokker Dr1 and what a Fokker it is! Just like Ians Walrus View attachment 293427View attachment 293428View attachment 293429its covered in flash and sink marks and has the decal locations applied as raised detail! I think this is an old Hawk kit or something , whatever ,its certainly been round the block a few times. Im going to chop the rear fuselage and extend it and add an extra wing from plastic card. The Dr1 is a mental looking plane anyway with the scolloped trailing edges and triangular tailplane so its a great start to chop up into something cartoony. Heres a few pics of the surface detail(?!), more updates at the weekend as im away for the night tomorrow
Attachments
![DSCN2743 [Desktop Resolution].JPG](/data/attachments/90/90562-c779c338cf67bc189368ab89acab8fa8.jpg?hash=0_MZ5WUu-x)
![DSCN2744 [Desktop Resolution].JPG](/data/attachments/90/90569-b2b48281b163e4fc13c76ab28119c16c.jpg?hash=ccdZNvZD5v)
![DSCN2745 [Desktop Resolution].JPG](/data/attachments/90/90576-a18a1aeae7b4bd6ea3a7323dc725432c.jpg?hash=m0z_R7w_WI)
OK , bit more progress today . Ive chopped the tail off and extended it with plastic sheet and strip, and filled some more sink marks/joints etc. Ive also cut out the pieces for the extra wing and marked the ribs on the underside of the top thin plastic sheet with a biro and a ruler. The front edge was then glued and clamped . I had cut the top piece a bit bigger front to back than the underneath piece so that when I glue the back edge I can bow up the top piece before gluing and clamping ,thus creating an aerofoil type shape . The tailplane has also been stuck on (anyone else seeing Gloster Javelin at this point!!?) but Im not using the kit rudder ,instead cobbling one up from plastic card again but with a scalloped batwing type shape. The poor pilot has also been tackled , this being about my skill level for figure painting , and this is one of the very few occasions where we WANT to see the whites of their eyes ! Im still not decided what colour its going to be but one things for certain , its not getting any weathering or panel line washes or any of that messing about!, heres some pics View attachment 293631View attachment 293632View attachment 293633View attachment 293634View attachment 293635View attachment 293636View attachment 293637View attachment 293638View attachment 293639View attachment 293640View attachment 293641View attachment 293642View attachment 293643View attachment 293644View attachment 293645View attachment 293646View attachment 293647View attachment 293648
Attachments
-
![DSCN2758 [Desktop Resolution].JPG](/data/attachments/91/91626-773214a958635c09260adb82af123c60.jpg?hash=czv4-95KTV) DSCN2758 [Desktop Resolution].JPG2.3 KB · Views: 0
DSCN2758 [Desktop Resolution].JPG2.3 KB · Views: 0 -
![DSCN2759 [Desktop Resolution].JPG](/data/attachments/91/91633-e651275b1f4b2f89d158cfc38bb7d32e.jpg?hash=88J0dGmYl1) DSCN2759 [Desktop Resolution].JPG2.8 KB · Views: 0
DSCN2759 [Desktop Resolution].JPG2.8 KB · Views: 0 -
![DSCN2760 [Desktop Resolution].JPG](/data/attachments/91/91638-e12293c60eab6fa5f28da85b4ce66c55.jpg?hash=s3AUW-e-A8) DSCN2760 [Desktop Resolution].JPG2.6 KB · Views: 0
DSCN2760 [Desktop Resolution].JPG2.6 KB · Views: 0 -
![DSCN2762 [Desktop Resolution].JPG](/data/attachments/91/91644-b2195f3cb08c973ec1ff90fa39d2f23f.jpg?hash=y34CTa-9Wq) DSCN2762 [Desktop Resolution].JPG2.5 KB · Views: 0
DSCN2762 [Desktop Resolution].JPG2.5 KB · Views: 0 -
![DSCN2763 [Desktop Resolution].JPG](/data/attachments/91/91652-fb4db9a4b489c87bdc66e32af35f02b0.jpg?hash=Ns3Qibjjy1) DSCN2763 [Desktop Resolution].JPG3.1 KB · Views: 0
DSCN2763 [Desktop Resolution].JPG3.1 KB · Views: 0 -
![DSCN2764 [Desktop Resolution].JPG](/data/attachments/91/91659-28b7222ea3ceef03ceb7f92315c2fda9.jpg?hash=a_9CwsxsWH) DSCN2764 [Desktop Resolution].JPG2.9 KB · Views: 0
DSCN2764 [Desktop Resolution].JPG2.9 KB · Views: 0 -
![DSCN2757 [Desktop Resolution].JPG](/data/attachments/91/91619-9f0914763ffbd2a2b69f8cae68f3eaae.jpg?hash=CLQzqO0DGb) DSCN2757 [Desktop Resolution].JPG2.5 KB · Views: 0
DSCN2757 [Desktop Resolution].JPG2.5 KB · Views: 0 -
![DSCN2756 [Desktop Resolution].JPG](/data/attachments/91/91612-ac3a15a81c9c24902ea9fff64de8f727.jpg?hash=e86_sVPbvG) DSCN2756 [Desktop Resolution].JPG1.9 KB · Views: 0
DSCN2756 [Desktop Resolution].JPG1.9 KB · Views: 0 -
![DSCN2755 [Desktop Resolution].JPG](/data/attachments/91/91605-e1fe77788387d5a0a9ad49e352aa4bc6.jpg?hash=PtcI3qkf_m) DSCN2755 [Desktop Resolution].JPG2.3 KB · Views: 0
DSCN2755 [Desktop Resolution].JPG2.3 KB · Views: 0 -
![DSCN2746 [Desktop Resolution].JPG](/data/attachments/91/91538-3d13a4ac97335f7ddae4df7e1264bcaf.jpg?hash=BNQt6gwfug) DSCN2746 [Desktop Resolution].JPG2.3 KB · Views: 0
DSCN2746 [Desktop Resolution].JPG2.3 KB · Views: 0 -
![DSCN2747 [Desktop Resolution].JPG](/data/attachments/91/91546-b7a11496177ef507fd698ab8793dd6cc.jpg?hash=H-4bwHx2Eq) DSCN2747 [Desktop Resolution].JPG2.5 KB · Views: 0
DSCN2747 [Desktop Resolution].JPG2.5 KB · Views: 0 -
![DSCN2748 [Desktop Resolution].JPG](/data/attachments/91/91554-32a6ba979eedf3f5077852bb967085f9.jpg?hash=9Ura6Y0OH5) DSCN2748 [Desktop Resolution].JPG2.2 KB · Views: 0
DSCN2748 [Desktop Resolution].JPG2.2 KB · Views: 0 -
![DSCN2749 [Desktop Resolution].JPG](/data/attachments/91/91562-4d19c6a692205709f6c3cffb8debdbb6.jpg?hash=z9n7Cm-eME) DSCN2749 [Desktop Resolution].JPG2.1 KB · Views: 0
DSCN2749 [Desktop Resolution].JPG2.1 KB · Views: 0 -
![DSCN2750 [Desktop Resolution].JPG](/data/attachments/91/91569-659a6a6b896d1c9b3db90f7d5fc32669.jpg?hash=rdDScax4hA) DSCN2750 [Desktop Resolution].JPG2.6 KB · Views: 0
DSCN2750 [Desktop Resolution].JPG2.6 KB · Views: 0 -
![DSCN2751 [Desktop Resolution].JPG](/data/attachments/91/91576-506909e91be7283c5381d913aac32de0.jpg?hash=w0T9vJUWTC) DSCN2751 [Desktop Resolution].JPG2.8 KB · Views: 0
DSCN2751 [Desktop Resolution].JPG2.8 KB · Views: 0 -
![DSCN2752 [Desktop Resolution].JPG](/data/attachments/91/91583-7d2ab47e190b1ec96b89adcf8fbc414f.jpg?hash=2LgmTucoQA) DSCN2752 [Desktop Resolution].JPG2.2 KB · Views: 0
DSCN2752 [Desktop Resolution].JPG2.2 KB · Views: 0 -
![DSCN2753 [Desktop Resolution].JPG](/data/attachments/91/91590-5375aaac0237ae8c263cc5235b20ff1e.jpg?hash=s-RttL7yuT) DSCN2753 [Desktop Resolution].JPG3.2 KB · Views: 0
DSCN2753 [Desktop Resolution].JPG3.2 KB · Views: 0 -
![DSCN2754 [Desktop Resolution].JPG](/data/attachments/91/91598-6eceebe16c67db9f3b21f3d835f2c4d6.jpg?hash=w4EmUKqx8G) DSCN2754 [Desktop Resolution].JPG3.2 KB · Views: 0
DSCN2754 [Desktop Resolution].JPG3.2 KB · Views: 0
G
Guest
Guest
Your wing job looks like it did the trick and looks very good!!!
I've decided to make a plaster mould for mine and give it a go... I don't know my odds for success but I'm going to have fun whilst doing it so it's a win either way")
Your tail surgery looks very close to my pencil drawings but this was a common feature of the planes in the show so I don't think I'm going to be called out for plagiarism...?
Luckily my youngest son still loves cartoons and the two of us have been sitting down to watch the old episodes earlier this week for inspiration and I've got loads!
Realising them in styrene is a whole different story, but I've got some sort of plan!
Fantastic work so far!
I've decided to make a plaster mould for mine and give it a go... I don't know my odds for success but I'm going to have fun whilst doing it so it's a win either way
Your tail surgery looks very close to my pencil drawings but this was a common feature of the planes in the show so I don't think I'm going to be called out for plagiarism...?
Luckily my youngest son still loves cartoons and the two of us have been sitting down to watch the old episodes earlier this week for inspiration and I've got loads!
Realising them in styrene is a whole different story, but I've got some sort of plan!
Fantastic work so far!
G
Guest
Guest
I love those new wings Tony. Exactly as the cartoon ones :surprised:
Ive now fettled and fitted the rudder and the lower pair of wings , also the cabane struts on the fuselage front deck. The top and extra bottom wings are going to be left off till later to ease painting. The wings are normally connected with a long strut that goes all the way from top to bottom but as I'm adding another wing underneath Ive had to make some longer ones from styrene section. The original lower wings have had a slot cut in them so this can pass right through to the new bottom wing. I think I might use the kit undercarriage struts and aerofoil section also the wheels but I'm going to have to make a much longer tail skid /wheel . The extra wing has been glued up on the rear edge and now just needs the ends closing up. heres some picsView attachment 293726View attachment 293727View attachment 293728View attachment 293729View attachment 293730View attachment 293731View attachment 293732
Attachments
-
![DSCN2765 [Desktop Resolution].JPG](/data/attachments/92/92103-1e7748820f0688ee0018c0b502fae3a5.jpg?hash=F-4wsvsb--) DSCN2765 [Desktop Resolution].JPG3 KB · Views: 0
DSCN2765 [Desktop Resolution].JPG3 KB · Views: 0 -
![DSCN2766 [Desktop Resolution].JPG](/data/attachments/92/92110-c72d49af16cee8bc73db9b4b69718047.jpg?hash=qWkX_mMVH0) DSCN2766 [Desktop Resolution].JPG3.3 KB · Views: 0
DSCN2766 [Desktop Resolution].JPG3.3 KB · Views: 0 -
![DSCN2767 [Desktop Resolution].JPG](/data/attachments/92/92118-95a031a73a446374e2ddb310494867a1.jpg?hash=S3FxcnYziT) DSCN2767 [Desktop Resolution].JPG2.8 KB · Views: 0
DSCN2767 [Desktop Resolution].JPG2.8 KB · Views: 0 -
![DSCN2768 [Desktop Resolution].JPG](/data/attachments/92/92126-e95b892da37971e8436ed68f929e9476.jpg?hash=30dqifN8d-) DSCN2768 [Desktop Resolution].JPG3.1 KB · Views: 0
DSCN2768 [Desktop Resolution].JPG3.1 KB · Views: 0 -
![DSCN2769 [Desktop Resolution].JPG](/data/attachments/92/92134-c28b4be0ad3736cab475915153ce4045.jpg?hash=sgczjdDOW1) DSCN2769 [Desktop Resolution].JPG2.8 KB · Views: 0
DSCN2769 [Desktop Resolution].JPG2.8 KB · Views: 0 -
![DSCN2770 [Desktop Resolution].JPG](/data/attachments/92/92142-e14824abb73770f0fc216a5c92deddf9.jpg?hash=_YGyaUDKfd) DSCN2770 [Desktop Resolution].JPG3.3 KB · Views: 0
DSCN2770 [Desktop Resolution].JPG3.3 KB · Views: 0 -
![DSCN2771 [Desktop Resolution].JPG](/data/attachments/92/92150-704609df0a382287b7e1da3cda5f78e3.jpg?hash=bQALWcBoFe) DSCN2771 [Desktop Resolution].JPG3.4 KB · Views: 0
DSCN2771 [Desktop Resolution].JPG3.4 KB · Views: 0
G
Guest
Guest
You are nailing it!
Little bit more progress today , its got the first bit of colour on , two shades of blue , darker for the wings and tail. Ive not assembled the top and bottom wings as it will make painting easier. The two middle wings might get painted with the old hairy stick as its just a pain to mask up! Hopefully i can get this one together soon and then start thinking about which kit im going to butcher next !! View attachment 294279
Attachments
- Status
- Not open for further replies.
Legal Notice
scalemodelling.co.uk is a privately operated online discussion forum. All content posted by members reflects their own views and opinions and does not necessarily represent those of the forum owners or administrators. While reasonable efforts are made to moderate content, no responsibility is accepted for user-generated material. By using this site, you agree to comply with UK law and the forum rules.