Theme editor

Scale Model Shop

Joe's Trumpeter 1/72 Mig-29C Fulcrum

Thread owner
There you go. If you can, always check with reference photos of the subject you're recreating, as that often diverges, in interesting ways, from what a plan sheet might tell you
Agree about research Chris. I was finding a few years ago that I would get so involved in detail that I began to actually struggle to complete anything, and often it took the fun out of building. So I go for "close enough is good enough" these days.
 
Thread owner
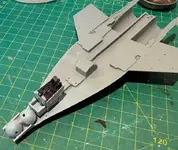
The next steps are to mate the fuselage halves and tail fins, and so far a dry fit suggests that this is a very well engineered kit.
 
Coming along nicely Joe. Interestingly the Airfix kit makes no reference of nose weight and so I haven't put any in. It doesn't have nearly as many parts as your kit so hopefullly it will sit nose heavy.
 
Last edited:
Thread owner
Nice work Joe, cockpit looks suitably busy for the scale 👍

Geoff.
Thanks Geoff

Nice cockpit joe , it does look a nice kit
Cheers Tony. The instructions require a bit of verification for colours, but otherwise I have adjusted to understanding Trumpeter's way of doing things and am enjoying this kit

Coming along nicely Joe. Interestingly the Airfix kit makes no reference of nose weight and so I haven't put any in. It doesn't have nearly as many parts as your kit so hopefullly it will sit nose heavy.
Cheers Steve. Trumpeter wanted 7 grams ballast. I'm not sure yet, but the underwing ordnance might sit forward of the main wheels?
 
Looks like it's coming along nice. I did that kit about a year ago in the Ukraine kit decals. It builds up nice and was an interesting paint scheme.
 
Thread owner
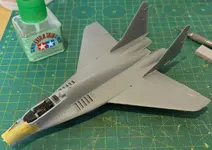
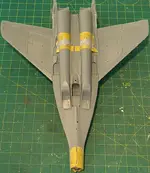
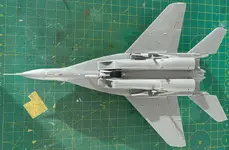
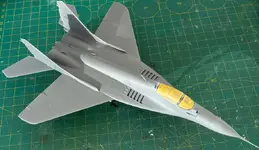
Construction continues. The fuselage halves, separated horizontally are mated. A very nice fit, just a quick pass with a sanding sponge was required. The nose area needed a bit of filler, nothing major. The tail fins connect to the sides and hide any seams on the rear.
IMG_3416.webp

I wasn't happy with the aft engine area connecting to the fuselage, so some filler was used there too.
IMG_3417.webp
 
Thread owner
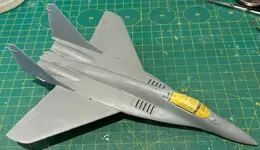
With those areas sanded, I applied some swipes of acrylic filler to some minor seams. Masking the canopy was quite simple, and the fit was no problem using PVA. The nose cone didn't mate perfectly to the shape of the forward fuselage, so with some sanding blended it in. That's where my MiG is at the end of play today, hoping to be ready for primer early next week.
IMG_3418.webp
 
HI Joe
yes your mig looks a very good kit an fit wish my hustler had been such a nice fit as this plane is as i had to struggle with parts that had warped over the last maybe 60 odd yrs an yes with thats lead whieghts fitted she should not be a tail sitter as that was the reason i fitted some lead in my hustler an them big inner engines as once its togeather then its to late then so better safe then sorry an i always fit lead in the nose of all my aircraft esp i will when i come to build that big XB70 as i bet that will be a tail sitter for sure only ones i dint fit lead in were them tiny B25 on my hornet an they were real tail sitter but could not fit lead in them as they were to tiny so had to go with the clear sprue idea but they look ok on the flight deck in my opinion so back to your mig very nice work so far an does she have whole engines in or just the enginge blanks ? but to finish off my freind enjoy the painting
ATB SIR
CHRISB
 
Back
Top