
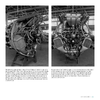
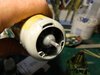
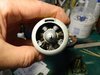
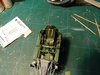
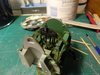
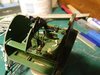
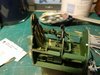
Bit more done today , I decided the guitar string chains didnt look very good so after a bit of searching found some fine jewellery 0.7mm box chain on e-bay for a couple of quid . Ive used this to replace the guitar string and it looks tons better. Ive also been sorting the exhausts. The wildcat f4f-4 had two big oval exhausts under the cowling , the ones on the kit though were just a couple of random blobs . I chain drilled and filed out two suitable holes and have some styrene tube to make the exhausts with, these will be fixed to the back plate of the engine. This will need some extra bits adding too , namely the rear of the engine ,exhaust shroud and the tubular engine bearer framework. The inside of the cowling has also had some plastic card added to cover up the lumpy insides caused by the (incorrect ) open cowl panel option.View attachment 290935 View attachment 290936 View attachment 290937 View attachment 290938 View attachment 290939 View attachment 290940 View attachment 290941 View attachment 290942 View attachment 290943 View attachment 290944
Attachments
-
![DSCN2693 [Desktop Resolution].JPG](/data/attachments/81/81470-8378dd2e6ddebda80b0529805fb470b3.jpg?hash=6PFzuJ30E5) DSCN2693 [Desktop Resolution].JPG2.8 KB · Views: 0
DSCN2693 [Desktop Resolution].JPG2.8 KB · Views: 0 -
![DSCN2692 [Desktop Resolution].JPG](/data/attachments/81/81456-c0f1d8614d7e25d769e40a843f9ae2a9.jpg?hash=_aY5M9XsWY) DSCN2692 [Desktop Resolution].JPG3.1 KB · Views: 0
DSCN2692 [Desktop Resolution].JPG3.1 KB · Views: 0 -
![DSCN2691 [Desktop Resolution].JPG](/data/attachments/81/81444-2f71c47004f8e28ad693b67107eac6ce.jpg?hash=6hsc74Yg-P) DSCN2691 [Desktop Resolution].JPG2.5 KB · Views: 0
DSCN2691 [Desktop Resolution].JPG2.5 KB · Views: 0 -
![DSCN2688 [Desktop Resolution].JPG](/data/attachments/81/81430-4c0ce962d2fcea21615da2c7985d624d.jpg?hash=np4sXldZuV) DSCN2688 [Desktop Resolution].JPG2.7 KB · Views: 0
DSCN2688 [Desktop Resolution].JPG2.7 KB · Views: 0 -
![DSCN2687 [Desktop Resolution].JPG](/data/attachments/81/81417-40c4a7996b47d48feb140602bf9e23ba.jpg?hash=-h1NPO_fEx) DSCN2687 [Desktop Resolution].JPG2.8 KB · Views: 0
DSCN2687 [Desktop Resolution].JPG2.8 KB · Views: 0 -
![DSCN2686 [Desktop Resolution].JPG](/data/attachments/81/81402-4e6af5836eb33d0ccecc215d439b9637.jpg?hash=QDdCsBdc8e) DSCN2686 [Desktop Resolution].JPG3 KB · Views: 0
DSCN2686 [Desktop Resolution].JPG3 KB · Views: 0 -
![DSCN2685 [Desktop Resolution].JPG](/data/attachments/81/81390-3ab1b4b0d296958ee8dd31c2fb40f209.jpg?hash=G_avOMuT_j) DSCN2685 [Desktop Resolution].JPG2.2 KB · Views: 0
DSCN2685 [Desktop Resolution].JPG2.2 KB · Views: 0 -
![DSCN2683 [Desktop Resolution].JPG](/data/attachments/81/81378-58bd04cb9afe2f5b40b43b26bc564eac.jpg?hash=9ygTQnetUE) DSCN2683 [Desktop Resolution].JPG2.7 KB · Views: 0
DSCN2683 [Desktop Resolution].JPG2.7 KB · Views: 0 -
![DSCN2679 [Desktop Resolution].JPG](/data/attachments/81/81363-14279b7741177240a6eae38db77d3e9d.jpg?hash=m5RKdaL8-N) DSCN2679 [Desktop Resolution].JPG2.5 KB · Views: 0
DSCN2679 [Desktop Resolution].JPG2.5 KB · Views: 0 -
![DSCN2677 [Desktop Resolution].JPG](/data/attachments/81/81350-a2b58751737bd863d489566367f4fae8.jpg?hash=ON3mqToxru) DSCN2677 [Desktop Resolution].JPG2.6 KB · Views: 0
DSCN2677 [Desktop Resolution].JPG2.6 KB · Views: 0
") .
.![DSCN2695 [Desktop Resolution].JPG](/data/attachments/81/81879-d77495124ca5624bc0fb3ebc3fa4d785.jpg?hash=ebojl5R0PX)
![DSCN2699 [Desktop Resolution].JPG](/data/attachments/81/81890-7ab8cc8451124be46b3759ee7c2c4315.jpg?hash=1FAW1Odefy)
![DSCN2698 [Desktop Resolution].JPG](/data/attachments/81/81900-fb962e42d7fe959d3b1119735eb43023.jpg?hash=CCvS2_XKF_)
![DSCN2694 [Desktop Resolution].JPG](/data/attachments/81/81922-2924c43499ff878f2bbadbd2136c9724.jpg?hash=BfE78DDDu-)
![DSCN2696 [Desktop Resolution].JPG](/data/attachments/81/81912-bede76b0e111e8b4ba7520b48d9492c1.jpg?hash=XIXktv2V3r)
")

![DSCN2704 [Desktop Resolution].JPG](/data/attachments/82/82612-142924eff7146fedc7c4b08891f3c7e4.jpg?hash=qzuXN8FEHq)
![DSCN2703 [Desktop Resolution].JPG](/data/attachments/82/82601-b3f47bf5c0be71c9d4212dd40e5045e4.jpg?hash=p-tRK-Q2ze)
![DSCN2739 [Desktop Resolution].JPG](/data/attachments/89/89734-00cc459c2a15353fc3a00198173c2e8f.jpg?hash=pm5fYJkPBK)
![DSCN2738 [Desktop Resolution].JPG](/data/attachments/89/89724-7e523b8ed5bdf5a23a3951f22c8dd3f3.jpg?hash=f5OSeQ8N77)
![DSCN2737 [Desktop Resolution].JPG](/data/attachments/89/89712-19506c974b0956b038d0a92deb5fa38d.jpg?hash=GibStOfuno)
![DSCN2734 [Desktop Resolution].JPG](/data/attachments/89/89704-643f550383ddf603ad9b9f3f81a14e05.jpg?hash=PLxYirDkDA)
![DSCN2720 [Desktop Resolution].JPG](/data/attachments/89/89694-e45fe7151f3cd54fe47aedde7b9c1785.jpg?hash=0L2KmZL2BU)
![DSCN2717 [Desktop Resolution].JPG](/data/attachments/89/89685-2cb7a9c401da33477404ab5690b4562a.jpg?hash=llTXIM0Kuy)
![DSCN2716 [Desktop Resolution].JPG](/data/attachments/89/89676-5a753d9c149a4665b735740514cf73d4.jpg?hash=qu7V555zyl)
![DSCN2715 [Desktop Resolution].JPG](/data/attachments/89/89665-df6649e71ac20d01e99932df89713813.jpg?hash=J8_1wrMra-)
![DSCN2721 [Desktop Resolution].JPG](/data/attachments/89/89993-754b97c97eb60eace4086ecf10a8f0a3.jpg?hash=zq5sGSXvg5)
![DSCN2742 [Desktop Resolution].JPG](/data/attachments/89/89982-b58ab1fcd73aa14b5b6a2e4bf99a0682.jpg?hash=kZOITKKQwK)
![DSCN2740 [Desktop Resolution].JPG](/data/attachments/89/89959-80f6081fd4a28ff1431c1af4d4dcb524.jpg?hash=ui3HQ70R0Q)
![DSCN2719 [Desktop Resolution].JPG](/data/attachments/89/89949-d646558eefd6452505ca043fe45c0595.jpg?hash=XNhjFsz-bX)
![DSCN2718 [Desktop Resolution].JPG](/data/attachments/89/89938-6306e1a936ecc25ef7ebb81d345d6ec6.jpg?hash=5hWMNdgYrV)
![DSCN2736 [Desktop Resolution].JPG](/data/attachments/89/89928-d02d6f9a87801a29b595dcf89d481b69.jpg?hash=hFcB7fQkoh)
![DSCN2735 [Desktop Resolution].JPG](/data/attachments/89/89918-d8652b737352527d848729bb3415950b.jpg?hash=VKE5q2hMtg)
![DSCN2722 [Desktop Resolution].JPG](/data/attachments/89/89906-5cac562c3fa05caa587596561c11f45e.jpg?hash=i-EK8ezmi4)
![DSCN2714 [Desktop Resolution].JPG](/data/attachments/89/89894-1026a1214cf049540d366a296bb27f19.jpg?hash=BqUWf3q_1Z)
![DSCN2713 [Desktop Resolution].JPG](/data/attachments/89/89885-dadb7411d798658e31ad9595e56a42bf.jpg?hash=d6Vn9seNbE)
![DSCN2729 [Desktop Resolution].JPG](/data/attachments/83/83278-619d7743cbc1f49b0fbc0890f4ac036d.jpg?hash=cUIM4-g3yX)
![DSCN2730 [Desktop Resolution].JPG](/data/attachments/83/83291-d7f98408180526ae49dd3a197ad6ec28.jpg?hash=D7ROz_Cbmn)
![DSCN2731 [Desktop Resolution].JPG](/data/attachments/83/83302-63b890e0e68bdc309b25a12bfb40a932.jpg?hash=laPNGdMj37)