
Thanks John...not something I have ever attempted before, but extremely satisfying, however exhausting!Jack .Loving the building work, that take both me and Ron Spanner back.
As to the build those brass shells look good. Your lucky to find ammo, I don't think there is any for my build of the Pak 88 at all .
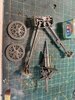
Slightly disappointed to find out I could have probably made the shell casings myself...these are literally chopped up brass tube with an etch plate to attach at the base. What it does give me however, is the dimensions, so will have a go at sourcing the right size brass and making some more I think. Can never have too many discards!!!


")