Theme editor

Scale Model Shop

BV 222

Status
Not open for further replies.

Gern

Well-known member
Joined
May 17, 2009
Messages
9,320
Reaction score
235
Points
63
1/3
Thread owner
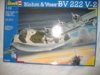
Well this one's been sat in the stash for a couple of years. This is as good a time as any to start it:

View attachment 75501

View attachment 75502

View attachment 75503

View attachment 75504

View attachment 75505


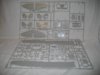
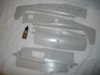
I hope this doesn't count as cheating, but I took the major parts from the sprues a couple of days ago for a test fit. I wouldn't be doing this at all if it fit poorly, but the big bits fit perfectly. Let's see if they still look perfect when I add glue .....

Gern

PS I'm NOT doing the one with the snow camo.

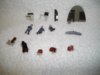
PPS The kit doesn't include pilot figures. The ones shown are from my spares box.

View attachment 188524

View attachment 188525

View attachment 188526

View attachment 188527

View attachment 188528
 

Attachments

  • Box.JPG
    Box.JPG
    2.9 KB · Views: 0
  • Instructions.JPG
    Instructions.JPG
    1.6 KB · Views: 0
  • Sprues1.JPG
    Sprues1.JPG
    1.8 KB · Views: 0
  • Sprues2.JPG
    Sprues2.JPG
    1.8 KB · Views: 0
  • Sprues3.JPG
    Sprues3.JPG
    1.9 KB · Views: 0
Nice Dave and looks a very big kit

PS why not the snow camo ? it looks good
 
Thread owner
Ian, according to my calculations it should be about 20" long with a 25" wingspan.

As for the snow camo - EVERYBODY does that one. I wanted mine to be different. Besides, I only just bought the paints in the right colours. I don't want to be wasting my money by coverin' 'em up later!

Gern
 
That looks great Gern, like a Sunderland, but even bigger.
 
Thread owner
Wish I had picked the 'snow' version now.

For that one, three of the windows on the port side are blanked off so you have, in theory, three spare transparencies. For the other version, you need these windows. Put in the transparencies supplied - and that leaves two short for the starboard windows!

One version needs 6 and the other needs 9 of that particular piece. The kit supplies 7. Go figure!

Anyway, I replaced the missing ones with some cut from a blank transparent CD - the ones they supply as protection in those stacks you can buy.

Gotta mask them on the inside then ready to paint - as soon as my paints arrive.

Gern

Edit: Forgot to mention that Revell got two sets of numbers for the windows the wrong way round in the instructions. Hope the rest doesn't turn out so problematical!
 
Thread owner
\ said:
That's one brute of an aircraft Dave.......Six engines! I struggle with one!
While waiting for my paint, I've been test fitting some bits.

You won't believe it Ron, but there are only a handful of parts for each engine, and apart from one mould seam on each one - which takes a couple of minutes to clean up - there is NO filling required anywhere on either the engines or the nacelles!

If you look at pic 3, you'll see the nacelles are moulded onto a piece which fits on the front of the wing. I've tried these against the wing and also a dry fit of the wings to the fuselage. Unless I get it wrong, none of these joints will need filler either. I reckon Revell have excelled themselves with this one. In fact, I can't remember ever building anything else where the major parts have fit so perfectly.

Gern
 
Looks like it will be a nice model to construct and not the sort that fights you all the way....
 
Looks a big ol' bugger. It will look very impressive.

Ian M
 
I've seen this kit made into a really impressive model.Ive no doubt yours will look really good as well.
 
Thread owner
Thanks for the vote of confidence Dave. I really must get back and do a bit more - I've been sort of carried away with my D-day build the last few days.

Gern
 
Looking forward to seeing some pic's Dave :) .

Love the subject, never seen one befor.

John
 
Thread owner
I've done some assembly and painting of internal bits - some dry brushing still needed for the control panels. Long way to go but so far no problems with the fit anywhere.

Dave W - the seat cushions are painted with that Vallejo clear wood you were looking at for the canopy of your TSR2. As you can see, it's too dark for the subtle effect you're after.

View attachment 77005


Gern

View attachment 190028
 

Attachments

  • Crew etc.JPG
    Crew etc.JPG
    2.2 KB · Views: 0
Looking forward to seeing this big beast come together Dave , looking great so far , cheers tony
 
A good start Dave.I see what you mean about the wood colour.Looks good on the seats.
 
Status
Not open for further replies.
Back
Top