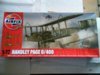
Theme editor

Scale Model Shop

Handley page 0/400

Status
Not open for further replies.

papa 695

Moderator
Staff member
Moderator
Joined
May 9, 2011
Messages
22,996
Reaction score
766
Points
113
Age
63
1/3
Thread owner
 

Attachments

  • Next build 001.jpg
    Next build 001.jpg
    2.9 KB · Views: 0
  • Next build 002.jpg
    Next build 002.jpg
    2.1 KB · Views: 0
  • Next build 003.jpg
    Next build 003.jpg
    2.4 KB · Views: 0
  • Next build 004.jpg
    Next build 004.jpg
    2.7 KB · Views: 0
  • Next build 006.jpg
    Next build 006.jpg
    2.5 KB · Views: 0
  • Next build 007.jpg
    Next build 007.jpg
    2.7 KB · Views: 0
Ian, this looks like an interesting build! Look forward to seeing it progress.

P.S. Enjoy Malta!
 
Looks an interesting build Ian, I love Malta, the kind of place you either love or hate, very interesting history. Cheers Derek
 
If your going to Malta,the war museum and 'Malta experience' in Valletta are well worth a look.
 
Lots of rigging on this one Ian!! Rather you than me! Looking forward to seeing the build , have a great time in Malta , cheers tony
 
Wow, look forward to seeing the HP400 Ian. Have fun in Malta. Lifestyles of the rich and famous eh!
 
Thread owner
I wish Joe ! Well i'm off thanks for the best wishes in Malta see you all in just over a weeks time Happy modeling
 
Thread owner
Hi all back now so going to start this. Had a great time in Malta scuba diving, only one upset flooded my camera so now can't take photos will have to try using the phone
 
\ said:
Welcome back Ian, looking forward to some progress posts on the HP.
Me to, I like the look of this old bird an am wondering If I want one.

Colin M..
 
Thread owner
Right finaly got some pictures for you to look at sorry for the quality View attachment 64381 View attachment 64382 View attachment 64383 there are some terrible pin marks on this kit most will be out of veiw when its all put together but some need to be got rid of and there right on the braceing wires on the inside so i had to paint them back on. Should look ok when buttoned up

The wings look very good from the top veiw View attachment 64384 but from the underside you can see the joints View attachment 64385 so the problem is what to do to get rid of the joint without destroying the wing ribs ? The only way i found was to sand it all flat then scribe some lines where the ribs were. This is what it looks like when painted, View attachment 64386 View attachment 64387 What do you think ?

Also got the bombs put together View attachment 64388 View attachment 64389

View attachment 65584

View attachment 65585

View attachment 65586

View attachment 65587

View attachment 65588

View attachment 65589

View attachment 65590

View attachment 65591

View attachment 65592

View attachment 178610

View attachment 178611

View attachment 178612

View attachment 178613

View attachment 178614

View attachment 178615

View attachment 178616

View attachment 178617

View attachment 178618
 

Attachments

  • Handley Page 0400 010.jpg
    Handley Page 0400 010.jpg
    2.2 KB · Views: 0
  • Handley Page 0400 008.jpg
    Handley Page 0400 008.jpg
    2.3 KB · Views: 0
  • Handley Page 0400 001.jpg
    Handley Page 0400 001.jpg
    2.3 KB · Views: 0
  • Handley Page 0400 003.jpg
    Handley Page 0400 003.jpg
    2.3 KB · Views: 0
  • Handley Page 0400 004.jpg
    Handley Page 0400 004.jpg
    2.2 KB · Views: 0
  • Handley Page 0400 005.jpg
    Handley Page 0400 005.jpg
    2 KB · Views: 0
  • Handley Page 0400 002.jpg
    Handley Page 0400 002.jpg
    1.9 KB · Views: 0
  • Handley Page 0400 006.jpg
    Handley Page 0400 006.jpg
    1.9 KB · Views: 0
  • Handley Page 0400 007.jpg
    Handley Page 0400 007.jpg
    1.9 KB · Views: 0
Thread owner
 

Attachments

  • WIP 003.jpg
    WIP 003.jpg
    2.4 KB · Views: 0
  • WIP 001.jpg
    WIP 001.jpg
    2.5 KB · Views: 0
  • WIP 007.jpg
    WIP 007.jpg
    2 KB · Views: 0
  • WIP 008.jpg
    WIP 008.jpg
    2.1 KB · Views: 0
  • WIP 009.jpg
    WIP 009.jpg
    2.3 KB · Views: 0
  • WIP 005.jpg
    WIP 005.jpg
    2.2 KB · Views: 0
  • WIP 002.jpg
    WIP 002.jpg
    2.2 KB · Views: 0
Thread owner
Thanks Joe going to try something else on the other wing to see if it's any better.

Derek the rigging is easy the holes are there for you

Right starting to put this together the plans tell you to put the front underside on first View attachment 64448 but there's a joint to sort out when it's put together so I left it off View attachment 64449 View attachment 64450 I will use some cellulose thinners to sort the joint out

Painted the guns View attachment 64451 and here it is in place View attachment 64452 not able to see much

And one of the large bomb View attachment 64453

View attachment 65651

View attachment 65652

View attachment 65653

View attachment 65654

View attachment 65655

View attachment 65656

View attachment 178677

View attachment 178678

View attachment 178679

View attachment 178680

View attachment 178681

View attachment 178682
 

Attachments

  • Off plans 009.jpg
    Off plans 009.jpg
    2.7 KB · Views: 0
  • Off plans 006.jpg
    Off plans 006.jpg
    1.9 KB · Views: 0
  • Off plans 007.jpg
    Off plans 007.jpg
    1.7 KB · Views: 0
  • Off plans 002.jpg
    Off plans 002.jpg
    1.9 KB · Views: 0
  • Off plans 011.jpg
    Off plans 011.jpg
    2.5 KB · Views: 0
  • Off plans 015.jpg
    Off plans 015.jpg
    1.7 KB · Views: 0
Nice going Ian.

Missed this one & it is a very interesting model. I like these intricate models with lots going on.

As mentioned by Peter there is a multitude of rigging going on there. I counted about 40 lines-------- and that was just one side & in 1/72. This will look the part.

What are you going to use for the rigging Ian ? I have a biplane, Gloster Gladiator, first model I bought but still boxed. When I get to it, it is 1/72, thought I would use EZ line or the nicker elastic thread.

Laurie
 
Thread owner
Hi Laurie I'm going to use EZ line for the rigging, i used it for the first time on the WW1 GB for the DH2 i built worked a treat .
 
Status
Not open for further replies.
Back
Top